
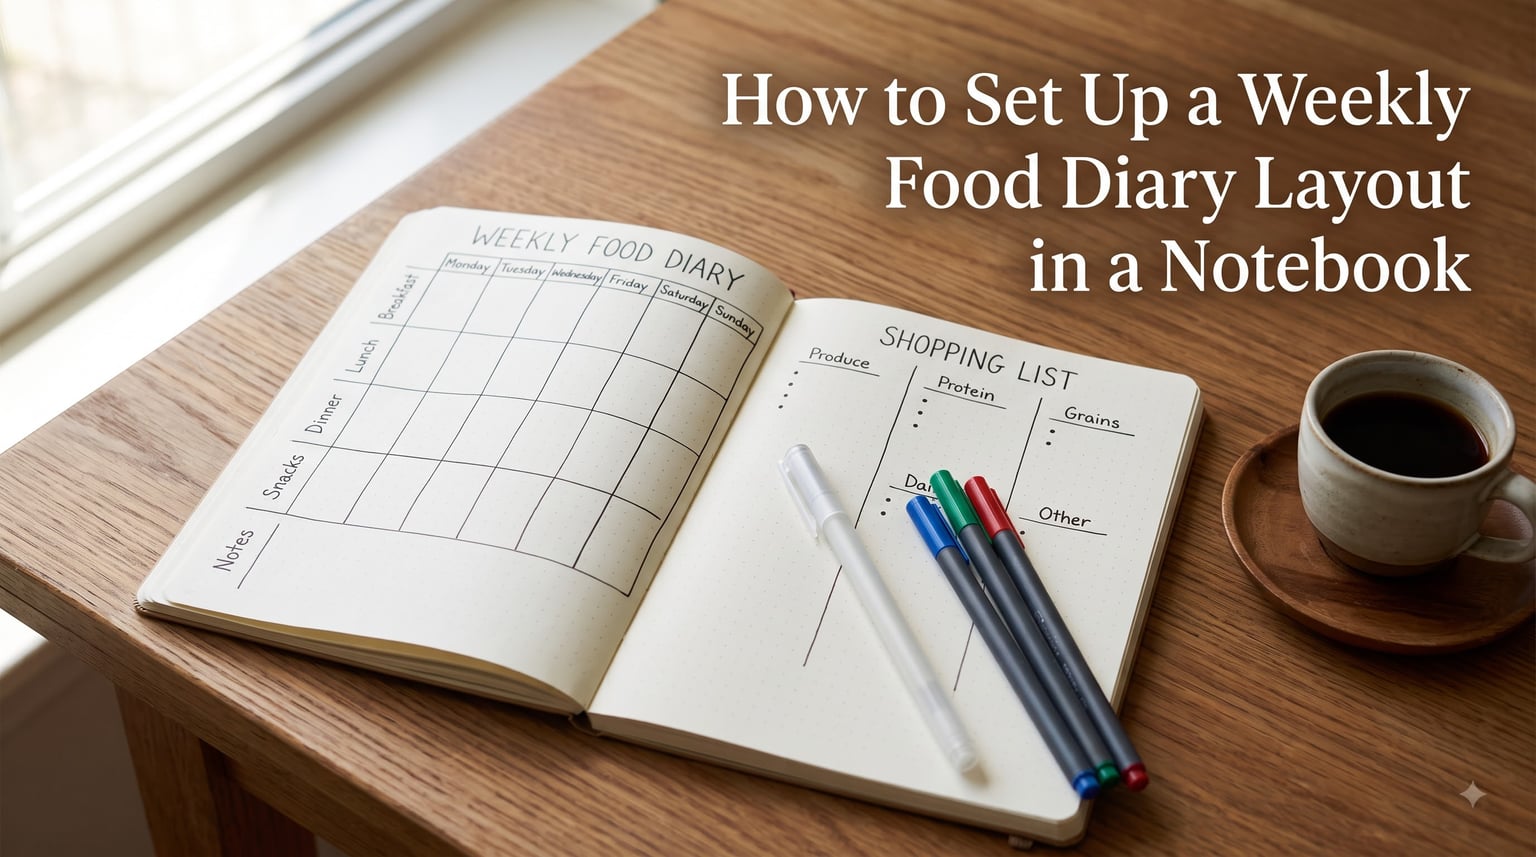
I built my first weekly food diary on a Sunday night with a borrowed dot-grid notebook, a black pen, and absolutely no plan. By Wednesday, my spread looked like a crime scene of scribbled lunch leftovers and an unfinished grocery list spilling onto the next page. That mess taught me what a good weekly food diary layout actually needs: structure on the left page for what you eat, structure on the right page for what you buy.
If you have ever wanted a low-tech way to track meals, plan groceries, and spot patterns in your eating, this guide will walk you through exactly how to set up a weekly food diary layout in a notebook. I will show you the two-page spread I now use every week, the variations worth trying, and the small habits that turn a blank page into something you actually open every day.
Table of Contents
- What a Weekly Food Diary Layout Is and Why It Works
- Choose the Right Notebook and Supplies
- How to Set Up a Weekly Food Diary Layout in a Notebook
- Layout Variations to Try
- Color Coding and Tracking Systems
- Tips for Sticking With Your Food Diary
- Common Mistakes to Avoid
- Frequently Asked Questions
- Final Thoughts on Your Weekly Food Diary Layout
What a Weekly Food Diary Layout Is and Why It Works
A weekly food diary layout is a two-page notebook spread that captures one full week of meals, snacks, and groceries in a single glance. The classic version puts a food calendar on the left page and a shopping list on the right page, so you can plan what you will eat and shop for it in the same sitting.
Self-monitoring is one of the most reliable behavior-change techniques we have. A 2008 study in the American Journal of Preventive Medicine found that people who kept a food diary lost roughly twice as much weight as those who did not track. The mechanism is simple: writing it down makes the invisible visible. You stop guessing about portions, you catch mindless snacking, and you start to see the connection between what you plan on Sunday and how you actually feel by Friday.
For our readers here at Best Weight Loss Planners, the notebook approach has an extra benefit. Unlike apps, a paper food diary removes notifications, removes ads, and removes the temptation to compare your lunch to someone else’s dinner. You sit with your own data.
Choose the Right Notebook and Supplies
Before you draw a single line, pick the right notebook. The layout choices below assume a standard A5 size (about 5.8 by 8.3 inches), but B5 and Letter both work — just scale your columns to fit.
Notebook Type
Dot grid is my top pick. The dots give you quiet guides for drawing straight lines and columns without the visual noise of a full grid. If you prefer structure, a squared grid (often called graph paper) is excellent for hand-drawn tables. Ruled notebooks work fine for a simple vertical list per day, but you will lose flexibility for column layouts.
Pens and Markers
One black pen for daily entries keeps things fast. Add two or three colored pens or fineliners for coding (more on that below). A soft highlighter works for marking weekly totals. Avoid anything that bleeds through thin paper — test on the inside back cover before committing.
Optional but Useful
Washi tape to mark your current week, sticky tabs for the index page, and a small ruler if your hand-drawn lines tend to wobble. None of these are required, but they make the ritual feel like a ritual rather than a chore.
How to Set Up a Weekly Food Diary Layout in a Notebook
This is the core walk-through. Set aside about 20 minutes on a quiet evening, follow the steps in order, and you will have a clean weekly food diary layout ready for Monday morning.
Step 1: Find Your Next Empty Spread
Open your notebook to a fresh two-page spread. Skip a page after your previous weekly spread so you have room to flip back and review. If you keep an index page at the front of your notebook, jot down the page numbers and the date range for this week so you can find it later.
Step 2: Title the Spread
Across the top of the left page, write the date range as your topic — for example, “August 11–17, 2026” or “Week 33.” Keeping the title on the left page signals that the left page is your primary canvas.
Step 3: Draw the Left Page Food Calendar
Draw a vertical table with seven rows (one per day) and three columns labeled Breakfast, Lunch, and Dinner. Add a fourth narrow column on the far right for snacks, water count, or notes. Leave generous space inside each cell — about four to six lines — so you can write real portions, not abbreviations you cannot read later.
Here is a simple ASCII sketch of what the left page looks like:
+ Week of Aug 11–17, 2026 ------------------------+
| Day     | Breakfast | Lunch   | Dinner  | Notes |
|---------+-----------+---------+---------+-------|
| Mon     |           |         |         |       |
| Tue     |           |         |         |       |
| Wed     |           |         |         |       |
| Thu     |           |         |         |       |
| Fri     |           |         |         |       |
| Sat     |           |         |         |       |
| Sun     |           |         |         |       |
+----------------------------------------------------+
Step 4: Build the Right Page Shopping List
Divide the right page into grocery-store sections: Produce, Protein, Dairy, Pantry, Frozen, and Other. As you fill in meals on the left page during your Sunday planning session, immediately transfer the ingredients to the matching section on the right page. By the time you finish planning, you have a ready-to-shop list.
Step 5: Add a Daily Logging Space
At the bottom of the right page, leave a small block for “How I felt today” or a one-line win and one-line challenge. This is where you capture the qualitative stuff apps usually miss — energy, mood, cravings, sleep. Patterns show up here faster than in any calorie count.
Step 6: Set a Trigger
Pick the moment you will sit down to log. Most people I work with anchor logging to an existing habit: with morning coffee, right after lunch, or before brushing teeth at night. Write that trigger at the very top of the spread so you see it before you open your fridge.
Step 7: Plan Your First Three Days in Detail
You do not need to plan the whole week on day one. Fill in Monday, Tuesday, and Wednesday in full, then return Thursday evening to add the next three days. This rolling approach keeps planning realistic and prevents the Sunday-night overwhelm that kills most food diaries by Wednesday.
Layout Variations to Try
The left-page, right-page spread is the workhorse, but it is not the only way to set up a weekly food diary layout in a notebook. Once you have done two or three weeks of the classic version, try one of these.
Vertical Day Columns Instead of Horizontal Rows
Flip the table on the left page so each day becomes a column and Breakfast, Lunch, Dinner become rows. This version works well if you write long descriptions of each meal or like to track macros per item. The trade-off is less horizontal space for notes.
One Page Per Day Layout
If you prefer detailed logging, dedicate one full page per day and use the right page as a running weekly summary. This is closer to a traditional food journal than a weekly planner, and it is the right choice if you are working with a dietitian on specific goals.
Monthly Overview Page
Add a single monthly overview page at the start of each month. Draw a 5-by-7 grid with weeks as rows and days as columns. Use one color to mark days you hit your protein target and another for days you hit your water goal. The bird’s-eye view reveals patterns a single week hides.
Habit Tracker Integration
Use a one-inch strip at the bottom of the left page as a mini habit tracker for the week: water glasses, steps, sleep hours, or veggie servings. Seven checkboxes per habit, fill them in as you go. Combining food and habit tracking on the same page keeps your morning routine short.
Color Coding and Tracking Systems
Color is the fastest way to make a notebook spread scannable. None of the top competitors in this space cover color coding in depth, so adding even a simple system sets your diary apart.
A Simple Three-Color System
Pick three colors and assign each one a job:
- Blue: hydration — tally water glasses next to each meal.
- Green: produce and vegetables — mark servings you actually ate.
- Red: trigger foods or planned treats — track without judgment.
This trio works because blue and green reward good habits, while red tracks the foods you are most likely to forget. You get an honest week, not a vanity week.
Tracking Macros Without the Math
If calorie counting feels heavy, draw four small circles at the top of the left page and shade them in: one for protein, one for vegetables, one for fiber, one for water. A glance at the end of the day tells you what you missed. No numbers, no app, no spreadsheet.
Mood and Energy Markers
Reserve a small symbol for the right page feeling section: a sun for high energy, a cloud for low, a lightning bolt for cravings. After three or four weeks, your notebook becomes a mood map that no fitness tracker can replicate.
Tips for Sticking With Your Food Diary
A pretty layout does not keep a diary alive — habits do. Here is what I have learned after more than two years of weekly spreads.
Log in the Same Spot Every Day
Keep your notebook on the kitchen counter, the nightstand, or wherever you eat breakfast. Out of sight is out of mind. In sight is in habit.
Use the Two-Minute Rule
If logging takes longer than two minutes, you will skip it. Write the meal name and a portion hint in shorthand you can decode later — “2 eggs + toast” beats a five-minute essay you will never finish.
Do a Sunday Review
Spend ten minutes every Sunday looking back at the week. Note one pattern, one win, and one small tweak for the week ahead. The review is where the diary actually changes your behavior. Logging without reviewing is just busywork.
The 3-3-3 Meal Prep Shortcut
If you are short on time, plan around the 3-3-3 rule: 3 breakfasts, 3 lunches, and 3 dinners, repeated twice across the week. It removes decision fatigue, cuts grocery list length, and still leaves room for one or two spontaneous meals.
Recycle the Layout That Fails
If a layout stops working after two weeks, change it. A food diary is a tool, not a tattoo. Keep what works, drop what does not, and keep moving.
Common Mistakes to Avoid
I have made most of these mistakes myself, so please learn from my errors.
Trying to Track Everything at Once
Calories, macros, water, mood, steps, sleep, supplements — picking all of them in week one is the fastest path to quitting. Start with meals only. Add one extra tracker each week until you hit your sweet spot.
Hiding Cheat Days
The diary is not a report card. If you skip writing down a snack because you feel guilty, you lose the most useful data point of the week. Honest entries beat perfect entries every time.
Rewriting Past Days
Memory fades fast. If you forget to log Tuesday, write “Tuesday — best guess: salad, soup, sandwich” rather than leaving it blank. Approximate is far more useful than missing.
Judging the Page Instead of Reading It
Your diary is a mirror, not a judge. If the page looks rough, the right response is curiosity — what happened, what can I learn — not shame.
Frequently Asked Questions
How to structure a food diary?
Start with a two-page spread. Use the left page as a food calendar with one row per day and columns for Breakfast, Lunch, Dinner, and notes. Use the right page for a categorized shopping list and a one-line daily reflection. Keep each cell generous so you can write real portions instead of shorthand you cannot decode later.
What is the 3-3-3 rule for meal prep?
The 3-3-3 rule means planning 3 breakfasts, 3 lunches, and 3 dinners, then repeating that rotation twice across the week. It reduces decision fatigue, keeps your grocery list short, and still leaves room for one or two spontaneous meals or leftovers.
How to create a weekly meal planner?
On the left page of a notebook spread, draw a 7-row by 4-column table with rows for each day and columns for Breakfast, Lunch, Dinner, and notes. Title the spread with the date range, fill in Monday through Wednesday in detail on Sunday, and roll the rest of the week forward one day at a time.
What is the 5-4-3-2-1 meal planning method?
The 5-4-3-2-1 method breaks the week into 5 dinners from new recipes, 4 lunches built from leftovers, 3 breakfast options on repeat, 2 prep-day blocks, and 1 free choice meal. It balances variety with realistic prep time and works well for anyone new to weekly meal planning.
Final Thoughts on Your Weekly Food Diary Layout
Setting up a weekly food diary layout in a notebook is a 20-minute Sunday ritual that pays you back all week long. You get a clear meal plan, a ready-to-shop grocery list, and a quiet record of how your food choices connect to how you feel.
Start simple. Draw the left-page calendar and the right-page shopping list this weekend. Log Monday through Wednesday in full. Add one color, one tracker, or one habit at a time. By the end of week four, you will have a layout that fits your real life, not someone else’s Instagram version of food journaling.
If you would like to take this further, our team has a roundup of the best weight loss planners that pair paper tracking with structured goal-setting. The notebook method you just built is the foundation; the planner takes it from observation to action.