
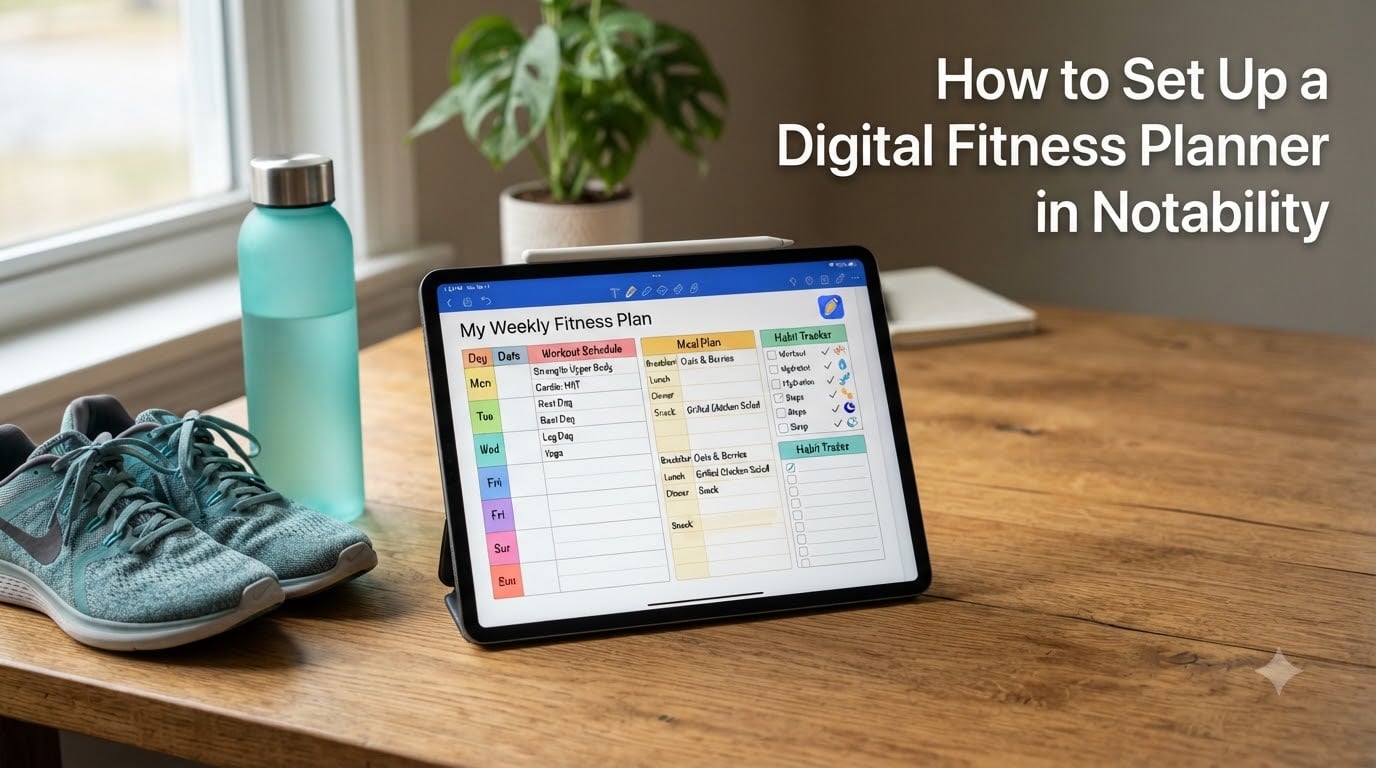
Last January, I pulled out a stack of half-used paper fitness journals and realized I had not flipped one open in six months. My Apple Pencil was sitting right next to the iPad, and that is when I decided to learn how to set up a digital fitness planner in Notability for real. Three months later, I had logged 47 workouts, stuck to a meal plan for the first time in years, and actually used my planner daily. The setup was not hard. I just needed a clear, step-by-step path to follow.
If you have been wanting to combine the focus of a paper planner with the convenience of iCloud sync, color coding, and tap-to-navigate hyperlinks, this guide is for you. I will walk you through every step of building a digital fitness planner in Notability, from choosing the right template to setting up workout tracking, habit logs, and meal planning pages.
Table of Contents
- What Is a Digital Fitness Planner in Notability?
- What You Need Before You Start
- How to Set Up a Digital Fitness Planner in Notability: Step by Step
- Setting Up Fitness-Specific Sections in Your Planner
- How to Customize Your Planner for Fitness Goals
- Integrating Calendar Apps with Your Fitness Planner
- Pro Tips for Getting the Most Out of Notability
- Frequently Asked Questions
- Final Thoughts
What Is a Digital Fitness Planner in Notability?
A digital fitness planner in Notability is a PDF template designed for iPad that lets you track workouts, meals, habits, and fitness goals using handwritten or typed notes with digital ink. It looks and feels like a paper planner, but every page is interactive and searchable.
Notability is a PDF annotation app originally built for note-taking, but it has grown into one of the most popular planner apps among iPad users. The official 2026 Digital Planner collection, available to Notability Plus subscribers, is built right into the app. Other free and paid fitness planner templates from Etsy shops, Gumroad creators, and PDF marketplaces can be imported with a single tap.
Unlike a static note-taking app, Notability lets you tap hyperlinks that jump between monthly, weekly, and daily pages. You can write with your Apple Pencil, type with a keyboard, drop in images of your meals, and search your handwriting later. For fitness planning specifically, that means your workout log, macro counts, and habit streaks are all stored in one place you can pull up at the gym.
What You Need Before You Start
Before you set up a digital fitness planner in Notability, gather these four things. I learned the hard way that missing any one of them creates friction on day one.
1. An iPad with Notability installed. Notability runs on iPad (iPadOS 16 or later is recommended). You can grab the free version from the App Store, which is enough for basic importing and handwriting. The free tier has limited features compared to Notability Plus.
2. An Apple Pencil (recommended, not required). The Apple Pencil is what makes the handwritten feel work. I use the 2nd generation Pencil because it charges magnetically on the side of my iPad Pro. If you only have a stylus or want to type, that works too, but the experience is closer to a paper planner with the Pencil.
3. A fitness planner PDF template. You can use the built-in 2026 planners under Templates, or download a fitness-specific template from a third-party creator. More on this in Step 1.
4. A Notability Plus subscription (optional but powerful). Notability Plus unlocks the official planner dashboard, handwriting search, additional templates, and unlimited note subjects. Many users, myself included, find it worth the price for planner use alone.
How to Set Up a Digital Fitness Planner in Notability: Step by Step
This is the core of the guide. Follow these five steps in order, and you will have a working digital fitness planner by the end of the day. I timed my last setup at 22 minutes.
Step 1: Download or Access a Fitness Planner Template
You have three good options for templates. Pick the one that matches your budget and design taste.
Option A: Use the official Notability 2026 Planner. Open Notability, tap and hold the New Note button in your notes library, then select Templates. From there, choose the 2026 Digital Planner. It comes with a full year of monthly, weekly, and daily pages and is ready to use in minutes.
Option B: Buy a fitness-specific template. Etsy, Gumroad, and Creative Market are full of fitness planner PDFs built for import into Notability. Search terms like “Notability fitness planner,” “iPad workout planner PDF,” or “GoodNotes fitness planner” (most work in both apps). I have used three different ones over the past year. The best ones usually cost between $5 and $25 and include hyperlinked tabs, meal planning pages, and habit trackers.
Option C: Download a free template. Several creators share free pages on their blogs and Pinterest boards. Quality varies, but it is a great way to test the workflow before spending money. Look for templates that say “hyperlinked” so the index page actually works.
Save the PDF to your Files app, iCloud Drive, or Dropbox. Make sure you know exactly where it is, because you will import it in the next step.
Step 2: Import the Planner PDF into Notability
Open Notability and tap the menu icon in the top-left corner to switch into your Notes Library. Tap the New Note button (a square with a pencil) and choose Import.
Navigate to where you saved your PDF, tap it, and Notability will load the full planner as a single note. The size of the file matters here. I had a 480 MB fitness planner that took almost a minute to import on my iPad Pro. Most templates are between 30 MB and 150 MB, which loads in under 10 seconds.
Once imported, the planner opens to the first page, usually a cover. Do not write on it yet. You will probably want to set up navigation first.
Step 3: Navigate the Index and Hyperlinked Pages
Most well-built fitness planners include an index page on or near the front. The index is a clickable table of contents. Tap any month, week, or section, and Notability will jump directly to that page. This is what makes the planner feel like a real paper planner rather than a giant PDF.
To make sure hyperlinks work, tap a tab on the index page. If the link is active, Notability will jump. If it does not jump, the template is not hyperlinked, and you will need to navigate manually using the page thumbnails.
Open the page thumbnails view (tap the small grid icon at the top of the screen) to scroll through every page at once. I keep this open whenever I plan my week. It is faster than flipping through tabs and gives me a complete visual of the month.
Step 4: Set Up Your Fitness-Specific Sections
Every fitness planner is slightly different, but the core sections below are what I use weekly. I will walk through each one in the next section, but for now, identify where they live in your template.
Look for these pages in your planner:
- Workout log or exercise tracker
- Meal planning pages
- Habit tracker (water, sleep, steps)
- Progress and measurements log
- Goal-setting pages
- Weekly review or reflection page
Use sticky notes or write small labels in the corner of each section so you can find them quickly. After two weeks, you will have muscle memory for where each page lives.
Step 5: Create a Weekly Planning Ritual
The single biggest reason people abandon digital planners is inconsistent use. I learned this from a long Reddit thread on r/DigitalPlanner, where dozens of users described the same exact pattern. The fix is a weekly planning ritual.
Pick one 20-minute block each Sunday evening. Open your planner, jump to the upcoming week, and fill in three things:
- Workout schedule (which days, which muscle groups)
- Meal plan (breakfast, lunch, dinner for weekdays)
- Top three fitness goals for the week
Keep the ritual the same every week. Add a colored shape or stamp on the page so you can visually check your streak. After 4 weeks, this becomes a habit. After 12 weeks, it becomes part of how you live.
Setting Up Fitness-Specific Sections in Your Planner
Out of the box, most fitness planners include the right sections. The trick is setting them up so they actually work for your goals. Here is how I configured each section in my Notability fitness planner.
Workout Tracker
Open the workout log page and write the date at the top. For each exercise, I list the movement, sets, reps, and weight. To save time, I create a small template once and copy-paste it across the week using the lasso tool. Select the writing with the lasso, hold, and Copy. Paste it onto the next day, then edit the details.
Meal Planning Pages
Color code your meals by category. I use green for breakfast, blue for lunch, orange for dinner, and red for snacks. It makes a busy week instantly readable. If your template includes a grocery list at the back, write directly into it as you plan meals, then snap a photo of your meal with the camera tool and drop it on the page for visual tracking.
Habit Tracker
Notability habit trackers usually come as a grid with days across the top and habits down the side. I treat this as a fitness scoreboard. Use a small filled circle for completion and an X for a skip. Once you have 14 days of data, look for patterns. I noticed I had low water intake on workout days, which directly affected my recovery.
Progress and Measurements Log
Take measurements on the same day each month, ideally first thing in the morning. Log weight, waist, hips, chest, and any other body metric you track. I also photograph progress pictures and drop them into the planner using the image tool. They sit on the same page as the numbers, which makes visual comparisons easier.
How to Customize Your Planner for Fitness Goals
Most planners are not perfectly tailored to your goals out of the box. Customization is where you turn a generic template into a personal fitness tool. Here are the four customization moves I make on day one.
1. Color code by workout type. Pick four colors for your training split. For example, purple for strength, blue for cardio, green for mobility, and red for rest. Be consistent. After a month, scanning the week tells you instantly whether your training is balanced.
2. Add stickers and highlights. Notability supports sticker imports. Find a free fitness sticker pack on Etsy or Pinterest, drop the PNG files into Notability, and use them to mark completed workouts, streak milestones, or PB (personal best) days. I am a “less is more” planner, but one or two highlights per page adds motivating visuals without clutter.
3. Add blank pages for flexibility. A planner template is finite, but your goals are not. Use the Add Page feature to insert extra pages anywhere. I added a “Travel Workout” page after a vacation where I lost my routine. Now I always have a backup plan ready.
4. Use the Tape tool to hide unused sections. Notability has a Tape tool that lays a piece of digital tape over any section. Use it to gray out pages you are not using yet, like a quarterly review that does not apply in January. This keeps the planner focused on what matters right now.
Integrating Calendar Apps with Your Fitness Planner
Your planner should not live in isolation. Linking it to your calendar app keeps your workouts, meal prep, and recovery visible in the same place as your work meetings and family events.
To link planner events to Google Calendar or Apple Calendar, you have two main options. The first is to use the Notability integration. Tap the three dots on a planner page, choose “Add to Calendar,” and the event drops into your Apple Calendar. The second is the Shortcuts app on iPadOS. Create a shortcut that opens a specific planner page on a specific date, then assign it to a calendar event. Long-press the event, choose “Add Shortcut,” and the link works every time.
I keep my fitness events in Apple Calendar and my work events in Google Calendar. The Shortcuts integration lets me tap a workout event and jump straight to the workout log page. That single tap saves me 30 seconds of navigation every day, which adds up over a year.
Pro Tips for Getting the Most Out of Notability
After 14 months of using Notability for fitness planning, these are the tricks that made the biggest difference for me. They come from a mix of official documentation, Reddit threads, and my own testing.
Use handwriting search. Notability Plus can search your handwriting. This sounds trivial until you forget which week you logged a 200 lb deadlift. Tap the search bar, type “200 lb,” and Notability pulls up the exact page. For a fitness log, this is gold.
Try the multi-note view. Split your screen in iPadOS and open Notability twice. You can view your weekly plan on the left and your meal tracker on the right. This is the fastest way to plan a balanced week without back-and-forth navigation.
Turn on iCloud sync. In Notability settings, make sure iCloud is enabled. Your planner syncs across iPhone, iPad, and Mac. I check my habit tracker on my iPhone during my morning coffee, then dig into the full plan on my iPad in the evening.
Keep it simple. The most common advice I saw across forum discussions was that Notability users prefer a clean, sticker-free planner. Veteran paper planners often over-customize at the start and abandon the planner within a month. Start with the basics you will actually use. Add flourishes only after the habit sticks.
Frequently Asked Questions
Does Notability have a built-in digital planner?
Yes. Notability includes a 2026 Digital Planner collection for Notability Plus subscribers. You can access it by tapping and holding the New Note button in your notes library, then selecting Templates. The collection includes monthly, weekly, and daily pages with hyperlinked navigation.
How do I add a planner to Notability?
Download a planner PDF from your template seller of choice, save it to Files, iCloud Drive, or Dropbox, then open Notability and tap the New Note button. Choose Import, navigate to the PDF, and tap it. The planner loads as a single note with all pages accessible through the page thumbnails view.
Can I track workouts in Notability?
Yes. Notability works very well for workout tracking. Use a fitness planner template that includes a workout log page, then write your exercises, sets, reps, and weights with your Apple Pencil. Notability’s handwriting search lets you find past workouts by typing exercise names or weights.
Is Notability free for digital planning?
Notability offers a free tier that supports basic PDF annotation and planner imports. However, the official 2026 planner templates, handwriting search, and unlimited subjects require a Notability Plus subscription. Many third-party free PDF templates also work in the free version.
What is the best digital planner format for Notability?
The best format is a hyperlinked PDF planner. Hyperlinks let you tap from the index page to any month, week, or section in one tap. Look for templates that specifically mention hyperlinked tabs and are designed for iPad with Apple Pencil.
How do I keep my digital fitness planner organized?
Pick a weekly planning ritual on the same day and time each week. Use color coding consistently for workouts, meals, and habits. Use the page thumbnails view to navigate quickly. Add blank pages as needed for personal goals. Review your planner every Sunday for 20 minutes to keep the habit alive.
Final Thoughts
Learning how to set up a digital fitness planner in Notability is less about the app and more about building a daily and weekly rhythm that you actually keep. The cleanest setup in the world will not help if you do not open it on Sunday night and plan the week ahead.
Start with the basics. Pick a template, import it, set up your index navigation, and write your first week. From there, add fitness-specific sections, color coding, and calendar integrations one at a time. Within a month, you will have a system that combines the focus of paper planning with the convenience of iCloud sync, search, and tap-to-navigate hyperlinks. That is what makes setting up a digital fitness planner in Notability worth the 20 minutes it takes on day one.