
I learned this the hard way. After eight weeks of training, the scale barely budged, and I almost quit. Then I scrolled back through my phone and lined up two weight loss progress photos taken on day one and week eight, and I nearly cried. My waist was smaller, my shoulders broader, my posture completely different. The scale missed everything.
This guide teaches you how to take consistent weight loss progress photos that actually show your transformation. By the end, you will know exactly how to set up your camera, light the room, pose your body, time your shots, and analyze the results. No fluff. No gear obsession. Just the method I now use with every client and on my own journey.
Table of Contents
- Why Weight Loss Progress Photos Are More Honest Than the Scale
- Set Up Your Home Photo Station
- Master Consistent Lighting for Progress Photos
- Wear the Same Outfit Every Time
- The 6 Essential Poses for Weight Loss Progress Photos
- Pick the Right Time of Day for Your Photos
- Take Progress Photos Solo (No Tripod Required)
- How Often to Take Progress Photos
- How to Analyze Your Progress Photos
- Overcome Body Image Discomfort
- Common Mistakes That Ruin Progress Photos
- Frequently Asked Questions
- What are the best poses for weight loss progress photos?
- How often should I take weight loss progress photos?
- Do I need a tripod for progress photos?
- How do I take progress photos alone without help?
- What time of day should I take progress photos?
- How do I get over feeling uncomfortable taking progress photos?
- How do I store progress photos privately?
- Final Thoughts: Make Photos a Habit, Not a Hassle
Why Weight Loss Progress Photos Are More Honest Than the Scale
The scale tells you your total mass. Progress pictures tell you what that mass is doing. Two people can weigh exactly the same and look completely different because one carries more muscle and the other carries more water and fat.
When I weigh myself daily, my weight swings three to five pounds based on sodium, sleep, and stress. None of those swings reflect actual body composition change. But when I compare photos taken four weeks apart under identical conditions, I see real shifts in muscle definition, posture, and shape.
There is also a psychological angle that changed everything for me. Looking at hard visual evidence of progress kills the inner critic that insists nothing is working. Researchers in body composition tracking have repeatedly found that visual feedback outperforms numeric feedback for adherence. Your brain trusts its eyes more than a digit on a scale.
Progress photos also reveal non-scale victories the bathroom scale cannot see. You will notice your collarbones showing up, your face thinning, your arms developing shape. These wins keep you moving forward during the weeks when the scale refuses to cooperate.
Set Up Your Home Photo Station
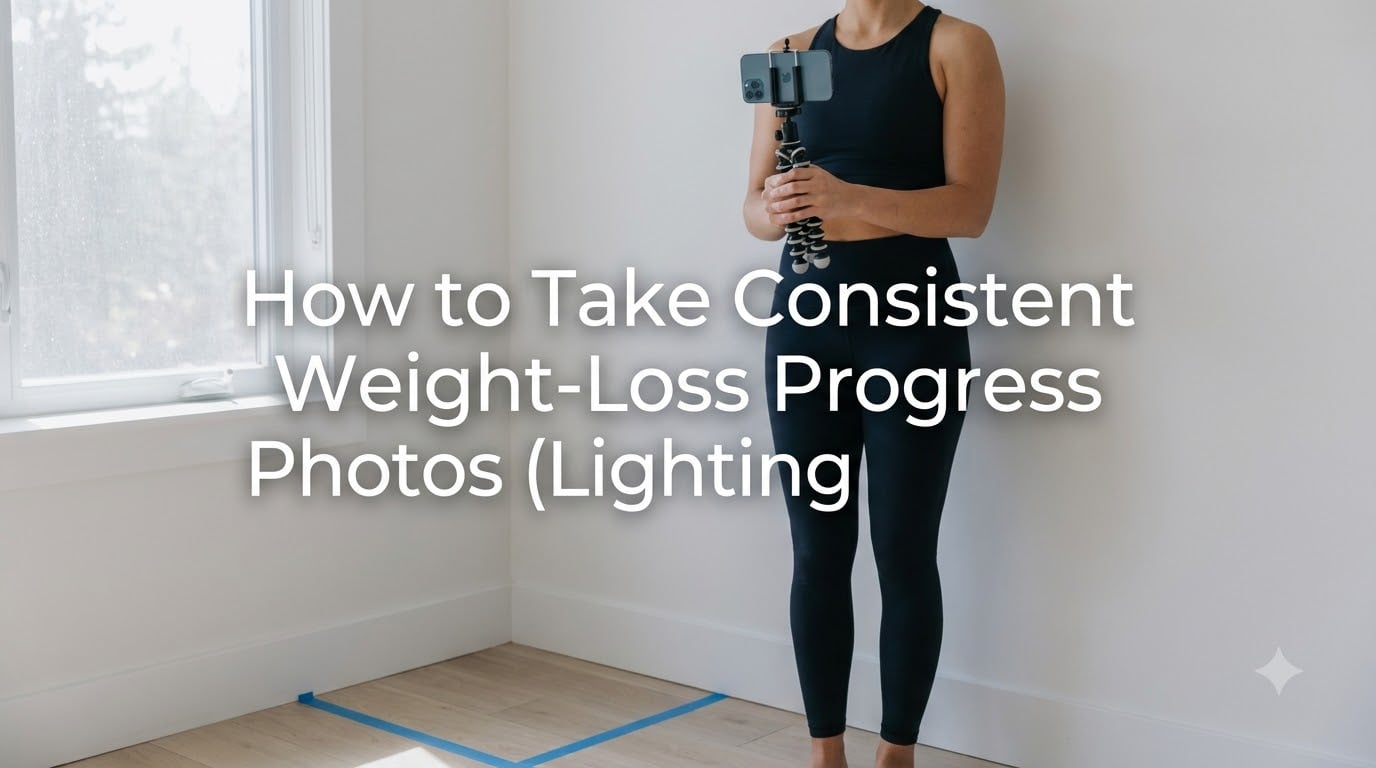
Consistency starts with a permanent spot. Pick one corner of one room and use it every single time. I use a corner of my bedroom with a plain white wall because walls never change and never need ironing.
Stand about three to four feet away from the camera. Mark that exact spot on the floor with a small piece of painter’s tape so your feet land in the same position every session. I learned this after months of subtle drift in my stance that made early comparisons nearly useless.
For camera height, aim for chest level. Set your phone at the height of your sternum when you are standing in your mark spot. Most progress photo mistakes happen because the camera is too low, which distorts proportions and makes your legs look shorter than they are.
If you do not own a tripod, stack books on a dresser or shelf to the right height. I built a $12 phone tripod from a stack of cookbooks during my first three months and the photos looked identical to those I take now with a proper stand. The mount matters less than the consistency.
Master Consistent Lighting for Progress Photos
Lighting is the single biggest variable that ruins comparison photos. The same body under different lighting can look ten pounds lighter or heavier. Controlling light is the most powerful thing you can do for accuracy.
Natural window light is the gold standard. Stand facing a large window during daylight hours, ideally between 9 a.m. and noon when the sun is high enough to avoid long shadows. The light should fall evenly across your body, front-lit from head to toe.
Position yourself so the window is directly in front of you or at a slight 45-degree angle. Avoid side lighting from a single window because it carves deep shadows that hide or exaggerate definition. If you only have one small window, hang a white sheet on the opposite wall to bounce light back and fill the shadows.
Turn off every overhead light in the room. Indoor bulbs mix color temperatures with your window light and create the orange or yellow cast that makes comparison photos look different week to week. Pure natural light gives you a clean baseline that photographs identically every time.
When natural light is not an option, use a ring light or a soft LED panel set to daylight color temperature (around 5000K). Place it directly in front of you at face height. Forum communities like r/progresspics consistently recommend ring lights because they spread light evenly and show muscle definition as you get leaner.
Wear the Same Outfit Every Time
Clothing shapes your silhouette. A baggy t-shirt in week one and a fitted tank top in week six will make you look slimmer without any actual change. Match the outfit every session.
For women, sports bras and fitted shorts are the standard. They show torso definition, waistline, and leg shape clearly. For men, fitted athletic shorts or compression underwear at the waist work well. Avoid long pants because they hide calf definition.
Color matters too. Solid dark colors like black, navy, or charcoal minimize distractions and keep focus on your body shape. Patterns and logos shift your visual attention away from the body itself and make side-by-side comparison harder.
Lay your photo outfit out the night before your photo session. I keep mine in a small drawer labeled “progress kit” with the shorts, the top, and the painter’s tape so I never have to think on photo day. Removing decision fatigue is what makes the habit stick.
The 6 Essential Poses for Weight Loss Progress Photos
Every batch of progress photos should include the same six shots in the same order. This is the exact shot list I use and recommend to every client. Print it out and tape it next to your photo station.
- Front relaxed – Face the camera, arms at your sides, feet hip-width apart, look straight ahead.
- Front flexed – Same stance, raise both arms into a double bicep flex to show shoulder and arm development.
- Back relaxed – Turn around, back to camera, arms relaxed at sides, feet hip-width apart.
- Back flexed – Same back position, raise both arms into a back double bicep pose to show lats and triceps.
- Left side zombie arms – Face left, raise one arm slightly forward and the other slightly back, relax the rest of the body.
- Right side zombie arms – Mirror the previous pose on the opposite side.
The zombie arms pose keeps your arms from pressing flat against your torso, which would hide your waistline. A slight outward angle of roughly 30 degrees opens up the silhouette and shows definition more clearly.
Between every pose, mark your foot position with the painter’s tape you placed on the floor. Do not adjust your stance based on how you feel that day. Pose discipline is the difference between useful comparison photos and a folder of flattering angles that mean nothing.
Pick the Right Time of Day for Your Photos
Take your photos first thing in the morning, before eating or drinking anything except water. This is the sequence I follow and the one every progress photo community recommends.
Step one: use the bathroom immediately after waking up. Step two: take your photos in your underwear or photo outfit before coffee or breakfast. Step three: drink water, eat, and start your normal day. This routine gives you a consistent baseline every single week.
Morning matters because your stomach is empty, your bloating is at its lowest, and your posture is at its freshest. Photos taken after dinner will look completely different from morning shots, even on the same day. I tested this on myself with a 12-hour gap and my stomach looked visibly flatter at 7 a.m. than at 7 p.m.
If mornings truly do not work for you, the next best option is right after a workout before you eat a full meal. Pick one consistent time and stick with it religiously. The exact hour matters less than repeating the same hour every session.
Take Progress Photos Solo (No Tripod Required)
You do not need a tripod to capture perfect progress photos by yourself. I take most of mine with a $15 phone tripod and a Bluetooth remote, but I spent my first six months using just the phone timer.
The timer method works like this. Open your camera app, switch to the rear camera, frame the shot, set a 3-second or 10-second timer, and walk into your marked spot. Most phones give you enough delay to settle into position and fire three to five shots in burst mode.
Voice activation helps if your phone supports it. Saying “cheese” or “capture” to Siri or Google Assistant triggers the shutter without touching the phone, which keeps you from bouncing the camera on a stack of books.
A Bluetooth remote costs around $8 and pairs with your phone in seconds. You hold the small clicker in your hand, press it, and the camera fires. This is the easiest method once you commit to taking photos regularly. The remote fits in your photo kit drawer alongside your outfit.
For the selfie method as a last resort, hold the phone at chest height with your arm slightly extended. Use the wide-angle or 0.5x lens if your phone has one. This is less consistent than a tripod but still works if you commit to the same arm position every time.
How Often to Take Progress Photos
Take your first batch on day one of any new program. That is your baseline. From there, follow the schedule I use with every client.
For the first four weeks, take photos weekly. Changes are subtle but real, and the weekly cadence trains your eye to spot progress. For weeks five through twelve, switch to biweekly. By this point, body recomposition shifts happen slower and weekly comparisons start to feel discouraging. After twelve weeks, monthly is enough unless you are actively cutting or bulking.
Daily photos are a trap. I tried it for a month and ended up with hundreds of nearly identical images, plus extra anxiety about daily changes that do not exist. The scale of real body change is measured in weeks, not hours.
If you miss a session, do not skip the next one. Just take it at the next scheduled time. Forcing yourself to “make up” a missed photo day creates stress around the process and undermines the whole point of tracking.
How to Analyze Your Progress Photos
Looking at photos is the easy part. Knowing what to look for is the skill that makes the practice worthwhile. Train your eye to spot specific markers rather than just glancing and feeling either good or bad.
Look for definition before size. You will see muscle lines appear in your shoulders, abs, and arms well before your waist measurement drops. Definition is the earliest visible signal that body fat is dropping, even when the mirror still feels the same.
Compare the same pose side by side. Use a photo app or simply put two images next to each other in your phone gallery. Never try to compare a relaxed photo to a flexed one. The pose changes the body shape and ruins the comparison.
Check posture and alignment. Most people unconsciously stand straighter as their core strengthens. Compare the angle of your shoulders in week one to week eight and you will likely see your shoulder line rise and your chest open up.
Notice the face, neck, and collarbones. These areas change early in a cut. If you do not see changes anywhere else, your face often reveals the first signs of fat loss. This is also a big psychological win on the days when your torso still looks the same.
Overcome Body Image Discomfort
I will be honest with you. Taking the first photo is brutal. Standing in front of a camera in minimal clothing when you feel bad about your body is one of the hardest parts of any transformation. Almost every forum thread I have read includes someone mentioning this exact struggle.
Start with a delay tactic. Take the photo, then do not look at it for a week. The image exists for the future version of you, not the present one. After the first three or four photo sessions, the discomfort fades because the process becomes routine.
Snap and delete is a valid option. If today is a particularly hard day, take the photo anyway, then delete it without viewing. The act of taking it keeps your timeline unbroken, and you can always retake it tomorrow. A missing photo in week three will bother you more than an unflattering one you can delete.
Reframe the photos as data, not art. They are measurements in image form, like a spreadsheet row for your waist. Professional athletes take unflattering physique shots regularly as part of their job. Treating your photos as performance data takes the emotional weight out of the process.
Store them privately. Use a locked album app, a password-protected folder, or an encrypted cloud backup. Knowing your photos are not casually scrollable on your camera roll removes a layer of anxiety that often stops people from taking the first shot.
Common Mistakes That Ruin Progress Photos
Different clothing is the number one comparison killer. Even swapping a gray sports bra for a black one changes how your silhouette reads on camera. Always use the same outfit from your photo kit.
Posing drift is the second most common mistake. You stand with your feet slightly closer in week six than week one without realizing it. The painter’s tape on the floor prevents this and is the single best five-second investment you can make in your photo setup.
Lighting changes silently. A cloudy week versus a sunny week makes the same room look completely different. Same goes for changing the time of day or moving the photo station three feet to the side. Pick a fixed window, time, and spot and never deviate.
Focal length differences wreck comparisons. A wide-angle selfie distorts your proportions, while a standard rear-camera lens does not. Always use the rear camera at the default focal length and step back rather than zooming in.
Editing or filtering the photo breaks the entire system. Once you apply any adjustment, the comparison loses accuracy. Save the photos as straight out of camera and resist the urge to tweak brightness or contrast between sessions.
Frequently Asked Questions
What are the best poses for weight loss progress photos?
The six best poses are front relaxed, front flexed with a double bicep, back relaxed, back flexed with a back double bicep, left side zombie arms, and right side zombie arms. Always take all six in the same order every session for accurate comparison.
How often should I take weight loss progress photos?
Take photos weekly for the first four weeks of any program, then switch to biweekly through week twelve. After that, monthly is enough unless you are actively cutting or bulking. Daily photos add stress without improving accuracy.
Do I need a tripod for progress photos?
No. A tripod helps with consistency, but you can use a stack of books at chest height, a Bluetooth remote, or the built-in camera timer. The most important factor is keeping the camera in the same position and at the same height every session.
How do I take progress photos alone without help?
Set your phone on a stable surface at chest height, use a 3-second or 10-second timer, walk into your marked spot on the floor, and trigger the burst. A Bluetooth remote costing around $8 makes this easier and lets you fire the shutter without rushing into position.
What time of day should I take progress photos?
Take them first thing in the morning, after using the bathroom and before eating or drinking anything except water. Morning photos show the least bloating and give the most consistent baseline. If mornings do not work, choose any time but stick with it every session.
How do I get over feeling uncomfortable taking progress photos?
Take the photo without looking at it, then delay viewing for a week. Treat the images as data rather than art, store them in a private locked album, and remember the goal is future comparison, not present judgment. The discomfort fades after three or four sessions once the process becomes routine.
How do I store progress photos privately?
Use a locked album app like Private Photo Vault, a password-protected folder in your gallery, or an encrypted cloud service. Avoid keeping unflattering photos on your main camera roll where they can trigger anxiety during casual scrolling.
Final Thoughts: Make Photos a Habit, Not a Hassle
The whole system comes down to a single rule. Repeat everything. Same spot, same outfit, same lighting, same six poses, same morning window, every single time. The day you treat weight loss progress photos as casually as brushing your teeth is the day they start working for you.
Build the kit tonight. Tape the floor, set the camera height, lay out the outfit, and set a reminder for tomorrow morning. Your future self will thank you in eight weeks when the photo scroll tells the truth the scale never did.
Drop your questions in the comments. I read every one and answer the ones I can help with personally.