
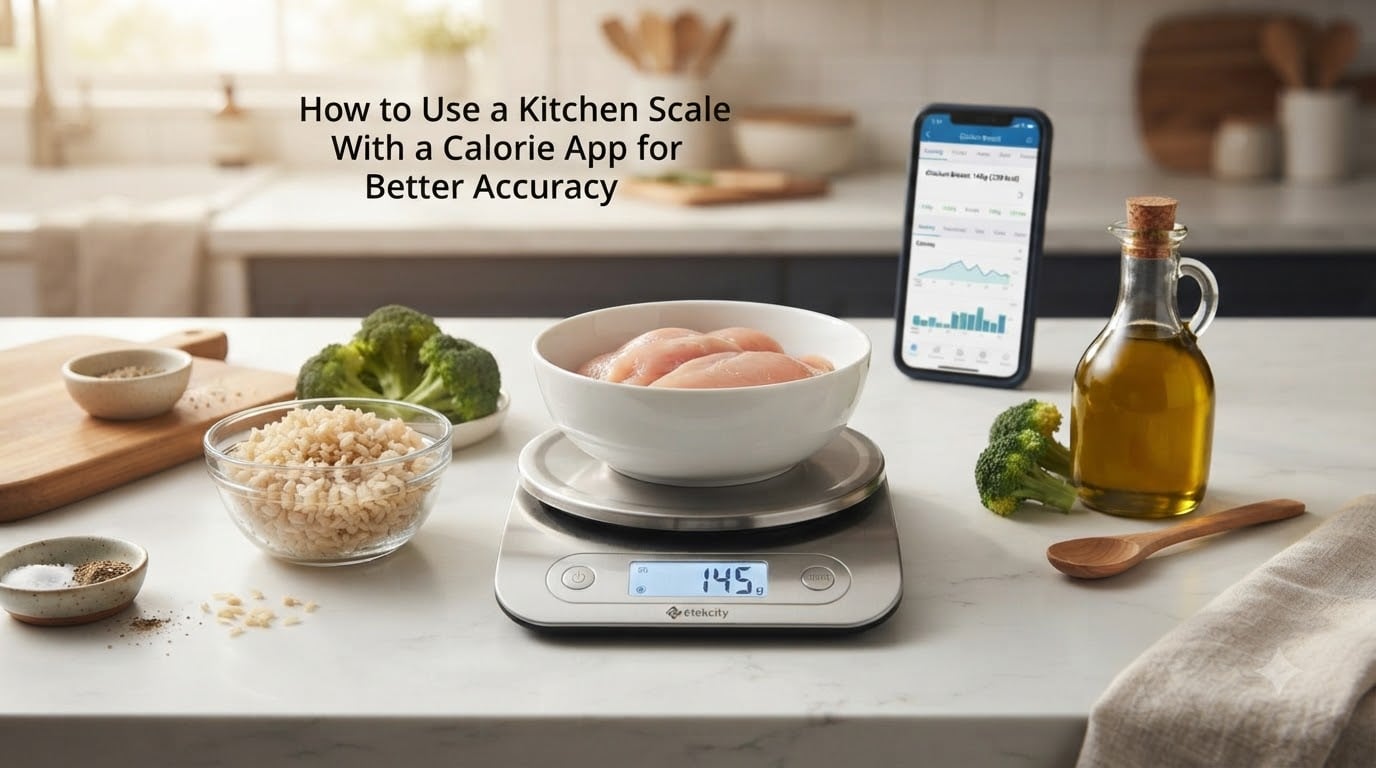
When I first started tracking calories, I guessed at portions for three weeks and thought I was eating around 1,800 calories a day. The day I pulled out a kitchen scale, I learned the real number was closer to 2,600. That gap is exactly why learning how to use a kitchen scale with a calorie app for better accuracy is the single biggest upgrade you can make to your nutrition tracking.
Visual estimates are wrong most of the time. Studies and thousands of Reddit threads agree: people consistently underestimate what they eat by 20% to 50%. A scale removes the guesswork. Combined with a calorie app, it turns logging from an exercise in hoping into an exercise in knowing. In this guide, I will walk you through the exact workflow I use, plus the tare function, raw vs cooked weighing, and the mistakes that throw off even careful trackers.
Table of Contents
- Why Kitchen Scales Improve Calorie Tracking Accuracy
- How to Use a Kitchen Scale With a Calorie App: Step-by-Step
- Understanding the Tare Function on a Food Scale
- Weighing Raw vs Cooked Food: What Counts in Your App
- Choosing the Right Food Scale for Calorie Tracking
- Common Mistakes to Avoid When Weighing Food
- Tips for Consistent, Accurate Measurements Every Day
- Frequently Asked Questions
- Final Thoughts on Using a Kitchen Scale With Your Calorie App
Why Kitchen Scales Improve Calorie Tracking Accuracy
A kitchen scale does not measure calories directly. It measures weight in grams or ounces, and your app translates that weight into calories using a nutrition database. The accuracy of your logs depends entirely on the accuracy of the weight you enter. This is where scales beat eyeballing every time.
The Hidden Problem With Visual Portion Estimates
Most people estimate a serving of rice at about one cup. One cup of cooked white rice actually weighs around 158 grams and contains roughly 205 calories. If you guessed one cup and got two cups, you doubled the calories without realizing it. The same problem exists with peanut butter, olive oil, cheese, and almost every calorie-dense food in your pantry.
Cheese is the classic example. A “serving” on the label is 28 grams, about the size of a domino. The pile of shredded cheese most people add to a plate weighs 56 to 84 grams. That single difference can add 80 to 120 calories you never counted.
What the Research Says About Food Scale Accuracy
Digital kitchen scales from reputable brands are accurate to within 1 to 2 grams at typical portion weights. That level of precision is more than enough for calorie tracking, where the goal is to get within 5% to 10% of your true intake. The scale itself is rarely the weak link. The weak link is what you do with the reading, which is where your calorie app matters.
When you connect a precise gram measurement to a complete nutrition database like the one in MyFitnessPal, Cronometer, or Lose It, your logging accuracy jumps from rough estimates to real numbers. This is the foundation of every other strategy in this guide.
How to Use a Kitchen Scale With a Calorie App: Step-by-Step
This is the core workflow. Once you have done it twenty times, the whole process takes under a minute per food. Here is exactly how to use a kitchen scale with a calorie app from start to finish.
Step 1: Power On and Check the Unit Setting
Turn on your scale and check the unit display. Most digital scales toggle between grams (g) and ounces (oz) with a button on the front or bottom. For calorie tracking, grams are strongly preferred because nearly every nutrition database lists values per 100 grams. Working in grams means fewer mental conversions and fewer chances to make a math error.
Step 2: Place Your Container and Press Tare
Put the bowl, plate, or container you plan to eat from on the scale. Wait for the reading to stabilize, then press the tare button. The display should reset to zero. This subtracts the container weight so only your food gets measured. Tare is the feature users on r/loseit and r/MyFitnessPal call the most valuable part of any kitchen scale.
Step 3: Add Your Food and Record the Weight
Add your food directly into the container on the scale. Wait for the number to settle, then read the gram value. For liquids and powders like olive oil or peanut butter, this step matters even more because these are the foods most likely to be underestimated by sight.
Step 4: Log the Measurement in Your Calorie App
Open your calorie app and search for the food. Choose the entry that matches your preparation, raw chicken breast versus cooked, white rice versus brown, and so on. Enter the exact gram weight from step 3. Save the entry. The app calculates calories and macros automatically based on the database value.
That is the entire workflow. Power on, tare the container, weigh the food, log the grams. Repeat for each ingredient, and you have a meal that is logged to within a few calories of reality instead of a few hundred.
Understanding the Tare Function on a Food Scale
Tare is the feature that makes weighing in a container possible. Without it, you would have to subtract the container weight in your head every single time, which is slow and error-prone. With it, the scale does the math for you instantly.
What Tare Actually Does
When you press the tare button, the scale stores the current weight and displays zero. Anything you add afterward is measured on top of that stored weight, but only the new weight shows on the screen. Add 150 grams of chicken to a tared bowl, and the display reads 150 grams, not bowl plus chicken.
You can press tare again at any point to add another ingredient. This is how you build a full meal in one bowl, weighing each component as you go, without ever doing subtraction in your head.
When to Use Tare for Multiple Ingredients
Say you are making a bowl with rice, chicken, and vegetables. Place the bowl on the scale, tare it, add rice, note the weight, tare again, add chicken, note the weight, tare again, add vegetables, note the weight. Now you have three separate measurements and one clean bowl. Log each one separately in your app and your totals are exact.
Use tare whenever you switch ingredients. It takes half a second and removes the only source of calculation error in the weighing process.
Weighing Raw vs Cooked Food: What Counts in Your App
This is the question that confuses more new trackers than any other. Should you weigh your chicken before or after cooking? The answer depends on which database entry you plan to use in your app, and it matters a lot because weight changes during cooking.
Why the Database Uses Raw Weight for Most Foods
Most nutrition databases list values per 100 grams of raw weight because raw weight is consistent. A chicken breast weighs the same raw whether you grill, bake, or pan-sear it. Cooked weight varies by cooking method, water loss, and added fat. Logging raw keeps your numbers stable across different meals.
The Exception: Foods That Change Dramatically When Cooked
Rice, pasta, oats, and beans absorb water and roughly triple in weight when cooked. A 50 gram serving of dry rice becomes about 150 grams after cooking. If your app entry is for cooked rice, weigh it after cooking. If the entry is for dry rice, weigh it before. Match the entry to the state of the food on your scale.
Meat and fish lose water during cooking, so a 200 gram raw chicken breast ends up around 160 grams cooked. If your entry is for cooked chicken, weigh it after. If raw, weigh it before. Either works as long as the entry and the weight match.
How to Log Cooked Weight When Raw Isn’t an Option
If you cooked a big batch of chicken earlier and only have the cooked weight, look for a database entry labeled “chicken breast, cooked, roasted” or similar. Use that entry with your cooked weight. Do not enter a cooked weight into a raw chicken entry, because the calories per gram are different and your totals will be off.
When in doubt, weigh raw. It is the most predictable state, and most apps have stronger raw entries than cooked entries.
Choosing the Right Food Scale for Calorie Tracking
You do not need an expensive scale to track calories accurately. You need a reliable one. Here is what to look for and what to skip.
Must-Have Features
Accuracy to 1 gram is the baseline. Anything coarser makes weighing small portions like nuts and oils frustrating. A tare button is non-negotiable. A flat surface that is easy to wipe clean saves you time every day. A weight capacity of at least 5 kilograms handles most family-sized portions without maxing out.
Nice-to-Have Features
A backlit display helps in low-light kitchens. A unit toggle between grams and ounces is useful if you ever follow recipes from older cookbooks. A removable platform or smooth surface simplifies cleaning, which matters more than people expect.
Smart Scales vs Basic Digital Scales
Smart scales connect to apps via Bluetooth and auto-log the weight. They are convenient but not necessary. A basic digital scale plus manual entry into MyFitnessPal or Lose It is what most serious trackers actually use, because the workflow is faster than dealing with pairing issues and app-specific quirks. If budget matters, spend it on a sturdy basic scale and a good app subscription instead.
Common Mistakes to Avoid When Weighing Food
Even experienced trackers slip on these. Watch out for them, especially in your first few weeks.
Mistake 1: Trusting the Nutrition Label Serving Size
Label serving sizes are not what you actually eat. They are standardized reference amounts. Always weigh what goes on your plate, then log that exact weight. Treat the label as a hint about calorie density, not a target portion.
Mistake 2: Weighing After Adding Sauces or Oils
A tablespoon of olive oil adds 120 calories. If you weigh your vegetables before dressing them, you miss those calories entirely. Either weigh the oil separately and log it on its own, or weigh the full dressed portion. The first approach is more accurate.
Mistake 3: Switching Between Grams and Ounces Mid-Log
Pick one unit and stick with it. Databases use grams, so grams is the safer default. If you log 4 ounces of chicken but enter it as 4 grams by accident, you have just logged one-tenth of the real calories. Consistency prevents this kind of decimal error.
Mistake 4: Not Zeroing the Scale Between Items
Every new ingredient gets its own tare. If you skip this, your second item’s weight includes the first, and your totals are wrong. Get in the habit of pressing tare before adding anything new.
Tips for Consistent, Accurate Measurements Every Day
Consistency matters more than perfection. A scale you use imperfectly every day beats a perfect scale that sits in a drawer.
Build a Weighing Habit
Start with one meal per day, usually dinner, and weigh everything on that plate. Once that feels automatic, add breakfast, then lunch, then snacks. Most people reach full coverage within three to four weeks.
Keep Your Scale in One Visible Spot
Counter visibility is the single biggest predictor of whether you will use a scale. If it lives in a cabinet, you will not use it. Leave it on the counter near where you prep food, and the habit sticks.
Track Preparation Method in Your Notes
Use the notes field in your app to record how the food was prepared, raw, baked, pan-fried in 1 tsp oil, and so on. If you ever need to back-calculate or audit a meal, those notes are gold. They also help you spot patterns, like which cooking methods sneak in extra calories.
Frequently Asked Questions
How accurate are food scales that measure calories?
Food scales themselves do not measure calories. They measure weight, usually in grams. Your calorie app converts that gram weight into calories using a nutrition database. A good digital scale is accurate to within 1 to 2 grams, which is more than enough precision for calorie tracking.
Should I weigh food raw or cooked for calorie counting?
Weigh raw whenever possible, because raw weight is consistent and most nutrition databases list values per 100 grams of raw food. The exception is dry grains and legumes like rice, pasta, oats, and beans, which triple in weight after cooking. For those, match the entry to the state you are weighing, raw entry with raw weight, cooked entry with cooked weight.
Do I need a smart scale to use a calorie app?
No. A basic digital scale with a tare button and 1 gram accuracy is all most serious trackers actually use. You weigh the food, read the number, and enter it manually into your app. Smart scales with Bluetooth auto-logging are convenient but not necessary, and they cost more than most people need to spend.
Which calorie apps work best with a kitchen scale?
MyFitnessPal, Cronometer, and Lose It all work well with any kitchen scale. Cronometer has the most accurate nutrition database for whole foods. MyFitnessPal has the largest food library, including restaurant and branded items. Lose It is the easiest for beginners. All three accept gram-based manual entry, which is why your scale does not need to be a smart model.
How do I use the tare button on a food scale?
Place your empty container on the scale, wait for the weight to stabilize, then press the tare button. The display resets to zero. Add your food, and the display shows only the food’s weight, not the container plus food. Press tare again before adding the next ingredient to weigh multiple items in one bowl.
Final Thoughts on Using a Kitchen Scale With Your Calorie App
Learning how to use a kitchen scale with a calorie app for better accuracy is one of the highest-return habits you can build for nutrition tracking. The four-step workflow, power on, tare the container, weigh the food, log the grams, takes under a minute per ingredient once you have practiced it. Pair that workflow with a reliable digital scale and a solid app like MyFitnessPal or Cronometer, and your calorie and macro counts finally match what you actually eat.
Start tonight. Pull out the scale, weigh your dinner, log it in your app, and notice how different the real numbers feel. That single moment is where accurate tracking begins.