
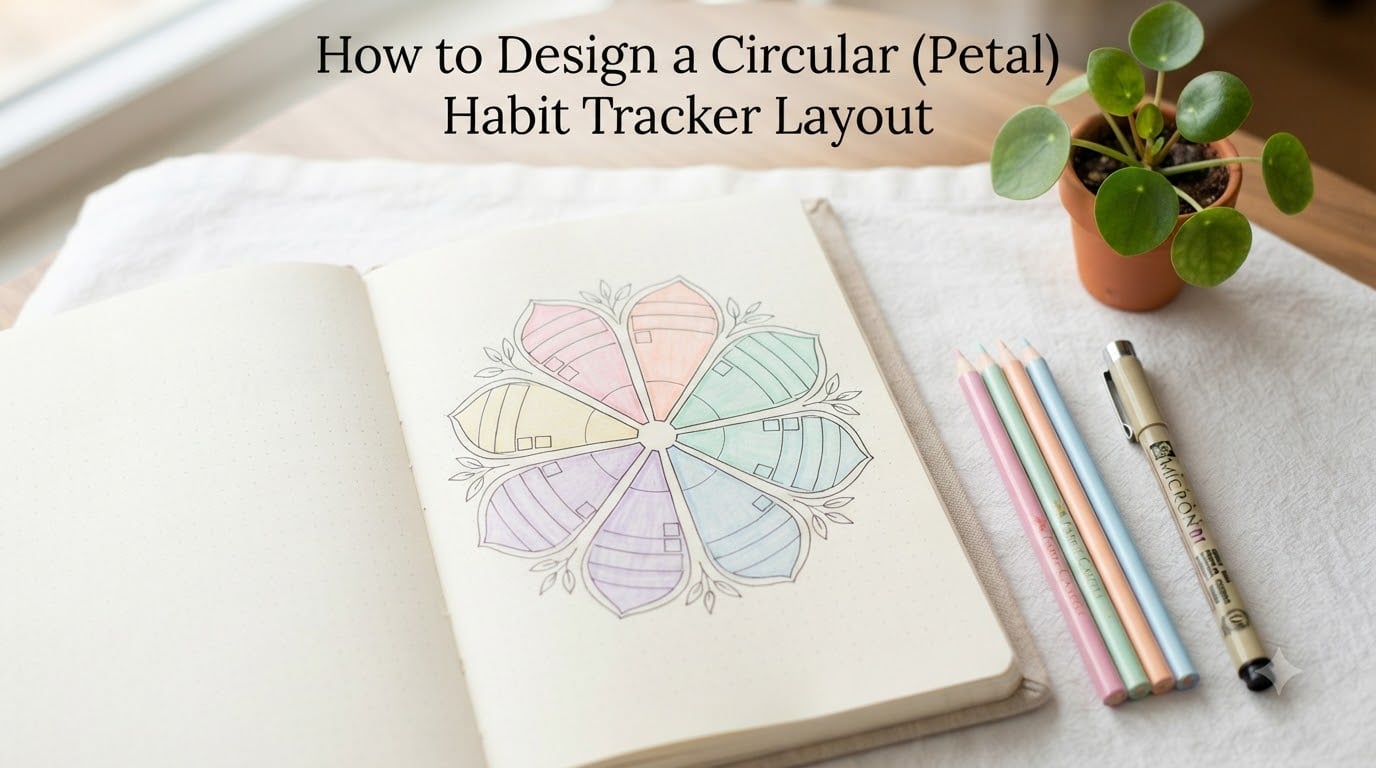
If you have ever opened a fresh bullet journal page, stared at the blank dot grid, and thought “I cannot draw anything that pretty,” I have been exactly where you are. The circular habit tracker looked like something only art-school graduates could pull off, so I avoided it for months.
Then I tried a simpler version: the petal habit tracker. Instead of one perfect circle filled with tiny dots, I drew a flower with six to eight petals, each one representing a habit I wanted to build. The whole spread took me 12 minutes, and I have used some version of it every month since.
In this guide, I will walk you through how to design a circular (petal) habit tracker layout that actually works for beginners. No compass required, no calligraphy skills, no guilt when you miss a day. By the end, you will have a finished spread ready to fill in.
Table of Contents
- What Is a Circular (Petal) Habit Tracker?
- Why a Petal Design Works for Habit Tracking
- Supplies You Will Need
- How to Design a Circular (Petal) Habit Tracker Layout: Step-by-Step
- How to Choose Habits to Track on Your Petal Tracker
- Design Variations and Creative Ideas
- Common Mistakes to Avoid (Especially as a Beginner)
- Tips for Staying Consistent With Your Tracker
- Frequently Asked Questions
- How do I divide a circle into equal sections without a protractor?
- How many petals should a habit tracker have?
- Can I use a petal habit tracker for weight loss goals?
- What if I miss a day – should I leave the petal empty?
- Do I need a compass or special tools?
- How long does it take to draw a circular habit tracker?
- Final Thoughts on Designing Your First Petal Habit Tracker
What Is a Circular (Petal) Habit Tracker?
A circular (petal) habit tracker is a radial habit-tracking layout shaped like a flower. Each “petal” represents one habit you want to track, and each small mark inside the petal represents one day of the month.
Unlike a traditional grid habit tracker with 30 rows and 5 columns, the petal version puts your habits in a ring around a center point. The beauty of this design is that you can see your entire month at a glance, and it feels lighter on the page.
In a typical bullet journal, you’ll draw one main circle, divide it into 6 to 12 sections (the petals), and label each petal with a habit. Some versions use nested circles so each habit gets its own ring. Others use a single layer of petals where you tick a small square for each day inside the petal shape.
This style is especially popular among weight loss planners because habits like water intake, protein tracking, steps, sleep, and mindful eating all fit neatly into a small number of petals. You track the building blocks of weight loss without staring at a giant spreadsheet.
Why a Petal Design Works for Habit Tracking
The petal layout works because it solves the two biggest problems people have with habit trackers: intimidation and tracking fatigue.
First, intimidation. A grid tracker with 30 days and 6 habits means you are committing to filling in 180 squares every month. That’s a lot of white space staring back at you. A petal tracker has fewer, larger sections. You draw 6 to 8 petals, label them, and you are done with setup.
Second, tracking fatigue. Research on habit formation consistently shows that simpler tracking systems get used longer. The petal design is forgiving: if you miss a day, you skip a dot in the petal and move on. There is no big blank row shaming you.
For weight loss specifically, the petal layout works because it forces you to focus on the daily habits that drive results. You are not tracking your weight on a grid every day. You are tracking the behaviors that lead to weight loss: drinking water, walking, sleeping seven hours, eating vegetables, journaling.
I also love how visually satisfying it is. After a few weeks, the petals fill up with color and you can literally see your progress blooming. That visual reward is what keeps people coming back to the page.
Supplies You Will Need
You do not need fancy tools to design a circular petal habit tracker. Here is what I keep on my desk for this spread.
- Bullet journal or planner with dot grid paper (any notebook works, but dot grid makes aligning the petals easier)
- Pencil for sketching the circle and guidelines before committing
- Ruler for dividing the circle into equal sections (a protractor is even better, but not required)
- Black fine-tip pen like a 0.3 or 0.5 mm for the final lines
- Colored pens, markers, or pencils for filling in the petals as the month progresses
- Circle template or small plate to trace if you don’t have a compass (a cup, jar lid, or bowl also works)
- Optional: washi tape or stickers for decorating the center of the flower
That is it. No specialized bullet journal pens required. I used a 0.38 mm Muji pen and a set of Crayola colored pencils for my first petal tracker, and it looked better than half the spreads I see on Instagram.
How to Design a Circular (Petal) Habit Tracker Layout: Step-by-Step
Below is the exact process I use each month. The whole layout takes 10 to 15 minutes once you have done it twice.
Step 1: Sketch the Center and Outer Circle
Start by drawing a small dot in the middle of your page. This is the center of your flower. Then, using a plate, cup, or compass, draw a circle around that dot, leaving at least one inch of margin on all sides of the page.
If you do not have a compass, place a small object in the center (like a pencil tip) and trace around a larger round object. The plate from your kitchen works perfectly. I used a 7-inch salad plate for my first tracker.
Lightly sketch the circle in pencil first. You will erase the pencil lines later, so do not worry about mistakes.
Step 2: Divide the Circle Into Petal Sections
Now you need to divide the circle into equal sections. For most months, 6 or 8 petals work well. Six petals gives you more space inside each petal; eight petals gives you a fuller flower look.
To divide without a protractor, use the clock method. For 6 petals, mark 12, 2, 4, 6, 8, and 10 on the circle. For 8 petals, mark every 45 minutes around a clock face: 12, 1:30, 3, 4:30, 6, 7:30, 9, and 10:30.
Draw light lines from the center dot to each of these marks. These are your petal dividers. The triangular wedge between two lines is one petal.
Step 3: Add Habit Rings or Tracks
Inside each petal, you will create small marks for each day of the month. Most beginners use one of two methods.
Method A: Dots in a row. Draw a small dot inside each petal for each day. For a 30-day month, you would draw 30 small dots arranged in 3 rows of 10 inside each petal.
Method B: Mini calendar squares. Draw tiny 1-millimeter squares inside each petal, arranged in a grid. Color in or check each square as you complete the habit that day.
Method A is faster to draw and looks more minimalist. Method B is easier to fill in daily because you can clearly see the next empty square.
Step 4: Label Each Petal and Day Number
Write the name of one habit at the wide outer edge of each petal. For weight loss, common choices include Water, Steps, Protein, Sleep, Veggies, No Sugar, Journal, and Move.
Then, number the dots or squares from 1 to 30 (or 31) inside each petal. You only need to label the first few dots and the last dot in each petal. Your eye can fill in the rest.
If you have fewer than 6 habits, draw fewer petals and use the empty space for decoration. If you have more than 8, use 10 or 12 petals, or split the circle into two layers (an inner ring of 4 habits and an outer ring of 4 more).
Step 5: Decorate and Color-Code
Once the structure is laid out, ink over the pencil lines with your fine-tip pen. Let the ink dry for 30 seconds, then erase the pencil.
Add a small decorative element in the center of the flower. I usually draw a 5-petal mini flower or write the month name in the center. Some people paste a small sticker or draw a sun.
Choose one color per habit. Water can be blue, veggies can be green, sleep can be purple. Consistency in color makes the tracker easier to read at a glance.
Step 6: Fill It In Daily
Each evening, take 60 seconds to color in or check the day’s mark for each habit. This is the whole point of the tracker: small, daily check-ins that build new neural pathways.
If you miss a day, leave it blank. Do not go back and fill it in. The blank dot is information, not failure. It shows you where you actually were, which is more useful than a fake “perfect” record.
How to Choose Habits to Track on Your Petal Tracker
Choosing the right habits is the difference between a tracker you use and a tracker you abandon by day 10. Keep the list short.
For weight loss, the four highest-leverage daily habits are: drinking enough water, sleeping 7+ hours, eating protein at every meal, and moving your body for 20+ minutes. If you can do those four consistently, the weight will follow.
Add a fifth habit if you have the bandwidth. Good options include journaling, meditation, no late-night snacking, hitting a step count, or practicing mindful eating. Pick the one that addresses your biggest personal struggle.
Do not track more than 8 habits. Cognitive load is real, and tracking too many things at once is the #1 reason people quit habit trackers. Start with 4 to 6, and only add more when those feel automatic.
Make sure each habit is binary. Yes/no. Did you drink water, yes or no. Did you sleep 7 hours, yes or no. Avoid vague goals like “ate well” because you will not know what counts.
Design Variations and Creative Ideas
Once you have the basic petal design down, try one of these variations to keep things fresh.
The 6-petal classic is the cleanest version. Six wide petals give you plenty of room inside each one. Best for 4 to 6 habits with dots in a row.
The 8-petal flower looks fuller and more decorative. Slightly smaller petals, but still roomy enough for 30 days of marks. Great for beginners who want a more “flower-like” look.
The double-layer wheel uses two concentric circles divided into petals. The inner ring tracks one set of habits, the outer ring tracks another. Use this if you have 8 to 12 habits to track.
The mini petal tracker fits in a 4×4 inch square. Use it for weekly tracking instead of monthly. Perfect for a planner pocket page or a top corner of a daily spread.
The themed petal tracker uses different flowers for different months. January can be a snowflake flower, February a heart, March a clover. This adds seasonal variety without changing the function.
The color-gradient petal uses shades of the same color in each petal. As you fill in more days, the petal fills with color. Visually striking and very motivating.
Common Mistakes to Avoid (Especially as a Beginner)
After watching the bullet journal community for years, I have seen the same rookie mistakes derail otherwise beautiful spreads.
Mistake 1: Tracking too many habits. If you have 12 habits in 12 petals, you will not finish the month. Cap it at 6 to 8.
Mistake 2: Drawing too small. If your petals are smaller than your thumb, you will not have room for 30 marks. Use a full page, not a corner.
Mistake 3: Expecting perfection. Your first petal tracker will not look like the Instagram photos. That is fine. The third one will look better. The fifth one will be your favorite.
Mistake 4: Skipping days and then quitting. Missing a day is normal. Missing three days in a row is a signal to simplify, not to give up. Drop a habit or two until you get back on track.
Mistake 5: Treating the tracker like a grade. The tracker is a tool, not a report card. If you see a pattern of missed days, that is useful data. It is not a reflection of your worth.
Tips for Staying Consistent With Your Tracker
Consistency is where the real magic happens. The tracker itself does not change your habits. Filling it in every day does.
Tie tracker-filling to an existing habit. I fill mine in right after I brush my teeth at night. That habit is automatic, so the tracker gets filled in automatically. The technical term is habit stacking, and it works.
Keep your pen on the page. Literally. If your colored pen is sitting next to your journal, you are 80% more likely to fill it in. If it is in a drawer across the room, you will skip it.
Review weekly. Every Sunday, look at the past 7 days. Notice which petals are full and which are empty. Use that information to plan the next week instead of judging the past one.
Drop the guilt. If you missed 8 days this month, you still have 22 days of data. That is more useful than a blank page. The whole point is awareness, not perfection.
Frequently Asked Questions
How do I divide a circle into equal sections without a protractor?
Use the clock method. For 6 petals, mark 12, 2, 4, 6, 8, and 10 on the circle. For 8 petals, mark every 45 minutes around a clock face starting at 12. Draw light pencil lines from the center dot to each mark, then ink over them. The triangular wedge between two lines is your petal.
How many petals should a habit tracker have?
Most beginners do best with 6 or 8 petals. Six petals gives more inside space per petal, which is better for tracking 30 or 31 days. Eight petals looks fuller and more flower-like, but the petals are smaller. If you have only 4 habits, use 4 petals. If you have 10 or more habits, switch to a double-layer wheel design.
Can I use a petal habit tracker for weight loss goals?
Yes. The petal layout is well-suited for weight loss because it focuses on the daily habits that drive results, like water intake, protein, sleep, steps, and mindful eating. You track 4 to 8 behaviors rather than the number on the scale, which is a more sustainable approach. Many users find the visual progress in the petals more motivating than a grid tracker.
What if I miss a day – should I leave the petal empty?
Leave the petal empty. A blank dot is information, not failure. It shows you where you actually were that day, which is more useful than faking a perfect record. If you miss multiple days, look for the pattern and adjust. Do not go back and fill in marks you did not actually do, because that defeats the purpose of tracking.
Do I need a compass or special tools?
No. A compass makes it easier, but you can get a perfect circle using a kitchen plate, cup, jar lid, or any round object roughly the size of the circle you want. Trace around it with a pencil. For dividing into sections, you can use the clock method described above or a printable protractor template. Specialty pens are optional.
How long does it take to draw a circular habit tracker?
Your first one will take 20 to 30 minutes. By the third or fourth try, you can finish a petal habit tracker in 10 to 15 minutes. If you use a printable template instead of drawing by hand, setup takes under 5 minutes. The daily filling-in takes about 60 seconds.
Final Thoughts on Designing Your First Petal Habit Tracker
Designing a circular (petal) habit tracker layout is one of the most beginner-friendly spreads you can learn. It takes one page, 10 to 15 minutes, and gives you a full month of motivation.
Start with 6 petals, 4 to 6 habits, and the clock method for dividing the circle. Keep your pen where you can see it, fill in the marks every night, and let the visual progress do the rest. Your first one will not be perfect, and that is the whole point. The point is showing up.