
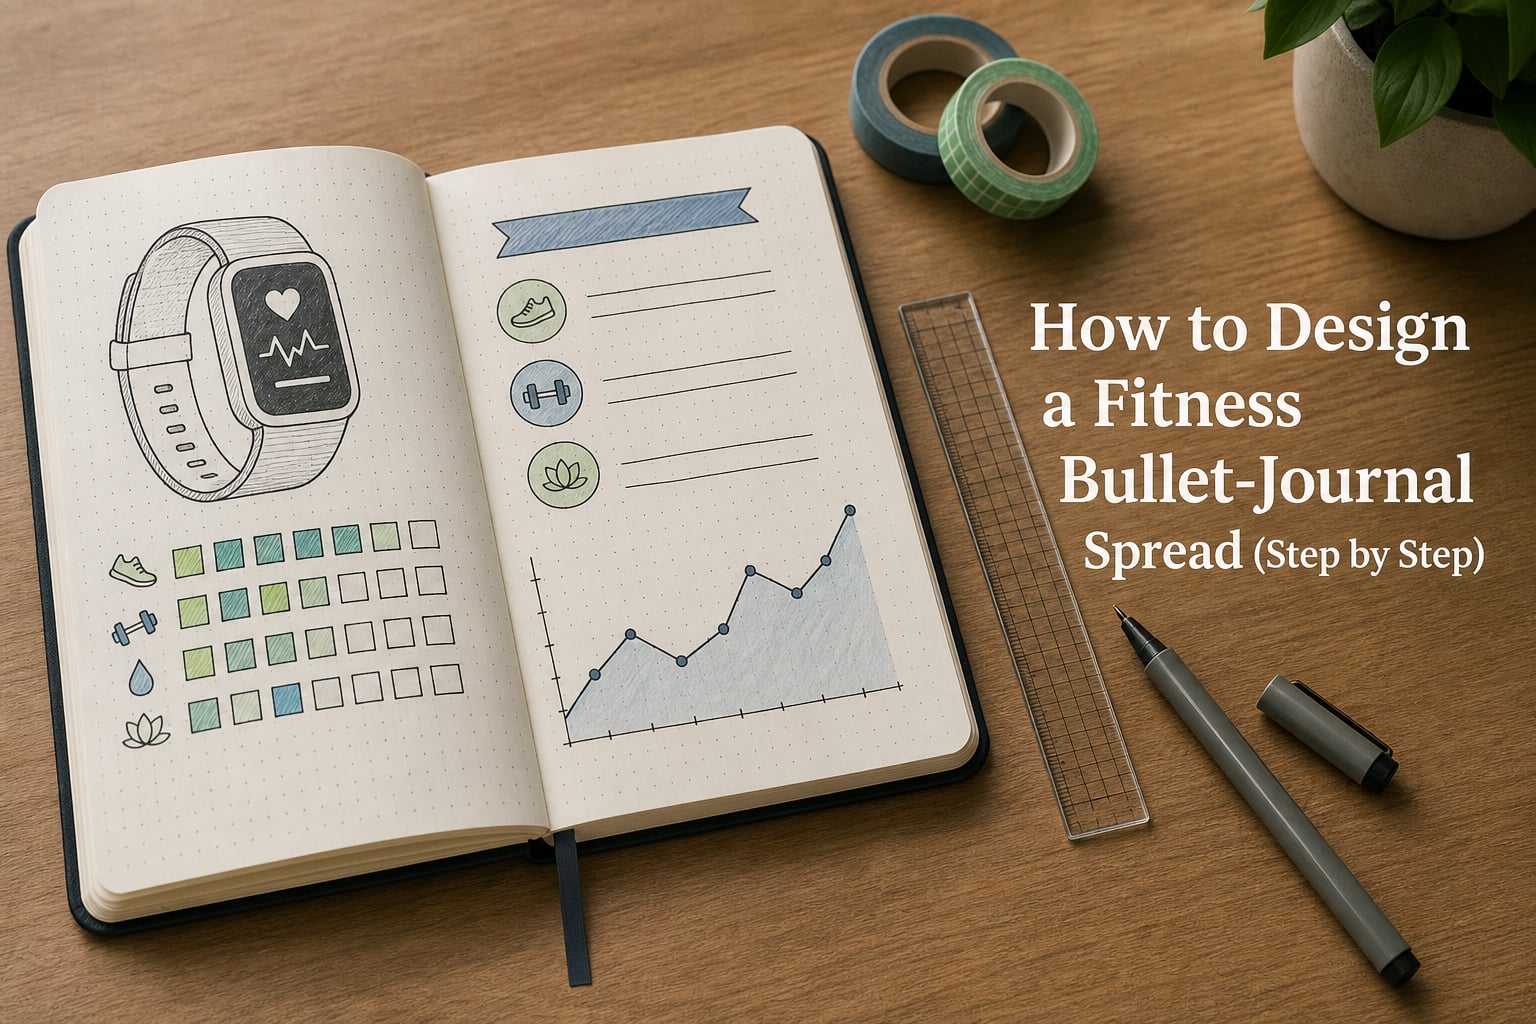
Tracking your workouts on paper can feel almost as satisfying as the workout itself. There is something about checking off a completed session, shading in a progress square, or watching a line graph climb upward that keeps people coming back to their notebooks day after day. A fitness bullet journal spread gives you a customizable, screen-free way to log exercises, monitor habits, and watch progress unfold over weeks and months.
I have been designing fitness spreads in dot grid notebooks for years, and the biggest lesson I learned is that the right layout makes or breaks your consistency. Too complicated and you avoid it. Too simple and you lose the data that keeps you motivated. The sweet spot is a spread that takes under two minutes to fill in daily but gives you meaningful insight when you flip back through it.
In this guide, I will walk you through how to design a fitness bullet-journal spread step by step. We will cover every component from goal pages and monthly workout trackers to habit grids, weight logs, and meal tracking pages. Whether you are a total beginner with a blank notebook or an experienced bujo user looking to level up your fitness tracking, each section includes exact layout instructions you can follow today.
Table of Contents
- Supplies You Need to Design a Fitness Bullet-Journal Spread
- How to Design a Fitness Bullet-Journal Spread: Step-by-Step Layouts
- Step 1: Plan Your Fitness Goals Spread
- Step 2: Design Your Monthly Workout Tracker
- Step 3: Build a Weekly Workout Log
- Step 4: Create a Habit Tracker for Fitness
- Step 5: Add a Weight and Measurement Tracker
- Step 6: Design a Running or Cardio Tracker
- Step 7: Add a Meal and Nutrition Tracking Page
- Tips for Staying Consistent With Your Fitness Bullet Journal
- Frequently Asked Questions
- Wrapping Up Your Fitness Bullet-Journal Spread
Supplies You Need to Design a Fitness Bullet-Journal Spread
You only need a handful of basic supplies to get started, and none of them need to be expensive. After testing setups ranging from bare-bones budget kits to premium stationery hauls, I can tell you the materials matter far less than the consistency of your tracking.
Here is what I recommend for a fitness bullet journal spread kit:
- Dot grid notebook: A dotted layout makes measuring and spacing effortless. Popular affordable options include the Amazon Basics dotted notebook or the Artist’s Loft dot grid from Michaels.
- Fineliner pens: Sakura Pigma Micron pens in sizes 01 and 03 are the community standard for crisp, bleed-resistant lines. A budget alternative like Sharpie Pens or Muji gel pens works just as well for beginners.
- Ruler: A clear acrylic ruler lets you see your dot grid underneath, making straight lines far easier.
- Pencil and eraser: Always sketch layouts lightly in pencil before committing to pen. Trust me on this one.
- Optional extras: Washi tape for headers and dividers, colored markers for coding workout types, and stencils for circles or trackers if you want geometric precision.
One Reddit user from r/bulletjournal shared a tip I love: start with a pencil, ruler, and one pen for your first month. Once you know which spread designs actually work for you, upgrade to colors and decorative elements. This keeps the barrier low and prevents the common trap of spending more on supplies than on actually using them.
How to Design a Fitness Bullet-Journal Spread: Step-by-Step Layouts
Below I will walk you through each spread type in the order I recommend building them. Start with a goals page, then add monthly and weekly trackers, and layer in specialized pages like weight logs or running trackers based on what you actually want to monitor.
Each step includes the exact drawing process, what to include, and tips I have picked up from the bujo community over the years. Grab your pencil and let us begin.
Step 1: Plan Your Fitness Goals Spread
Your goals page is the anchor for your entire fitness bullet journal spread. This is where you define what success looks like for the month, quarter, or year, and every other tracker feeds into these targets.
Here is how I draw mine step by step:
1. Write a header at the top. Use large hand-lettered text that says something like “Fitness Goals 2026” or “[Month] Goals.” Leave about an inch of space below it.
2. Divide the page into three zones. Draw two horizontal lines across the page, creating roughly equal thirds. Label them “Short-Term Goals,” “Mid-Term Goals,” and “Long-Term Goals.” Short-term might be weekly mileage. Mid-term could be a weight target in three months. Long-term might be a race or a lifting PR by year-end.
3. Write 3 to 5 goals per zone using SMART format. Each goal should be Specific, Measurable, Achievable, Relevant, and Time-bound. Instead of “get stronger,” write “deadlift 225 lbs by November.” Instead of “run more,” write “run 50 miles total in September.”
4. Add a mini progress visual. Draw a small bar chart, a fillable jar, or a thermometer next to each goal. Each time you check in, shade in a portion. I use this technique and it works wonders for keeping me motivated because I can see the gap between where I am and where I want to be.
5. Include a “Why” box at the bottom. Write one or two sentences about why these goals matter to you. On days when motivation dips, this reminder is what gets me to open the journal and keep tracking.
One community tip worth noting: many bujo users on r/xxfitness recommend revisiting and updating your goals page every four weeks rather than leaving it static. Adjustments are not failures. They are feedback.
Step 2: Design Your Monthly Workout Tracker
A monthly workout tracker gives you a bird’s-eye view of your training over four to six weeks. This is the spread most people associate with a fitness bullet journal, and it is where color coding shines.
Follow these steps to draw it:
1. Count the days in your month. Most months have 28 to 31 days, so plan your grid accordingly.
2. Draw a vertical column for day numbers. On the left side of the page, write the numbers 1 through 31 stacked vertically, one per row. Leave a small gap between each number.
3. Add columns for each workout type. To the right of the day numbers, draw vertical lines to create 3 to 5 columns. Label each with a category like “Strength,” “Cardio,” “Yoga,” “Mobility,” or “Rest.” The number of columns depends on your training style.
4. Assign a color to each workout type. Pick one color per category. Strength might be blue, cardio might be orange, yoga might be green, and rest days might be grey. Write a small color key in the top corner of the page.
5. Shade in completed days. After each workout, find the day number, move across to the column for the workout type you did, and fill that square with the matching color. At the end of the month, you will have a colorful visual map of your training.
6. Add a weekly summary row. At the bottom, leave space to tally total workouts per category each week. This gives you a quick snapshot of whether your training is balanced or whether you are overdoing one type.
I learned this trick from the bujo community: instead of a full grid, some people draw a simple calendar with 30 or 31 small squares arranged like a monthly calendar page. Each square gets a small colored dot representing the workout done that day. This version is faster to draw and works well if you do one workout type per day.
Another popular variation I have seen in fitness journal ideas online is the “minutes tracker” layout. Instead of workout type, you track total active minutes per day. Users on r/xxfitness say this motivates them to log even 10 to 15 minute workouts because every minute counts toward the visual total.
Step 3: Build a Weekly Workout Log
While your monthly tracker shows the big picture, a weekly workout log captures the details of each session. This is where you record sets, reps, weights, cardio duration, and notes about how you felt.
Here is how I structure mine each week:
1. Start with a weekly header. Write the date range, for example “Week of September 9 to 15.” Add a small decorative element like washi tape if you want some visual flair.
2. Create a row for each day. Draw 7 horizontal rows, one for each day of the week. Label them Monday through Sunday on the left.
3. Add columns for the details you want to track. Common columns include “Exercise,” “Sets x Reps,” “Weight,” “Duration,” and “Notes.” If you are focused on cardio, you might swap “Weight” for “Distance” and “Pace.” Customize these to match your training.
4. Fill in planned workouts in pencil ahead of time. Writing your intended workouts on Sunday night for the upcoming week creates a mini plan. It removes the daily decision fatigue of figuring out what to do.
5. Update with actual results after each session. Cross out or adjust the plan and write what you actually did. Over time, comparing planned versus actual reveals patterns in your training.
6. Use the Notes column for form cues and energy levels. Write things like “felt strong on squats” or “right knee tight, foam roll tonight.” These notes become invaluable when you look back to understand why a week went well or poorly.
A real tip from forum users: some people write their weekly workouts on a sticky note instead of directly in the journal. If the workout gets repeated, you just move the sticky note to the next week. This is especially useful for running programs like Couch to 5K or progressive lifting plans where the structure repeats with small changes.
Step 4: Create a Habit Tracker for Fitness
A fitness habit tracker monitors the daily behaviors that support your training but are easy to overlook. Water intake, sleep, stretching, protein consumption, and steps all belong here.
This is one of the easiest spreads to draw, and it is surprisingly powerful for consistency:
1. List habits down the left side of the page. Write 5 to 10 habits you want to track daily. Good options include “Drink 8 glasses of water,” “Sleep 7+ hours,” “10,000 steps,” “Stretch,” “Hit protein target,” and “No added sugar.”
2. Draw a grid of small squares to the right. Across the top, write the numbers 1 through 31 for each day of the month. Draw vertical and horizontal lines to create a grid where each habit intersects with each day.
3. Choose a marking system. Fill in the square with an X, shade it fully, or use a small symbol. For water tracking, many bujo users draw small droplet shapes and color them in. Pick whatever feels satisfying to you.
4. Fill in daily, ideally at the same time. I do mine right before bed as part of a wind-down routine. It takes about 90 seconds.
5. Review at month-end. Count how many days you hit each habit. This gives you a baseline to improve on the following month.
The key insight from community discussions is that habit trackers work best when they are honest. Users on r/BasicBulletJournals emphasize that missing a day is not a failure. The tracker is for data, not judgment. Seeing a gap just tells you where to focus next month.
Keep your habit list short for the first month. Five habits tracked consistently beats fifteen habits abandoned by week two. You can always add more as the system becomes second nature.
Step 5: Add a Weight and Measurement Tracker
If weight loss or body recomposition is a goal, a dedicated tracking page for measurements gives you data that day-to-day fluctuations cannot. I recommend combining a weight graph with a measurement log for the full picture.
Here is the step-by-step for both:
1. Draw a line graph for weight. Along the bottom of a two-page spread, write the numbers 1 through 12 for each month, or use weekly dates if you prefer more granular tracking. Along the left side, write your weight range, for example 150 to 180, with appropriate tick marks.
2. Plot a dot each time you weigh in. Connect the dots with a line as the weeks progress. Seeing the trend line over time is far more meaningful than any single weigh-in.
3. Create a measurement table below the graph. Draw a simple table with columns for Date, Chest, Waist, Hips, Arms, Thighs, and Weight. Measure once every two to four weeks, not daily, since body measurements change slowly.
4. Add a progress photo reference. You cannot print photos in a journal easily, but you can note the date and location of progress photos stored on your phone. Write “Photos: [date]” entries so you have a timeline to cross-reference.
5. Leave space for non-scale victories. Write down milestones like “fit into old jeans” or “ran first 5K without stopping.” These entries matter more than any number when you look back.
A forum user on r/xxfitness shared something that stuck with me: she tracked her workouts, weight, mood, and caloric intake for three and a half years in her bullet journal. The data helped her identify that her weight plateaued every time she dropped below a certain calorie level. Without the manual tracking, she never would have spotted that pattern. This is the power of a well-maintained fitness journal.
One important note: weight fluctuates daily due to water retention, sodium, hormones, and stress. Many experienced trackers recommend weighing in once a week under consistent conditions and charting only that data point. This smooths out the noise and reveals the real trend.
Step 6: Design a Running or Cardio Tracker
If running, cycling, or cardio is a major part of your fitness routine, a dedicated tracker gives you better insight than a generic workout log. Runners especially benefit from tracking distance, pace, and route details over time.
Here is how to set up a cardio-specific spread:
1. Create a run log table. Draw columns for Date, Distance, Time, Pace, Route, Weather, and Notes. Each row represents one run.
2. Add a visual mileage tracker. Draw a large circle or series of rectangles representing your monthly mileage goal. For example, if your goal is 50 miles, draw 50 small squares or a pie chart divided into 50-mile increments. Shade in one section per mile completed.
3. Include a route map section. Some runners like to sketch their regular routes on a small map area in the corner of the page. This is optional but adds a fun personal touch.
4. Track personal records separately. Reserve a small box for PRs like “Fastest 5K,” “Longest Run,” or “Best Pace.” Update these whenever you beat a previous record.
5. Use color for terrain or intensity. Green for easy runs, yellow for tempo, red for hard intervals. At a glance you can see if your training is balanced.
For half marathon or race training, I recommend adding a countdown element. Draw a calendar leading up to race day and cross off each day as it passes. The visual countdown builds excitement and keeps you accountable to your training plan.
Cyclists and swimmers can adapt this same layout by swapping columns. Replace pace with average speed for cycling, or track laps and stroke type for swimming. The structure stays the same.
Step 7: Add a Meal and Nutrition Tracking Page
Nutrition is often the missing piece in a fitness routine, and a meal tracking spread helps you stay aware of what you eat without the rigidity of a calorie-counting app. This page works best as a simple food diary with optional macro tracking.
Here is my approach to building it:
1. Draw a daily food log layout. Create 7 rows for each day of the week with columns for Breakfast, Lunch, Dinner, Snacks, and Water. Keep it simple. This is a record, not a restriction.
2. Add a water intake tracker. Draw 8 small droplet shapes per day and color them in as you drink. This is one of the most popular fitness journal ideas in the bujo community because it is visual and fast.
3. Optional: add a macro or calorie column. If you track macros, add columns for Protein, Carbs, and Fat. If counting calories, add one column for daily total. Only include this if it helps you. For some people, it creates anxiety rather than insight.
4. Include a weekly meal prep box. Reserve a small section to write down what you plan to prep for the week. This bridges planning and tracking in one place.
5. Add a “Foods That Made Me Feel Good” list. Over time, note meals that gave you energy and ones that left you sluggish. This creates a personal nutrition guide based on your own body’s responses.
From my experience, meal tracking works best when it is about awareness, not perfection. Writing down what you ate, even the cookies, builds a more honest picture than trying to remember at the end of the week. The data helps you make small adjustments rather than drastic overhauls.
Tips for Staying Consistent With Your Fitness Bullet Journal
The biggest challenge with any tracking system is keeping it going. Most people start strong and abandon their journal within three weeks. Here are the strategies that have helped me and the bujo community maintain the habit long-term.
Keep your journal visible. Leave it open on your desk, nightstand, or kitchen counter. Out of sight means out of mind. If you have to dig through a drawer to find it, you will skip days.
Pair tracking with an existing routine. Fill in your workout log right after your shower. Update your habit tracker while your coffee brews. Tying the journal to a habit you already have makes it automatic.
Set a weekly journal date with yourself. Every Sunday evening, spend 15 minutes reviewing the past week, filling in any gaps, and planning the next week’s workouts. This weekly check-in is the single most powerful consistency tool I have found.
Do not redraw spreads from scratch every month. If a layout works, recreate the same structure. You will get faster at drawing it each time. Some users create a master template page they reference when setting up a new month.
Avoid the perfection trap. Crossed-out lines, smeared ink, and crooked boxes are part of the process. A messy journal that you actually use beats a beautiful one you are afraid to write in. I remind myself of this constantly.
Start with fewer trackers than you think you need. A goals page and a monthly workout tracker are enough for month one. Add the habit tracker in month two, the weight log in month three. Building gradually prevents overwhelm and lets you discover what you actually want to track.
Use streak tracking for motivation. Draw a row of small circles and number them. Add a dot or checkmark for each consecutive day you worked out. Seeing a streak build is genuinely motivating, and breaking a streak is a gentle nudge to get back on track the next day.
Embrace seasonal changes. Your fitness routine shifts throughout the year. Running dominates in summer, strength training might take priority in winter. Let your spreads evolve with your training. Redesigning for a new season keeps the journal fresh and exciting.
Frequently Asked Questions
How do I layout a bullet journal?
Start by numbering your pages and creating an index on the first page. Add a future log for long-term dates, a monthly log with a calendar and task list, and a daily log for rapid-note entries. For a fitness journal, dedicate specific pages to workout trackers, habit grids, and goal spreads. Use a ruler and pencil to sketch layouts before going over them in pen.
What is the 3-3-3 rule for fitness?
The 3-3-3 rule is a simple workout structure where you do 3 days of strength training, 3 days of cardio, and 3 days of mobility or active recovery per week. It provides a balanced approach that covers all major fitness components without overtraining any single area.
What is the 5-5-5-30 rule?
The 5-5-5-30 rule is a time-efficient workout format where you perform 5 exercises, 5 rounds each, with 30 seconds of work per exercise. This creates a 12.5-minute workout that delivers a full-body conditioning session in minimal time, making it popular for quick home workouts.
How do I create my own bullet journal?
Grab any dotted or blank notebook and a pen. Number the first few pages and create an index. Set up a key with symbols for tasks, events, and notes. Create a future log for the year ahead, then add monthly and daily spreads as you go. For a fitness focus, include a goals page, monthly workout tracker, and habit grid in your first setup. There is no wrong way to organize it.
Wrapping Up Your Fitness Bullet-Journal Spread
Learning how to design a fitness bullet-journal spread is really about building a system that fits your life and your goals. Start simple with a goals page and a monthly workout tracker, then layer in habit grids, weight logs, and nutrition pages as you discover what data actually helps you stay on track.
The best fitness bullet journal spread is the one you will actually use. Pick up your notebook, grab a pen, and draw your first page today. Your future self will thank you for starting now.