
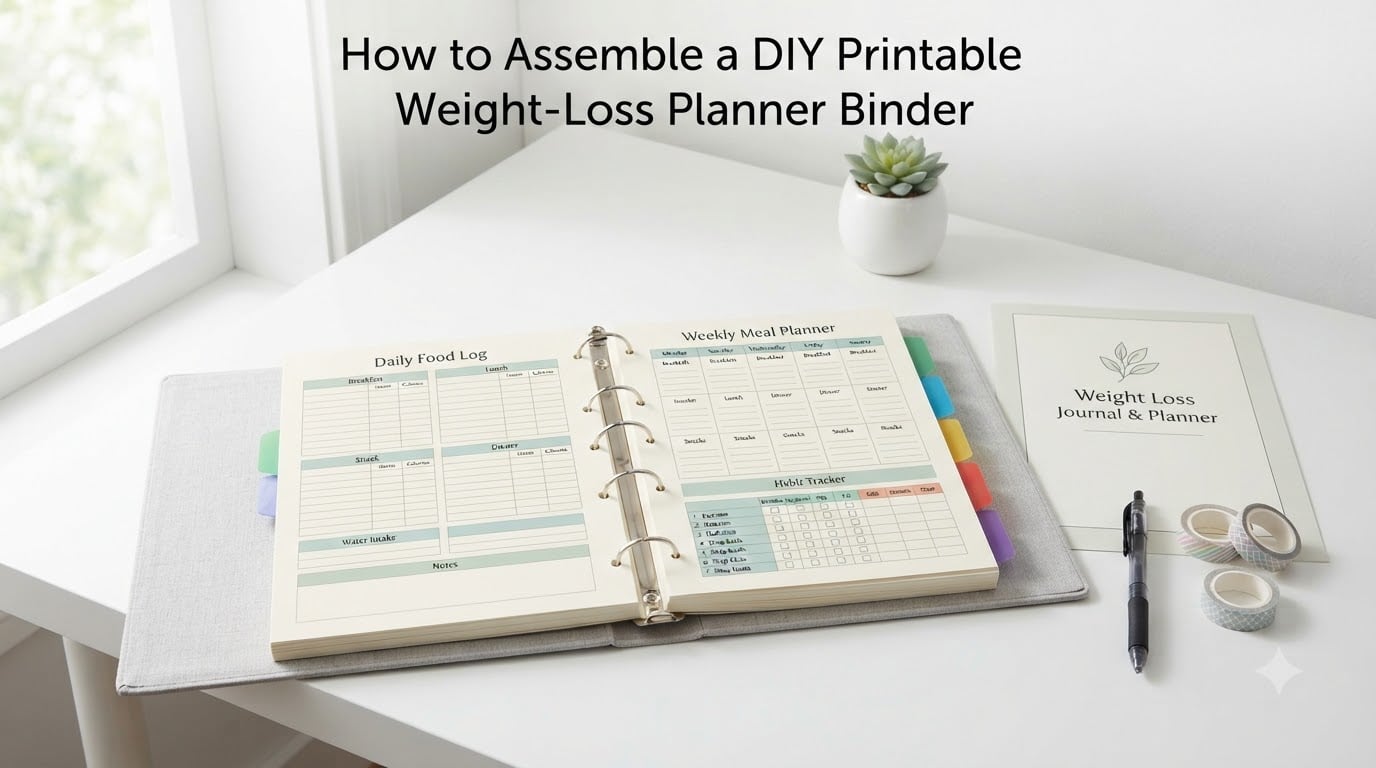
When I started my own weight-loss journey a few years ago, I bounced between three different apps and a notebook scribbled with half-finished food logs. Nothing stuck. Then I built a DIY printable weight-loss planner binder, and for the first time, I could see my progress on paper without scrolling through menus.
A physical planner binder gave me something the apps never did: a clear, visual record of every meal, workout, and small win over weeks and months. In this guide, I’ll walk you through exactly how to assemble your own. You’ll get the materials list, step-by-step assembly, a smart tab system that competitors rarely cover, and a printable checklist so you can build a binder that actually gets used.
Table of Contents
- What Is a DIY Printable Weight-Loss Planner Binder?
- What You Need to Get Started (Materials List)
- How to Assemble a DIY Printable Weight-Loss Planner Binder: Step-by-Step
- How to Organize Your Planner Binder With Tabs and Dividers
- Essential Printables to Include in Your Binder
- How to Customize Your Binder to Match Your Goals
- Tips for Using Your Weight-Loss Binder Every Day
- Common Mistakes to Avoid When Assembling Your Binder
- Where to Find Free and Affordable Printables
- Frequently Asked Questions
- Final Thoughts: Making Your Planner Binder Stick
What Is a DIY Printable Weight-Loss Planner Binder?
A DIY printable weight-loss planner binder is a customizable, physical organization system that combines printable tracking pages into a single binder to monitor your fitness goals, meals, workouts, and progress over time. Instead of relying on a single pre-made planner, you download the pages you need, print them at home or at a print shop, and arrange them inside a 3-ring binder using dividers and sheet protectors.
The biggest advantage over a store-bought planner is flexibility. You choose the layouts, add or remove sections as your goals change, and reprint pages whenever you run out. Many people on forums like r/loseit and r/bulletjournal say they prefer paper tracking because it slows them down just enough to think about what they eat, rather than quickly tapping “save” and forgetting.
What You Need to Get Started (Materials List)
Before you print a single page, gather your supplies. I keep my list short on purpose so you can actually find things at any office or craft store.
- A 3-ring binder (1.5 to 2 inch spine): Big enough to hold your printables without bulging, but not so heavy that you stop carrying it.
- Printable PDF pages: Downloaded weight loss tracker, food log, meal planner, workout log, habit tracker, and goal-setting sheets.
- A printer and paper: A standard inkjet or laser printer works fine. Use 24 lb paper if you want pages that don’t bleed through.
- A 3-hole punch: Get a heavy-duty one if you plan to punch more than a few sheets at a time.
- Tab dividers (5 to 8 tabs): Plastic tabs last longer than paper and resist curling.
- Sheet protectors: A small pack of clear sleeves for reusable pages like weekly checklists or hydration logs.
- Binder spine insert or label: Optional, but it makes your binder easy to spot on a shelf.
- Pen, highlighter, and washi tape: For filling in and decorating.
Tip from my own setup: I used a 2-inch binder for the first three months and quickly outgrew it. If you think you’ll keep adding pages, start with a 3-inch binder.
How to Assemble a DIY Printable Weight-Loss Planner Binder: Step-by-Step
Below is the exact process I use to put together a fresh binder. Work through each step in order so your tabs and page flow line up from the start.
Step 1: Download and print your pages
Pick one or two printable packs that match your goals. I usually start with a 30-day pack so I’m not overwhelmed. Print a couple of copies of pages you’ll use daily, like food logs and habit trackers. If your printer supports double-sided printing, use it for non-tracking pages to save paper.
Step 2: Punch holes in your printables
Stack 10 to 15 sheets at a time and run them through your hole punch. Make sure the holes line up with your binder rings before you commit. I learned this the hard way by punching 40 pages only to discover my cheap punch was off-center by a few millimeters. A quick alignment check saves you from reprinting.
Step 3: Insert tab dividers
Place your dividers in the order you plan to use them. I keep mine in this order: Goals, Daily Tracking, Meals, Workouts, Measurements, Reflection, Notes. Once you set this, try not to shuffle them around. Your brain starts to memorize where each section lives, which makes daily use faster.
Step 4: Add a cover and spine label
Print a cover page with the binder’s name, the date you started, and any motivation quote that matters to you. Slide it into the front of the binder. For the spine, either buy a clear sleeve or print a custom label that says something like “Weight Loss Journey – Started August 2026.”
Step 5: Place weekly and daily pages
Put your weekly planning pages right after the Goals tab so you flip to them first thing in the morning. Daily food logs and habit trackers go behind the Daily Tracking tab. Keep one blank weekly layout at the very front of the Daily Tracking section so you always know where to start each day.
Step 6: Add sheet protectors for reusable pages
Pages you want to wipe clean and reuse (hydration logs, weekly check-in forms, workout splits) belong in sheet protectors. Use a dry-erase marker on these so you don’t waste paper. The rest of your pages stay loose so you can write normally and turn them over for more room.
How to Organize Your Planner Binder With Tabs and Dividers
Most guides tell you to “use tabs” without showing you where they should actually go. This is where I think the DIY weight-loss planner binder really shines if you set it up well from the start.
A tab system that works in real life has six sections, in this order: Goals, Daily Tracking, Meals, Workouts, Measurements, Reflection. I tested this layout over two 30-day cycles, and the order matters because it follows the flow of a typical day. You wake up and check your goals, log your breakfast, plan lunch, do your workout, take measurements weekly, then reflect at night.
Color-coding your tabs
If you want a quick visual cue, use a different color for each tab. Green for Goals, blue for Tracking, yellow for Meals, red for Workouts, purple for Measurements, and orange for Reflection. Color-coding sounds small, but it cuts down the time you spend flipping through pages and helps you stay focused.
Keeping frequently used pages in front
The pages you touch every day should sit at the front of their section. Less-used reference pages (like monthly measurement charts) go at the back of the binder. Some users on r/HappyPlanners also keep a “current week” pocket folder inside the front cover so the active week’s pages are always on top.
Updating sections as you progress
Every 4 weeks, take 10 minutes to clean out finished logs and refresh your weekly pages. Move completed months to the back of the binder or into a separate “archive” binder. This keeps your active binder from getting too heavy and gives you a nice paper trail you can flip through later to see how far you’ve come.
Essential Printables to Include in Your Binder
Not every printable belongs in your binder. The trick is to choose pages you’ll actually use, not pages that look pretty in a preview. Here are the seven categories I always include.
Goal-setting worksheets
Start with one SMART goals page that covers your 30-day, 90-day, and 6-month targets. Break each goal into a single measurable number, like “lose 8 pounds in 30 days” or “work out 4 times a week.” Skip vague goals like “eat better.” You want something you can put a check mark next to.
Weight and measurement trackers
Use both a weekly weight tracker and a measurement tracker. Many people in r/loseit say that tracking inches lost (waist, hips, thighs) is more motivating than the scale, because muscle gain and water retention can hide fat loss for weeks. Print a body measurement chart that includes chest, waist, hips, arms, and thighs.
Meal planning pages
A weekly meal planner with breakfast, lunch, dinner, and snack slots keeps you from deciding what to eat at 6 p.m. when you’re already hungry. Add a separate grocery list printable right after the meal planner so you can tear it off and take it to the store.
Workout logs
A simple workout log with columns for date, exercise, sets, reps, and notes is enough. If you do different workouts on different days, print a few copies and group them by day. I keep one log per week so I can flip back through my training volume without flipping through food logs too.
Habit and water trackers
Habit trackers work because they turn small actions into a visible chain. Put a 30-day habit tracker in your Daily Tracking tab with checkboxes for sleep, water intake, steps, vegetables, and no-sugar days. A water tracker with 8 or 10 glasses per day keeps hydration visible, which often gets forgotten when you start a new plan.
Motivation and reflection pages
Reflection pages keep the emotional side of weight loss visible. At the end of each week, write down one win, one challenge, and one thing you’ll try differently. Over time, this becomes a record of how your mindset changed along with your body.
Notes and brainstorming
Always leave a few blank lined pages at the back of the binder. You will think of ideas at random times, like a new recipe or a workout you saw online, and you’ll want a place to jot them down without flipping through a specific section.
How to Customize Your Binder to Match Your Goals
Customization is where your DIY printable weight-loss planner binder starts to feel personal rather than generic. Pick a theme that matches your style, then build from there.
If you prefer minimalist design, choose black-and-white printables and use a solid-color binder cover. If you like color and creativity, look for themed packs (floral, pastel, retro) and pair them with matching washi tape on the dividers. Some bullet journal fans on r/bulletjournal hand-letter their tab labels and add motivational quotes to the inside cover.
Add a small photo of yourself on the first page with today’s date. When you flip through old binders in a year, that photo will remind you where you started. It feels simple, but it’s a strong motivator.
Tips for Using Your Weight-Loss Binder Every Day
The hardest part of a planner isn’t assembling it. It’s using it consistently. Here are the habits that helped me actually stick with mine.
Pick a fixed time to fill it in
Most people forget to log meals because they leave it for the end of the day when they’re tired. Instead, log breakfast right after you eat it, lunch right after lunch, and so on. If that doesn’t work, try a 5-minute evening recap at the same time every night. A fixed time builds a habit.
Do a weekly review every Sunday
Take 15 minutes on Sunday to update your measurement tracker, review the past week’s meals, and write down your reflection answers. This weekly check-in is the single most useful habit in any weight-loss binder. Without it, your daily logs become scattered entries with no story.
Avoid overload
Don’t print 15 different types of trackers on day one. Pick 3 or 4 core pages and master them for two weeks before adding more. Forum users frequently complain that they abandoned their binder because it had too many pages they never opened. Less is more in the first month.
Combine paper with digital tools
You don’t have to choose between paper and apps. Many users log meals in MyFitness Pal during the day for quick barcode scanning, then copy totals into their binder once a week. Use paper for reflection, planning, and long-term progress, and use apps for fast daily logging.
Common Mistakes to Avoid When Assembling Your Binder
A few small errors can make your DIY printable weight-loss planner binder frustrating to use. Here’s what to watch out for.
Overloading with too many pages
More pages don’t equal better tracking. If your binder has 60 different trackers, you won’t use half of them. Start with 20 to 25 pages covering the essentials, then add more only when you find a gap.
Skipping the cover date
Without a start date on the cover, your binder becomes anonymous. You won’t remember which journey was which in six months. Always write the start date on the cover page and on the spine label.
Forgetting to leave room for growth
Don’t pack your binder so full that adding a new page means removing an old one. Leave at least 1 inch of free space on the rings at all times so you can insert pages easily without rearranging the whole system.
Using only a weight tracker
The scale is the least reliable measure of progress. If your binder has only a weight tracker, you’ll get discouraged during normal weight fluctuations. Always include measurement, energy, sleep, and habit trackers so you have multiple ways to see progress.
Where to Find Free and Affordable Printables
You don’t have to spend a lot to fill your binder. Many creators offer free printable weight-loss planners as a way to introduce their work.
Free resources
Websites like Savor and Savvy, 101 Planners, and The Housewife Modern all offer free printable packs that you can download as PDFs. These usually include the core pages like weight trackers, food logs, and goal-setting worksheets.
Premium printable shops
If you want more polished designs or larger packs (40+ pages), premium shops on Etsy often sell complete weight-loss planner bundles for under $20. These usually come with matching cover pages, divider tabs, and themed graphics.
Designing your own pages
If you have very specific needs (for example, tracking macros for a medical condition), design your own using Canva, Google Docs, or Excel. Export as PDF, print, and add to your binder. A few custom pages often save you from buying a pack that mostly fits but not perfectly.
Frequently Asked Questions
How to set up a weight loss journal?
Start by choosing a notebook or printable planner, then add sections for goals, daily food logs, workouts, water intake, and weekly reflections. Print your pages, punch holes, and arrange them in a 3-ring binder with tab dividers so each section is easy to find.
How can I create my own effective weight loss plan?
Begin with one measurable goal, such as losing a specific number of pounds in 30 days or working out four times a week. Break that goal into daily and weekly habits, then track them on printable pages inside your binder so you can review progress every week.
What do I need to make a fitness binder?
You need a 1.5 to 3 inch 3-ring binder, printable PDF pages (food log, workout log, weight and measurement trackers), a 3-hole punch, tab dividers, sheet protectors, and a printer with regular paper. Optional items include washi tape, highlighters, and a printed cover and spine label.
How do I organize my planner binder?
Use 6 tab dividers in this order: Goals, Daily Tracking, Meals, Workouts, Measurements, and Reflection. Color-code each tab for fast visual reference, keep daily pages at the front of each section, and move completed logs to the back every 4 weeks to keep the active binder light.
What printables should I include in a weight loss binder?
The most useful printables are goal-setting worksheets, weekly meal planners, daily food logs, workout logs, weight and measurement trackers, habit and water trackers, motivation quotes, and weekly reflection pages. Start with 20 to 25 pages and add more only after you have used the core set consistently.
Final Thoughts: Making Your Planner Binder Stick
Assembling a DIY printable weight-loss planner binder takes less than an hour once you have your materials, and the payoff lasts as long as you keep using it. The real value is not the binder itself but the small daily habit of writing things down. Pick your printables, set up your tabs in the order above, and start with a 30-day cycle. By the end of it, you will have a system you actually want to keep.