
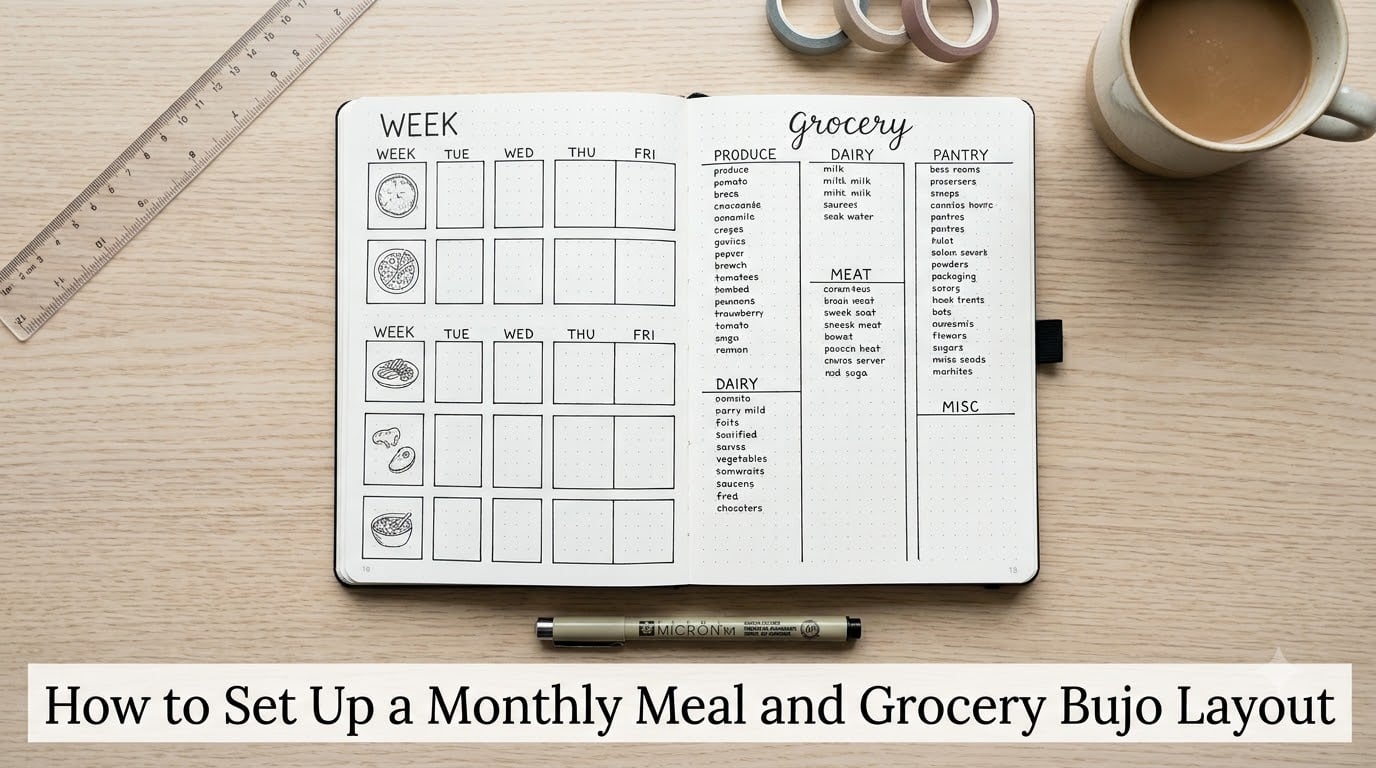
Meal planning and grocery shopping eat up hours every week. A monthly meal and grocery bujo layout combines both tasks into a single bullet journal spread so you plan once and shop smart all month long. I have used this system for over two years, and it has cut my grocery bills by roughly 30 percent while practically eliminating food waste.
In this guide you will learn how to set up a monthly meal and grocery bujo layout from scratch. I will walk you through every supply, every section, and every step so that by the end you can build your own spread in under an hour.
Whether you are new to bullet journaling or you already run a monthly log, this combined approach saves money, reduces stress, and keeps your kitchen running smoothly.
Table of Contents
- What Is a Monthly Meal and Grocery Bujo Layout?
- Supplies You Need to Get Started
- Step-by-Step Setup of Your Monthly Meal and Grocery Bujo Layout
- Designing the Monthly Overview Spread
- Building the Grocery List Section
- Meal Prep and Weekly Tracking Integration
- Tips for Maintaining Consistency Month After Month
- Frequently Asked Questions
- Wrapping Up Your Monthly Meal and Grocery Bujo Layout
What Is a Monthly Meal and Grocery Bujo Layout?
A monthly meal and grocery bujo layout is a two-page bullet journal spread that maps out every meal for the month on one side and an organized grocery list on the other. Instead of planning week by week, you see the full month at a glance.
The layout pairs the core ideas behind Ryder Carroll’s Bullet Journal Method with practical meal planning. Your monthly log tracks what you eat, and a dedicated grocery section tracks what you need to buy. Everything lives in one notebook, so nothing slips through the cracks.
Most bujo users start with a weekly meal planning spread. That works fine, but it forces you to plan and shop every single week. A monthly layout front-loads the work into one session and frees up your weekends.
The biggest advantage is visibility. When you can see 30 days of meals alongside your grocery needs, you spot patterns. You notice when you are eating out too often, when you are repeating the same five dinners, and where your grocery budget is leaking.
Supplies You Need to Get Started
You do not need anything fancy. Here is what I use and what I recommend to anyone building their first monthly meal and grocery bujo layout.
A dot grid notebook. Dotted pages give you light guidance for drawing straight lines and grids without the visual clutter of ruled lines. A standard A5 dotted notebook works perfectly. If your pages bleed through easily, look for one with at least 100 gsm paper.
Fine-liner pens. Black fine-liners in two tip sizes (0.3 mm and 0.5 mm) handle everything from headers to small grocery text. Add one or two colored pens or highlighters if you want to color-code meals or store sections.
A ruler. You will draw a lot of boxes. A clear 6-inch ruler keeps your lines straight and your spread looking clean.
Optional extras. Washi tape can section off areas or label your grocery categories. Sticky notes or sticky tabs let you flag pages you reference often. A white gel pen is handy for fixing small mistakes on darker ink.
That is it. The whole supply kit costs less than one restaurant dinner, and it lasts for months.
Step-by-Step Setup of Your Monthly Meal and Grocery Bujo Layout
Follow these steps in order and you will have a fully functional monthly meal and grocery bujo layout in about 45 minutes. I have refined this exact process over two years of trial and error.
Step 1: Pick your two-page spread. Open your notebook to a fresh two-page spread. The left page will hold your monthly meal overview. The right page will hold your grocery list and budget tracker.
Step 2: Title and date the spread. Write the month name across the top of the left page. Add the year and a small header like “Monthly Meal Plan” so you can find this page quickly later.
Step 3: Draw the monthly meal grid. Divide the left page into a grid with 30 or 31 rows (one per day). Use three columns: Breakfast, Lunch, and Dinner. If you have room, add a narrow Snacks column. Use your ruler and fine-liner to keep lines crisp.
Step 4: Add theme nights. Assign a theme to each day of the week. Common ones include Meatless Monday, Taco Tuesday, Pasta Wednesday, Sheet-Pan Thursday, and Slow-Cooker Sunday. Theme nights cut decision fatigue because you already know the category before you pick a recipe.
Step 5: Fill in your meals. Work from your family favorites list, your recipe collection, or whatever is in your pantry. Fill in dinners first since those drive your grocery list, then add breakfasts and lunches. Leave a few days blank for leftovers, eating out, or spontaneous meals.
Step 6: Build the grocery list. Move to the right page. Divide it into vertical columns by store section: Produce, Meat and Seafood, Dairy and Eggs, Pantry, Frozen, and Household. As you fill in meals on the left, jot down every ingredient you need in the matching column on the right.
Step 7: Add a budget tracker. Reserve a small box at the bottom of the right page for your grocery budget. Write your target amount, then log what you actually spend each shopping trip. Over the month you can see whether you are on track.
Step 8: Review and refine. Read through both pages. Check for missing ingredients, meals that overlap on ingredients (so you can buy in bulk), and any gaps where you have no plan. A 10-minute review now saves a midweek grocery run later.
Your spread is now ready to use. Take it with you to the store, check off items as you shop, and cross off meals as you make them.
Designing the Monthly Overview Spread
The monthly overview is the heart of your layout. This is where the meal planning happens. A well-designed overview makes the whole month feel manageable.
Start with a simple calendar-style grid if you prefer a visual layout. Draw a 5-by-7 or 6-by-6 grid and write one date in each square. Inside each square, write the dinner planned for that day in small letters. This format gives you a bird’s-eye view of the whole month.
If a calendar grid feels cramped, use the row-and-column format from Step 3 above instead. Some people prefer a list of dates down the left side with three columns for meals across. There is no wrong answer, so pick whichever format you can read at a glance.
Add a recipe key in the corner of the overview. Use small symbols or letters to mark where each recipe lives. For example, write “CB” next to a meal that comes from your favorite cookbook, or “IG” for a saved Instagram recipe. When it is time to cook, you know exactly where to find the instructions.
Reserve a few rows for a leftovers and eating-out tracker. Mark planned leftover nights with an “L” and planned restaurant nights with an “R.” Reddit users in r/bulletjournal consistently say this is the feature they wish they had added from the start, because it prevents overbuying groceries on weeks they end up eating out.
Finally, use color sparingly. One highlighter color for new recipes and another for family favorites is enough. Too many colors make the spread hard to read and slow to update.
Building the Grocery List Section
The grocery list is what turns your meal plan into action. A disorganized list means wandering the store, buying things you do not need, and forgetting things you do. Here is how to build a list that actually works.
Organize every item by store section. This is the single most effective change you can make. Group items into Produce, Meat and Seafood, Dairy and Eggs, Pantry and Canned Goods, Frozen, Bread and Bakery, and Household and Cleaning. When your list matches the physical layout of the store, you shop faster and skip fewer aisles.
Try the 5-4-3-2-1 grocery rule as a sanity check before you head to the store. Aim for at least 5 vegetables, 4 fruits, 3 proteins, 2 grains or starches, and 1 treat. This simple formula ensures your cart has balance without overthinking every item.
Keep a master staples list on a separate page in your notebook. Write down every item you buy regularly, like olive oil, eggs, rice, and paper towels. Before each shopping trip, scan this list and check off anything running low. You will never run out of coffee again.
Add quantity notes next to items on your grocery list. If a recipe calls for two onions and you already have one at home, write “1 onion” on your list. This sounds obvious, but most people buy duplicates because they do not check their pantry first.
Use check boxes instead of bullet points for list items. Checking off a box as you drop an item in your cart is satisfying, and it makes the list reusable if you shop in two trips.
Meal Prep and Weekly Tracking Integration
Once your monthly layout is set, you need a way to break it into weekly action. This is where meal prep and a weekly spread come in.
Each Sunday, copy the coming week’s meals from your monthly overview into a simple weekly spread. This takes five minutes and keeps your monthly pages clean. Your weekly spread only needs seven days and a short prep checklist.
Use the 3-3-3 rule for meal prep to guide your Sunday cooking session. Pick 3 proteins, 3 vegetables, and 3 grains or starches to prep in bulk. Mix and match them throughout the week to build quick meals without cooking from scratch every night.
Add a small meal prep box to your weekly spread. List the two or three things you will batch cook on Sunday, like roasting a tray of vegetables, cooking a pot of rice, or marinating chicken. When Wednesday gets busy, you already have components ready to assemble.
Track snacks and lunches here too. Many people plan dinners carefully but grab whatever is around for lunch. Writing lunch and snack ideas on your weekly spread keeps your whole day covered and stops the 2 p.m. vending machine run.
Tips for Maintaining Consistency Month After Month
The hardest part of any planning system is keeping it going. Here is what works after the novelty wears off.
Set a monthly planning date. Pick one day each month, like the last Sunday, to build next month’s spread. Put it on your calendar. Treat it like an appointment. This one habit is the difference between people who meal plan for a month and people who do it for years.
Get family input early. Before you fill in meals, ask your household for their top five dinners. Reddit users in r/bujo swear by this because it reduces complaints and makes everyone feel invested in the plan.
Start minimal and build up. Forum users across r/bulletjournal and r/BasicBulletJournals consistently say the same thing: simple spreads beat elaborate ones. Start with just dinners and a grocery list. Add breakfast, lunch, snacks, and budget tracking only once the basic system feels automatic.
Migrate what works. At the end of each month, note which meals your family actually ate and which got skipped. Carry the winners forward and drop the losers. Over a few months your monthly layout fills with meals you know will get eaten, which means less waste and less stress.
Do not redraw from scratch. If your layout worked well last month, trace or photocopy the same grid. You can tweak one section at a time instead of redesigning everything. Consistency comes from reducing friction, not from artistic perfection.
Frequently Asked Questions
What is the 5 4 3 2 1 grocery rule?
The 5-4-3-2-1 grocery rule is a simple checklist for balanced shopping: buy at least 5 vegetables, 4 fruits, 3 proteins, 2 grains or starches, and 1 treat. It ensures your cart has variety and nutrition without overthinking every item.
What is the 3-3-3 rule for meal prep?
The 3-3-3 meal prep rule means prepping 3 proteins, 3 vegetables, and 3 grains or starches in bulk. You mix and match these components throughout the week to build quick meals without cooking from scratch every night.
How do I create a meal plan and grocery list?
Write down every meal for the week or month, then list every ingredient each meal requires. Group those ingredients by store section (produce, meat, dairy, pantry) so your list matches the store layout. Cross off anything you already have in your pantry before you shop.
How do I organize my bujo for meal planning?
Dedicate a two-page spread to meals and groceries. Use the left page for a monthly meal grid organized by day, and the right page for a grocery list organized by store section. Add a small budget tracker and a weekly spread for day-to-day prep.
Wrapping Up Your Monthly Meal and Grocery Bujo Layout
You now have everything you need to build your own monthly meal and grocery bujo layout. The system boils down to eight steps: pick your spread, title it, draw the grid, add theme nights, fill in meals, build the grocery list, add a budget tracker, and review.
The benefits are real and measurable. My grocery spending dropped 30 percent in the first two months. Food waste practically disappeared. And I stopped staring into the fridge at 6 p.m. wondering what to cook.
Start simple. A basic dinner grid and a grocery list organized by store section is all you need for month one. You can always add breakfast, lunch, snacks, budget tracking, and meal prep boxes as the system becomes a habit.
Grab your dot grid notebook, a pen, and a ruler. Pick a monthly planning date. In 45 minutes you will have a monthly meal and grocery bujo layout that keeps your kitchen organized and your budget on track all month long.