
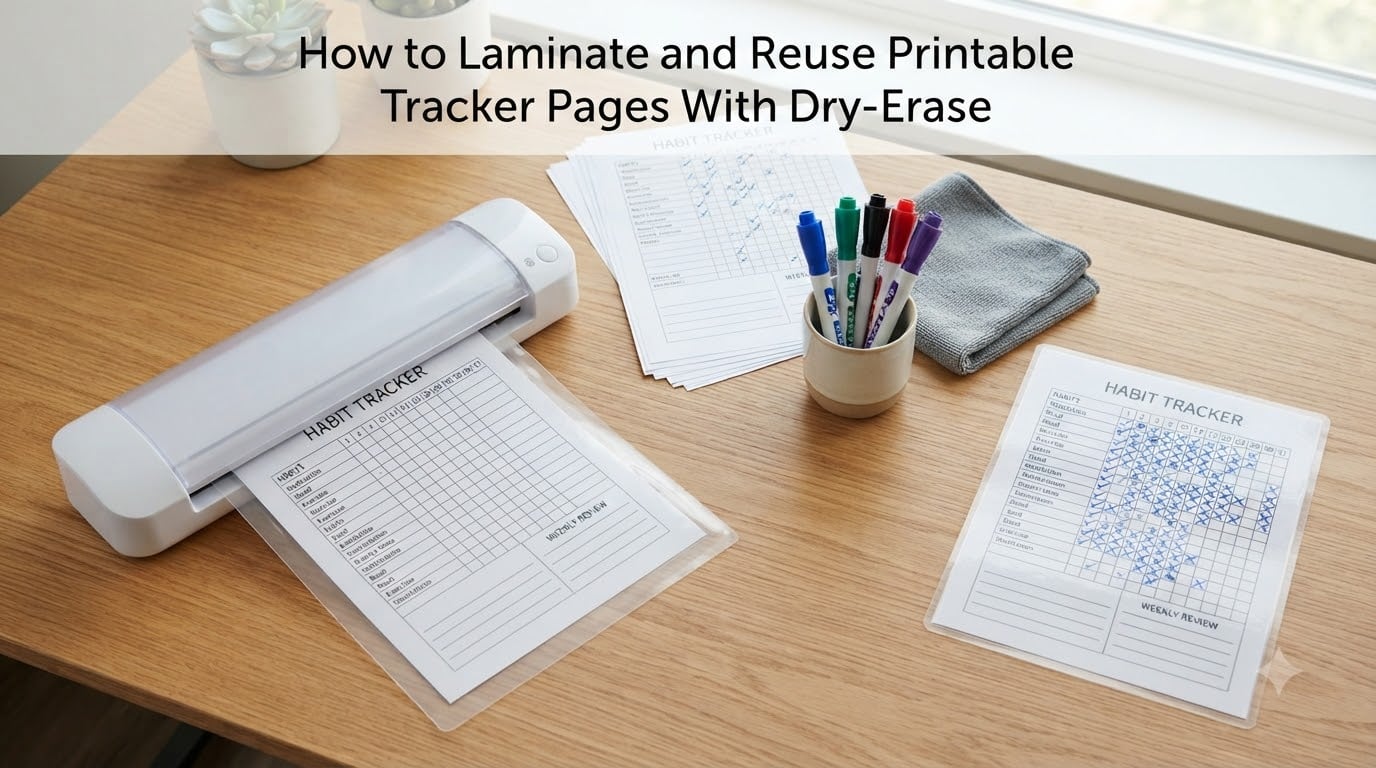
Learning how to laminate and reuse printable tracker pages with dry erase turned into one of my favorite planner upgrades. I started with a simple habit tracker, and now my whole desk runs on reusable laminated pages. In this guide I’ll show you exactly which materials to buy, how to seal a sheet without bubbles, and the cleaning tricks that keep pages ghost-free for months of daily tracking.
If you track your weight, water, workouts, or weekly habits, laminating your pages lets you write, wipe, and rewrite the same page hundreds of times. We’ll cover the full method below, then answer the questions I hear most often in planner communities.
Table of Contents
- What Is Lamination and Why Use It for Printable Trackers
- Materials You Need to Laminate and Reuse Printable Tracker Pages
- Step-by-Step: How to Laminate and Reuse Printable Tracker Pages With Dry-Erase
- Dry Erase vs Wet Erase: Which Marker Works Best on Laminated Paper
- Tips for Preventing Ghosting on Laminated Tracker Pages
- Cleaning and Storing Your Reusable Tracker Pages
- Where to Find Printable Tracker Pages Worth Laminating
- Common Mistakes to Avoid When Laminating Planner Pages
- Frequently Asked Questions
- Final Thoughts on Reusable Laminated Trackers
What Is Lamination and Why Use It for Printable Trackers
Lamination is the process of sealing a paper sheet between two layers of clear plastic film using heat and pressure. A thermal laminator feeds your printed page inside a plastic pouch, melts the adhesive, and bonds a glossy, wipeable film to both sides of the paper. The result behaves like a whiteboard you can print from your home computer.
For tracker pages, lamination unlocks three practical advantages. You write today, wipe tomorrow, and never reprint. You save paper and ink over months of use. And you get a rigid page that survives a kitchen counter, a gym bag, or the inside of a backpack without curling or tearing.
Most printable planners work best at the standard letter size, and 3-mil or 5-mil pouches balance flexibility with durability. Thicker 7-mil pouches feel almost credit-card stiff, while 3-mil pouches bend easily and feel closer to a magazine page. If you’ve never laminated anything before, start with 3-mil pouches and a basic thermal laminator. I’ve personally used mine weekly for over three years and still have pages that wipe clean.
Materials You Need to Laminate and Reuse Printable Tracker Pages
Here’s the short supply list I’ve tested against five different laminator brands. None of it is expensive, and most items pull double duty around a home or classroom.
- Thermal laminator — A 9-inch or 13-inch home model handles every standard planner page.
- Laminating pouches — Letter-size, 3-mil for flexibility or 5-mil for rigidity. Scotch and Fellowes both work well.
- Dry erase markers — Expo fine point is the community favorite for clean erasing on laminate.
- Microfiber cloth or whiteboard eraser — Skip paper towels; they leave lint and can scuff the film.
- Rubbing alcohol — Your reset button for ghosting and old ink stains.
- Optional: Self-adhesive laminating sheets — Useful if you don’t own a thermal laminator yet.
A quick note on laminator type. Thermal laminators run paper through heated rollers and produce the smoothest, longest-lasting seal. Self-sealing or “cold” pouches work without heat, but they tend to peel at the corners after weeks of repeated erasing. For tracker pages you’ll touch daily, thermal lamination is worth the small upfront cost.
Step-by-Step: How to Laminate and Reuse Printable Tracker Pages With Dry-Erase
Follow this exact order and your first page will look clean enough to use immediately. I do all eight steps in under five minutes per page now that I’ve got the rhythm down.
- Print your tracker page. Use standard copy paper for everyday trackers and 24 lb paper if you want a stiffer finished page. Set your printer to its highest quality mode so thin lines stay crisp.
- Trim close to the design. Cut away any white margin larger than a quarter inch. Less overhang means less chance of the pouch edge peeling up later.
- Insert the page into a laminating pouch. Make sure the printed side faces the sealed edge of the pouch so air escapes cleanly as it enters the laminator.
- Center the page inside the pouch. Leave an even border of plastic on all four sides. Uneven borders can let moisture wick into the paper over time.
- Feed the pouch through the laminator. Use the carrier sheet if your model came with one. Most home laminators need about 30 to 90 seconds to fully bond the film.
- Let the laminated page cool flat. Place it on a tabletop for one or two minutes. Hot plastic can warp if you stack or fold it too soon.
- Trim the sealed edges. Use a paper trimmer rather than scissors. A straight edge keeps the seal tight and prevents the corners from curling.
- Write a test stroke and erase it. Confirm your dry erase marker wipes clean before you commit the page to daily use. If it streaks, your marker may be old, or the pouch may not have fully bonded.
Once you’ve finished step 8, the page is fully reusable. Write in the morning, wipe at night, and start fresh the next day. That single loop is the whole point of laminating a tracker.
Dry Erase vs Wet Erase: Which Marker Works Best on Laminated Paper
Both marker families write on laminated paper, but they behave differently once you try to erase them. Dry erase markers use a slick, alcohol-based ink that sits on top of the laminate and wipes away with a dry cloth. Wet erase markers use a water-based ink that bonds slightly to the surface and needs a damp cloth to remove.
For weekly weight loss or habit trackers you wipe and rewrite every day, dry erase markers feel faster and cleaner. The ink lifts almost instantly, which means no ghosting if you erase within 24 to 48 hours. For monthly tracker pages where data sits longer, wet erase markers stay legible longer and resist accidental smudging from a stray hand brushing the page.
If you’re laminating sheets for both quick daily logs and longer monthly charts, keep one of each on your desk. I personally reach for an Expo dry erase marker on weekday habit pages and switch to a Vis-A-Vis wet erase marker on the monthly weight chart that sits by my coffee pot all weekend.
Tips for Preventing Ghosting on Laminated Tracker Pages
Ghosting, the faint shadow that stays behind when a dry erase marker doesn’t fully lift, is the most common complaint in planner forums. Most ghosting is preventable with a few small habits.
- Wipe within 24 to 48 hours. The longer dry erase ink sits on laminate, the more it bonds. A nightly wipe routine keeps the surface clear.
- Swap worn markers. A dry erase marker past its prime leaves faint color even when freshly wiped. Replace markers every four to six months on heavily used pages.
- Use a clean microfiber cloth. Microfiber lifts ink without smearing. Paper towels leave lint and can drag ink across the page.
- Clean monthly with rubbing alcohol. A quick swipe of 70% isopropyl alcohol dissolves the thin film of residue that builds up over time.
- Avoid permanent markers. Sharpies bond permanently to laminate. If you grab one by accident, see the FAQ below.
One last ghosting tip I learned the hard way. Don’t leave laminated pages sitting in direct sunlight on a windowsill. UV light bakes dry erase ink into the plastic film and turns faint ghosts into permanent stains.
Cleaning and Storing Your Reusable Tracker Pages
A laminated tracker page can last years with the same basic cleaning routine. The “deep clean” only takes a minute a month and adds months of life to the plastic.
For everyday cleaning, wipe the page with a dry microfiber cloth at the end of each day. For weekly cleaning, lightly mist the surface with water and a drop of mild dish soap, wipe, and dry with a second cloth. For monthly deep cleaning, dampen a cloth with rubbing alcohol and pass it across the entire page to dissolve ink residue that builds up even when the surface looks clean.
Store laminated pages flat in a small filing tray, or punch a hole in the corner and slide them onto a binder ring. Standing them upright in a magazine holder works too. The key is keeping them out of heat. A hot car or a sunny shelf can warp the plastic and curl the edges off the sealed paper.
Where to Find Printable Tracker Pages Worth Laminating
Almost any planner printable can become a reusable page, but certain designs laminate especially well. Look for layouts with clean white space, bold section dividers, and checkboxes or graph areas where you’ll write daily entries. Printable trackers for weight loss, water intake, sleep, mood, fitness, and habit streaks are all popular choices.
Free printable tracker pages appear on hundreds of planner blogs, and many include a commercial-use license for personal printing. Etsy and Creative Market sell premium bundles with matching tracker sets if you want a coordinated layout across your planner. Once you’ve laminated your first page, you’ll quickly see which designs from your current library deserve the upgrade.
Common Mistakes to Avoid When Laminating Planner Pages
Forum threads across Reddit, Facebook planner groups, and teacher forums surface the same handful of beginner mistakes. Steering clear of them saves money and rework on your first few pages.
- Letting the pouch enter the laminator crooked. A pouch that enters at an angle comes out with sealed edges on one side and bare paper on the other. Always align the pouch with the entry guide.
- Pulling the page out before it cools. The plastic is still soft for a few seconds after it exits the laminator. Let it rest flat for about a minute.
- Using old dry erase markers. Markers that have dried out at the tip leave a faint stain even when freshly wiped.
- Reaching for a Sharpie by mistake. Permanent marker bonds to laminate and won’t wipe off with a dry cloth. Rubbing alcohol can lift it if you catch it quickly.
Frequently Asked Questions
Can you use dry erase on laminated paper?
Yes. Standard dry erase markers write cleanly on laminated paper and wipe off with a dry microfiber cloth. Expo and similar alcohol-based markers are the most popular choice across planner communities and erase within seconds.
How do you laminate multiple tracker pages at once?
Feed them through the laminator one at a time, in sequence. Laminating two pages in the same pouch can cause incomplete sealing because the extra paper thickness prevents the adhesive from melting evenly. Most home laminators handle one letter-size sheet every 30 to 90 seconds.
Will Sharpie stay on laminated sheets?
Sharpie is a permanent marker, and yes, it bonds tightly to laminate film. Dry erase markers and wet erase markers lift off with a cloth, but Sharpie requires rubbing alcohol and a quick wipe within minutes of the mistake.
How do you erase dry erase marker from laminated paper?
Wipe the page with a clean, dry microfiber cloth within 24 to 48 hours of writing. For older ink or ghosting, dampen the cloth with a small amount of rubbing alcohol and wipe across the area. Avoid paper towels, which smear ink and leave lint behind.
What markers work best on laminated paper?
Expo fine-point dry erase markers erase the cleanest and are the most widely recommended choice. For pages where data sits longer than a day, Vis-A-Vis wet erase markers hold up to smudges and lift with a damp cloth.
How long do laminated tracker pages last with regular use?
With weekly cleaning and rotation of dry erase markers, a laminated tracker page usually lasts 2 to 3 years of daily use before the corners or surface begin to wear. Replace the page when the seal loosens or marker residue no longer lifts.
Final Thoughts on Reusable Laminated Trackers
Once you know how to laminate and reuse printable tracker pages with dry erase, you’ll find a dozen places to put the technique to work. A reusable weight chart by the fridge, a wipe-clean habit grid in your planner, a monthly water tracker on the bathroom mirror. Each one saves paper, prints fewer sheets, and turns your planner into a system you can adjust as your goals change.
Start with one tracker you already use daily. Laminate a single page tonight, write your first entry tomorrow morning, and wipe it clean before bed. That single loop is the whole reward, and it’s what makes laminated tracker pages one of the best small upgrades you can make to a printable planner.