
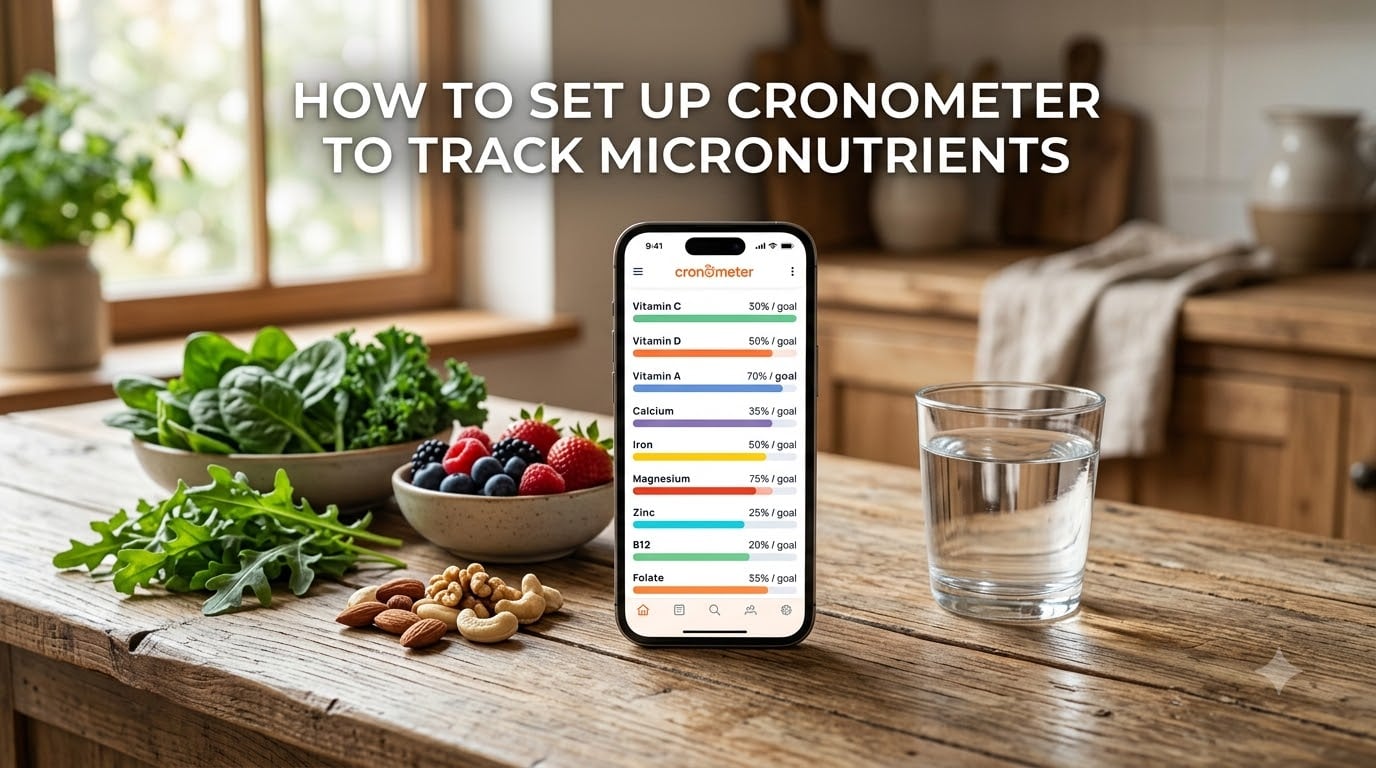
Counting calories tells you how much you eat. Tracking micronutrients tells you whether what you eat actually nourishes you. That is the difference most nutrition apps miss, and it is exactly why so many people switch to Cronometer.
If you have ever finished a day within your calorie target only to feel sluggish, foggy, or short on energy, a vitamin or mineral gap might be the culprit. I have spent months testing different tracking apps, and Cronometer stands apart because it tracks over 80 micronutrients by default rather than just macros.
This guide walks you through exactly how to set up Cronometer to track micronutrients from scratch. We cover account creation, profile configuration, setting targets, choosing accurate food entries, and avoiding the common mistakes that throw off your data.
Whether your goal is identifying a deficiency, optimizing athletic performance, or supporting a weight loss plan, getting your Cronometer setup right from day one makes every subsequent log more meaningful.
Table of Contents
- What Are Macronutrients and Micronutrients
- Getting Started with Cronometer Account Setup
- How to Access Nutrient Targets in Cronometer
- Setting Your Macronutrient Targets
- Setting Your Micronutrient Targets
- Understanding Dietary Reference Intakes (DRIs)
- How to Choose Accurate Food Entries (NCCDB)
- How to Track Supplements in Cronometer
- Free vs Gold Features for Micronutrient Tracking
- Common Mistakes to Avoid When Setting Up Micronutrient Tracking
- Tips for Consistent Tracking
- Frequently Asked Questions
- Conclusion
What Are Macronutrients and Micronutrients
Before setting up Cronometer, it helps to understand what the app is actually measuring. The distinction between macronutrients and micronutrients is the foundation of everything you will configure.
Macronutrients are the nutrients your body needs in large amounts: protein, fat, and carbohydrates. These provide energy measured in calories. Most popular tracking apps like MyFitnessPal focus almost entirely on these three plus calories.
Micronutrients are the vitamins and minerals your body needs in smaller quantities but just as critically. They include everything from vitamin C and folate to magnesium, zinc, and selenium. These compounds drive immune function, energy production, bone health, hormone regulation, and hundreds of other processes.
The categories most commonly grouped as essential micronutrients include water-soluble vitamins (B-complex and C), fat-soluble vitamins (A, D, E, and K), macrominerals (calcium, phosphorus, magnesium, sodium, potassium, chloride, and sulfur), and trace minerals (iron, zinc, copper, manganese, iodine, selenium, and molybdenum).
Here is the key point: you can hit your protein target and calorie goal every single day and still fall short on magnesium, potassium, or folate. That is why learning how to set up Cronometer to track micronutrients matters so much for anyone serious about their nutrition.
Getting Started with Cronometer Account Setup
The setup process takes about 10 minutes, and getting your profile details right from the start ensures your targets are calculated correctly. Cronometer uses your personal data to generate Dietary Reference Intake targets automatically.
Start by downloading the Cronometer app from the App Store or Google Play, or visit cronometer.com to create an account on the web version. The free account gives you full micronutrient tracking, which is a major advantage over competitors that lock nutrient detail behind paywalls.
During setup, Cronometer asks for your age, biological sex, height, weight, and activity level. Be honest with these inputs. The app uses them to calculate your energy target and apply the correct DRI values for your demographic.
One important choice appears early: selecting your preferred food database. I recommend choosing the NCCDB (Nutrient Coordinating Center Database) as your default source. This database contains comprehensive micronutrient data for whole foods, often listing 77 or more nutrients per entry. Brand-name and restaurant entries tend to include far fewer vitamins and minerals.
On mobile, you will find the setup wizard walks you through each step with prompts. On desktop, the same options appear under Settings after you create your account. The web version gives you more screen space, which makes it easier to configure detailed targets initially, but both platforms are fully functional.
How to Access Nutrient Targets in Cronometer
Now that your account is set up, you need to find where nutrient targets live. This is the control center for everything related to micronutrient tracking.
The navigation path to reach nutrient targets is straightforward. On the web version, click the More tab in the left sidebar, then select Targets, and then click the Nutrient Targets sub-tab. On mobile, tap the More icon at the bottom of the screen, select Settings, then Nutrient Targets.
You can also access individual nutrient targets directly from your food diary. When you tap or click on any nutrient name in your daily summary, a shortcut appears that takes you straight to that nutrient’s target setting. This is faster when you notice a specific vitamin running low and want to adjust its goal.
Once you are on the Nutrient Targets page, you will see a full list of vitamins, minerals, and other tracked compounds. Each one has a checkbox to make it visible in your diary, a daily target field, and options for maximum thresholds.
By default, Cronometer shows the most commonly tracked nutrients. If a vitamin or mineral you care about is not visible in your diary, check the checkbox next to it on this page to add it. You can also uncheck nutrients you do not want cluttering your daily view.
Setting Your Macronutrient Targets
Before diving into micronutrients, take a moment to configure your macronutrient targets. The macro and micro settings interact with each other, so getting both right produces more useful data.
From the Targets section, navigate to the Macro Targets tab. Here you will see three main configuration options: Macro Ratios, Fixed Targets, and Ketogenic Target.
Macro Ratios let you set percentage-based splits, such as 40 percent carbohydrates, 30 percent protein, and 30 percent fat. Cronometer calculates the gram amounts automatically based on your energy target. This approach works well if you follow a balanced or Mediterranean-style eating pattern.
Fixed Targets let you enter exact gram amounts for each macro. This is the better option if you work with a nutritionist or coach who has given you specific numbers. Fixed targets give you precise control without the values shifting when your calorie target changes.
The Ketogenic Target option automatically sets carbs to a low threshold, typically 5 to 10 percent of total energy, and adjusts fat and protein accordingly. If you are using a keto calculator or following a therapeutic ketogenic diet, this preset saves time and reduces configuration errors.
Under Advanced Settings, you can toggle between total carbs and net carbs. Net carbs subtract fiber from total carbohydrates, which matters for anyone following a low-carb or ketogenic approach. Choose whichever your dietary framework uses.
Setting Your Micronutrient Targets
This is where the real power of Cronometer becomes apparent. Setting micronutrient targets lets you define exactly what adequate intake looks like for each vitamin and mineral, and the app tracks your progress toward those goals automatically.
Here is the step-by-step process to set up Cronometer to track micronutrients with custom targets.
Step 1: Navigate to More, then Targets, then Nutrient Targets on the web app, or More, Settings, Nutrient Targets on mobile.
Step 2: Review the list of nutrients. Check the box next to any vitamin or mineral you want visible in your daily food diary. I recommend enabling at minimum all B vitamins, vitamins A, C, D, E, and K, calcium, iron, magnesium, potassium, zinc, and selenium.
Step 3: For each nutrient, review the default target value. Cronometer auto-populates these based on Dietary Reference Intakes for your age and sex. These defaults are scientifically sound for the general population.
Step 4: If you want to customize a target, click the edit icon or tap the target field and enter your preferred value. You might do this if your doctor has recommended a specific intake level, if you are pregnant or breastfeeding, or if you follow an athletic protocol with higher nutrient demands.
Step 5: Toggle the option to use custom values instead of DRIs if you want to override the defaults entirely. This setting applies to individual nutrients, so you can keep DRI defaults for most and customize only the ones you care about.
Step 6: Set maximum thresholds for nutrients where excessive intake could be a concern, such as sodium or preformed vitamin A. These appear as upper limits on your progress bars.
Once configured, your daily food diary will show progress bars for each enabled nutrient. Green means you are on track, yellow means you are approaching the target, and red indicates a shortfall you should address.
Understanding Dietary Reference Intakes (DRIs)
The defaults Cronometer uses for micronutrient targets come from a system called Dietary Reference Intakes. Understanding what these values mean helps you interpret your data more accurately.
DRIs are a set of reference values developed by the Food and Nutrition Board of the Institute of Medicine. They represent the best available scientific consensus on how much of each nutrient healthy individuals need.
Within the DRI framework, the most common value you will encounter is the Recommended Dietary Allowance, or RDA. The RDA is the average daily intake level sufficient to meet the nutrient requirements of approximately 97 percent of healthy individuals in a given demographic group.
Another value is Adequate Intake, or AI. This is used when there is not enough evidence to establish an RDA. AI represents a recommended intake based on observed or experimentally determined approximations.
The Tolerable Upper Intake Level, or UL, is the highest daily intake likely to pose no risk of adverse health effects for nearly all people. Cronometer uses ULs to set warning thresholds on certain nutrients.
Most users do not need to customize these values. However, if you have a diagnosed deficiency, are pregnant, follow a restrictive diet like veganism, or are working with a healthcare provider, customizing specific targets gives you more relevant tracking data.
How to Choose Accurate Food Entries (NCCDB)
Your micronutrient data is only as good as the food entries you select. This is the single biggest factor affecting accuracy in Cronometer, and it is where many beginners unknowingly sabotage their results.
The NCCDB, maintained by the University of Minnesota’s Nutrition Coordinating Center, is the gold standard for nutrient data in Cronometer. Entries from this database typically list 77 or more nutrients per food, including detailed vitamin and mineral breakdowns.
When you search for a food like “chicken breast” or “spinach,” Cronometer returns multiple results. Always look for entries tagged with the NCCDB source indicator. These generic database entries contain far more complete micronutrient profiles than branded or user-submitted alternatives.
Brand-name entries, packaged food scans, and restaurant items often report only the nutrients required on nutrition labels. That typically means calories, fat, carbs, protein, sodium, and a handful of vitamins. If you log a branded meal, your micronutrient totals will appear artificially low because the data is incomplete rather than because you are actually deficient.
Users on Reddit’s nutrition forums frequently report that European food database entries also lack complete micronutrient data. If you are outside North America, prioritize NCCDB entries for whole foods even if a local branded option appears in search results.
A practical approach: for whole foods like produce, meat, eggs, grains, and legumes, always choose the NCCDB entry. For packaged products where NCCDB does not have an equivalent, use the brand entry but understand that some micronutrients will be missing from that log.
How to Track Supplements in Cronometer
Supplements play an important role in closing micronutrient gaps, especially for nutrients that are difficult to obtain in adequate amounts from food alone. Tracking them in Cronometer ensures your daily totals reflect everything you consume.
To add a supplement, search for it the same way you search for food. Many popular supplement brands have entries in Cronometer’s database. If you find your exact product, log the serving size you take and the nutrient data populates automatically.
If your supplement is not in the database, you can create a custom food entry. Go to the Add Food screen, select Create Custom Food, and enter the nutrient amounts listed on your supplement’s label. This takes a few minutes but ensures your tracking is complete and accurate going forward.
Log supplements at the time you take them. This keeps your daily totals updating in real time and prevents you from forgetting at the end of the day.
A question that comes up frequently on Reddit is whether you should log supplements during a micronutrient audit or evaluation period. The consensus among experienced users and nutrition coaches is to log everything, including supplements, for the first few weeks. This shows your true total intake. Once you have a baseline, you can evaluate whether whole foods alone cover your needs.
One caution: high-dose supplements can push certain nutrients above the UL threshold. If you see a nutrient maxing out or exceeding its upper limit, review your supplement dosages with a healthcare provider.
Free vs Gold Features for Micronutrient Tracking
One of the most common questions about Cronometer is whether the free version is sufficient for micronutrient tracking. The short answer is yes, the free tier covers everything you need for detailed vitamin and mineral logging.
The free version includes full access to the NCCDB database, complete micronutrient tracking for all vitamins and minerals, the food diary, barcode scanner, daily and weekly nutrient summaries, and DRI-based target calculations. This alone puts it ahead of most competitors that charge for similar features.
Cronometer Gold, the paid subscription, adds several features that may appeal to advanced users. Gold unlocks custom biometric tracking, recipe creation, data export, the ability to target custom nutrient ratios, and an ad-free experience. You also get detailed reports and charts for longer time periods.
For most people setting up micronutrient tracking for the first time, the free version is more than enough. Consider Gold if you want to export your data for a nutritionist, create complex custom recipes, or track biometrics alongside nutrition data over months or years.
There is no functional difference in how accurately micronutrients are tracked between free and Gold. The nutrient database and target settings are identical. Gold adds convenience and analysis tools, not data quality.
Common Mistakes to Avoid When Setting Up Micronutrient Tracking
After watching many users struggle with Cronometer setup, the same patterns emerge. These are the most common mistakes that undermine your micronutrient data and how to avoid them.
Mistake number one is choosing incomplete food entries. As we covered earlier, branded and user-submitted foods often lack full nutrient panels. If your diary consistently shows low readings across multiple minerals, the problem might be your food source selection rather than an actual dietary gap. Always prefer NCCDB entries for whole foods.
Mistake number two is panicking over low mineral readings on day one. Minerals like potassium, magnesium, and choline are notoriously under-consumed in modern diets. Seeing these in the red is common and does not necessarily mean something is wrong with your setup. Track for at least a week before drawing conclusions.
Mistake number three is ignoring the weigh-and-measure step. Estimating portions by eye leads to significant errors in micronutrient totals. A food scale is one of the best investments you can make for accurate tracking. This is especially true for calorie-dense foods like nuts, oils, and seeds where small portion errors compound quickly.
Mistake number four is accepting default DRI targets without considering your individual situation. If you are pregnant, breastfeeding, recovering from a deficiency, following a vegan diet, or training intensely, your nutrient needs may differ from the population averages. Review your targets with a healthcare provider if any of these apply.
Mistake number five is forgetting to log cooking oils, seasonings, and condiments. These contribute meaningful micronutrients and calories. A tablespoon of olive oil adds vitamin E and vitamin K. A pinch of salt affects your sodium and iodine totals. Log everything for a true picture of your intake.
Tips for Consistent Tracking
Setting up Cronometer correctly is only the first step. The value comes from logging consistently over time. These strategies help make tracking a sustainable habit rather than a chore.
Use the Favorites feature for foods you eat regularly. Tap the star icon next to any food to save it, then access it instantly from your Favorites list without searching. This single feature can cut your daily logging time in half.
The Copy Previous Day function is another time-saver. If your breakfast or lunch is similar day to day, copy meals from yesterday with a single tap and adjust the portions. This is available on both mobile and web versions.
Check your nutrient summary at the end of each day, not just your calorie total. The summary view shows all your micronutrient progress bars together, making it easy to spot patterns. If the same nutrients fall short consistently, that is actionable information you can use to adjust your food choices.
Review your weekly trends every Sunday. Cronometer’s weekly view reveals patterns that daily logs obscure. You might discover that your iron intake is adequate on weekdays but drops on weekends, or that your vitamin C consumption tracks closely with whether you ate citrus that day.
Finally, pair your Cronometer tracking with a structured plan if your goal includes weight management. A planner that accounts for both your calorie targets and micronutrient goals gives you a more complete framework than tracking either metric alone. Consistency over perfection is what produces results.
Frequently Asked Questions
What’s better, MyFitnessPal or Cronometer?
Cronometer is better for micronutrient tracking because it uses the NCCDB database with complete vitamin and mineral data for whole foods. MyFitnessPal focuses primarily on macronutrients and calories, with limited micronutrient detail. Users who switch to Cronometer specifically cite micronutrient tracking as the main reason. For basic calorie counting, both apps work well, but for identifying nutrient gaps and deficiencies, Cronometer is the stronger choice.
How do I track my micronutrients?
To track micronutrients, open Cronometer, go to More then Targets then Nutrient Targets, check the boxes for vitamins and minerals you want visible, and log your foods using NCCDB entries for the most complete data. Cronometer automatically calculates your micronutrient intake from the foods you log and compares it against DRI-based targets shown as progress bars in your daily diary.
How to track supplements on Cronometer?
Search for your supplement by name in the food search bar, select the matching entry, and log the serving size you take. If your supplement is not in the database, create a custom food entry by entering the nutrient amounts from the product label. Log supplements at the time you take them so your daily totals stay accurate throughout the day.
What are the 7 essential micronutrients?
There are more than seven essential micronutrients, but the categories most often referenced include water-soluble vitamins (B-complex and C), fat-soluble vitamins (A, D, E, and K), and key minerals like calcium, iron, magnesium, potassium, zinc, iodine, and selenium. Cronometer tracks over 80 micronutrients total across these categories, giving you a far more detailed picture than the simplified lists used in basic nutrition guidance.
Is Cronometer actually accurate?
Cronometer is considered one of the most accurate nutrition tracking apps because it uses the NCCDB database, which provides comprehensive nutrient data for whole foods with up to 77 listed nutrients per entry. Accuracy depends largely on which food entries you select. Choosing NCCDB entries over branded or user-subplied ones produces the most reliable micronutrient data. The app itself applies scientifically established DRI values for target calculations.
Conclusion
Learning how to set up Cronometer to track micronutrients gives you a tool that goes far beyond calorie counting. By choosing NCCDB food entries, configuring your nutrient targets, logging supplements, and reviewing your data consistently, you can identify gaps that would otherwise go unnoticed.
The setup takes about 10 minutes. The payoff is a daily nutrition picture that shows whether your diet is truly nourishing you, not just meeting an energy target. Start tracking today, review your first week of data, and use what you find to make informed adjustments to your food choices.