
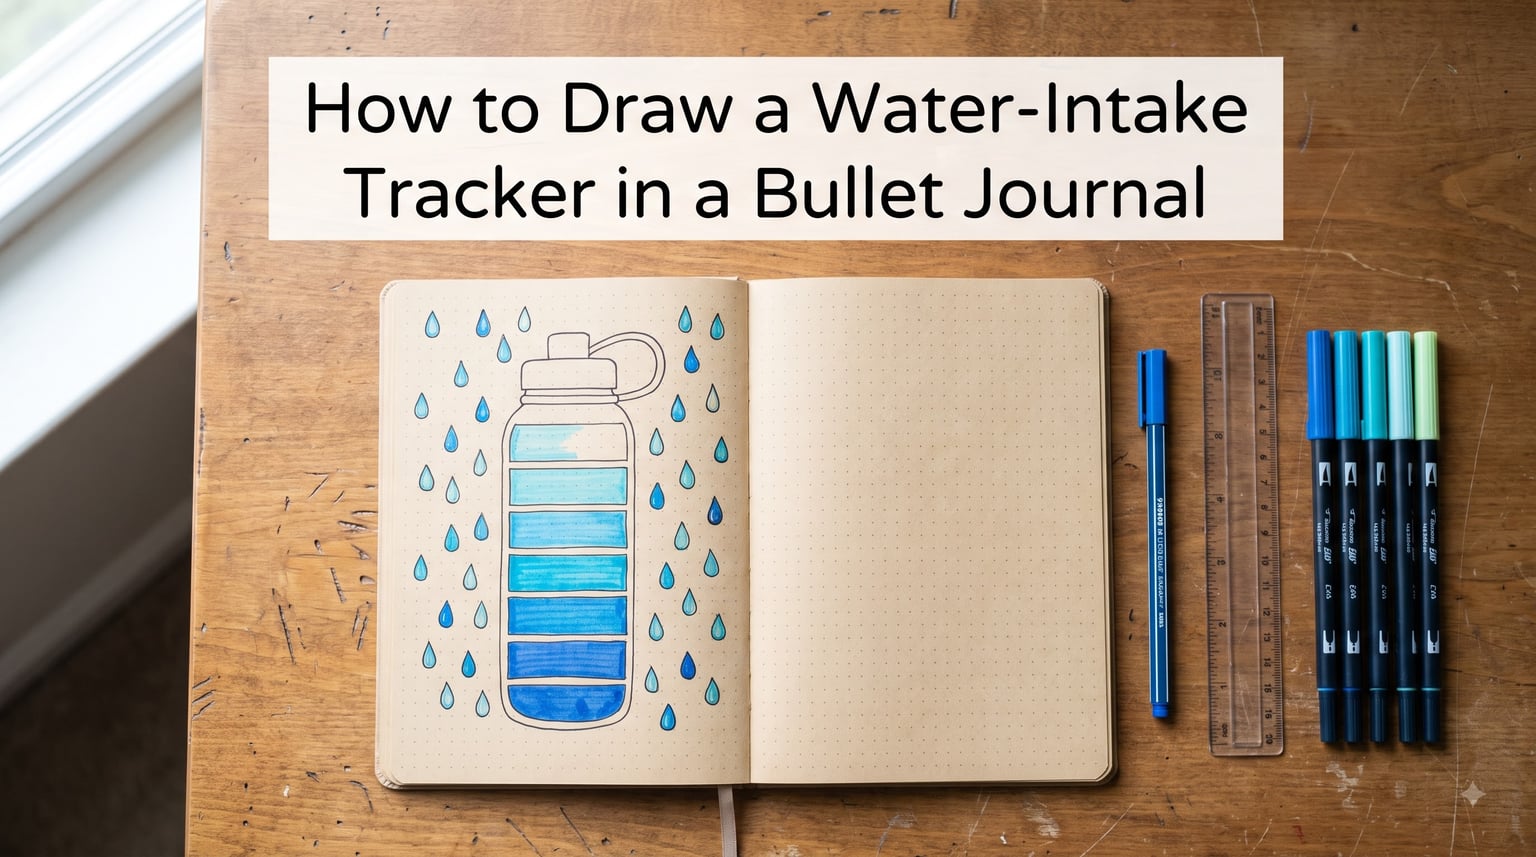
Learning how to draw a water-intake tracker in a bullet journal is one of the simplest and most satisfying spreads you can create. Whether you are trying to drink more water, build a hydration habit, or just stay accountable, a hand-drawn tracker turns an abstract health goal into something you can see and fill in every day.
I have used bullet journal water trackers for over three years, and I can tell you that the design matters less than the consistency. Still, having a tracker that looks good makes you actually want to open your journal. In this guide, I will walk you through exactly how to draw a water-intake tracker in a bullet journal, step by step, with four design styles ranging from beginner to creative.
You do not need artistic talent or expensive supplies. By the end of this article, you will have everything you need to set up a hydration tracker bujo spread that works for your daily routine.
Table of Contents
- What Is a Water-Intake Tracker in a Bullet Journal
- How Much Water Should You Drink Daily
- Materials You Need to Draw a Water Tracker
- How to Draw a Water-Intake Tracker in a Bullet Journal: Step-by-Step
- Weekly vs Monthly Water Tracker: Which Layout Works Best
- Tips for Staying Hydrated With Your Bullet Journal
- Common Mistakes to Avoid When Drawing Your Tracker
- Combining Your Water Tracker With Other Habit Trackers
- Frequently Asked Questions
- Conclusion
What Is a Water-Intake Tracker in a Bullet Journal
A water-intake tracker in a bullet journal is a hand-drawn grid, chart, or set of icons that you fill in each time you drink water throughout the day. It is a visual record of your daily hydration that lives right inside your journal pages.
Most trackers use a simple concept: each icon or cell represents one glass or bottle of water. When you drink, you color it in. Some people draw water drops, others use circles, glasses, bottles, or even coffee cups. The design is entirely up to you.
The reason a bullet journal water tracker works so well is that it makes hydration measurable. Instead of guessing whether you drank enough, you can look at your spread and see exactly how many glasses you logged. That visual feedback is what turns a vague intention into a daily habit.
How Much Water Should You Drink Daily
The most common guideline is the 8×8 rule: drink eight 8-ounce glasses of water per day, which equals about 64 ounces total. This is the baseline most bullet journal water trackers are built around, and it works well for a standard tracker with eight icons per day.
Your actual water needs depend on your body weight, activity level, and climate. A more personalized guideline is to drink half your body weight in ounces. For example, if you weigh 160 pounds, your target would be roughly 80 ounces per day.
Here is what counts toward your water intake: plain water, sparkling water, herbal tea, and water-rich foods like cucumbers and watermelon. Coffee and caffeinated tea count partially, but they have a mild diuretic effect, so most journalers prefer to track plain water separately.
When you design your tracker, pick a daily goal first. If you use the 8×8 rule, you need eight slots per day. If your goal is 100 ounces and each glass is 12 ounces, you need roughly eight to nine slots. Knowing your number before you draw keeps the layout clean.
Materials You Need to Draw a Water Tracker
You only need a handful of supplies to draw a water tracker in your bullet journal. Here is what I recommend based on what has worked for me and the community over on Reddit’s bullet journal forums:
- A dotted or grid notebook (A5 size works best for most spreads)
- A black fineliner pen (0.3mm or 0.4mm tip for clean lines)
- A pencil and eraser for light sketching before inking
- A ruler or straight edge for grid lines
- Colored markers, highlighters, or watercolor pencils for filling in your daily glasses
- Optional: washi tape or stickers for decorating the header
You do not need expensive supplies. A basic notebook and a single pen are enough to get started. The tracker works the same whether you use a ten-dollar notebook or a premium journal.
How to Draw a Water-Intake Tracker in a Bullet Journal: Step-by-Step
This is the section most guides skip. Competitors show finished tracker photos but never explain how to actually draw one from scratch. I am going to fix that gap right now with four designs, each broken into clear steps.
Design 1: Simple Water Drop Grid (Beginner)
This is the easiest water tracker bullet journal design. If you are new to bujo or short on time, start here. You can draw the entire month on a single page.
Step 1: Across the top of your page, write the days of the month from 1 to 31 in two rows. Use your ruler to keep the numbers evenly spaced, leaving a small gap between each.
Step 2: Under each number, draw a small teardrop shape. To make a teardrop, draw a circle and then pull the top into a gentle point. Keep each drop about the size of a pencil eraser so they all fit on one page.
Step 3: Add a title at the top of the page, such as “Water Tracker” or “Hydration Log.” You can letter it simply or add a decorative banner. Write your daily goal in small letters at the bottom, like “Goal: 8 glasses.”
Step 4: Each time you drink a glass of water, color in one drop for that date. If you drink eight glasses, color in eight drops across the day’s row. Some people draw multiple drops per day, but for a monthly layout, one drop per day works as a yes-or-no check.
For a more detailed monthly version, draw a small grid with eight cells per day instead of one drop. This takes more space but lets you track individual glasses rather than just whether you hit your goal.
Design 2: Monthly Water Bottle Tracker
This is one of the most popular bullet journal water tracker ideas on Instagram and Pinterest. You draw a large water bottle that fills up over the course of the month.
Step 1: Draw the outline of a large water bottle in the center of your page. Start with a narrow neck at the top, widen into shoulders, then draw straight sides down to a flat bottom. Make the bottle tall enough to fill most of the page vertically.
Step 2: Draw horizontal lines across the inside of the bottle to create segments. For a 30-day month, draw 30 equal horizontal sections. Use your ruler to keep the lines straight and evenly spaced.
Step 3: Number each segment from 1 at the top to 30 at the bottom. Write the numbers along the left side of the bottle in small, neat digits.
Step 4: Add a cap at the top of the bottle and a label in the center. Write “Water Intake” or the month name on the label. You can also add measurement marks on the right side, like “8 oz” increments.
Step 5: Each day, color in the segment for that date. By the end of the month, your bottle should be full. This design is satisfying because you can see your progress fill up visually over time.
Design 3: Weekly Glass-by-Glass Layout
This design is ideal if you want to track individual glasses of water each day rather than just a monthly total. It works best as a weekly water tracker spread.
Step 1: Draw seven columns, one for each day of the week. Label them Monday through Sunday across the top. Use your ruler to draw vertical lines separating each column.
Step 2: In each column, draw eight small glass shapes stacked vertically. A simple glass is just a rectangle with a slightly narrower bottom. If you want to get fancy, add a curved rim at the top.
Step 3: Next to each glass, write the ounce amount (8 oz, 16 oz, 24 oz, and so on up to 64 oz). This helps you see your cumulative intake as you fill them in.
Step 4: Add a weekly summary box at the bottom of the page. Label it “Total Glasses This Week” and leave space to add your number on Sunday night.
Step 5: Each time you drink a glass of water, color in one glass icon for that day. By bedtime, you can see exactly how close you came to your eight-glass goal.
This layout takes more effort to set up weekly, but it gives you the most detailed daily tracking of any design. Reddit users consistently report that filling in individual glasses is the most satisfying format.
Design 4: Creative Coffee Cup or Mason Jar Tracker
If you want something more playful, try drawing coffee cups or mason jars instead of water drops or glasses. This is a fun way to make your hydration tracker feel less clinical.
Step 1: Draw a grid with seven rows (one per day) and eight columns (one per glass). Each cell should be roughly half an inch square to fit a small icon.
Step 2: In each cell, draw a tiny mason jar or coffee cup. A mason jar is a rectangle with a slightly rounded bottom and a small rectangle on top for the lid. A coffee cup is a trapezoid with a small handle on the side.
Step 3: Label the days of the week along the left side. Add a decorative title at the top, like “Sip Sip Hooray” or “Stay Hydrated.”
Step 4: Color in each jar or cup as you drink. Use a blue marker for water, or experiment with different colors for different beverages if you track variety.
Weekly vs Monthly Water Tracker: Which Layout Works Best
Choosing between a weekly and monthly water tracker depends on how detailed you want to be and how much time you spend on journal setup.
A monthly tracker gives you the big picture. You set it up once and use it all month. It is great for people who want a low-maintenance tracker and just need a quick daily check-in. The downside is that monthly layouts usually only track whether you hit your goal, not individual glasses.
A weekly tracker lets you log each glass individually. This means you redraw the layout every week, which takes more time. The trade-off is that you get much more detailed data and the satisfaction of coloring in individual glasses throughout the day.
My recommendation: start with a monthly layout if you are new to bullet journaling. Once you have the habit established, switch to a weekly layout for more granular tracking. Some journalers do both, using a monthly bottle tracker for the big picture and a weekly glass grid for daily detail.
Tips for Staying Hydrated With Your Bullet Journal
Drawing the tracker is the easy part. Actually drinking enough water is where most people struggle. Here are practical tips from my experience and the bullet journal community:
Keep your journal open on your desk or kitchen counter during the day. Seeing your tracker serves as a visual reminder to drink water. Out of sight means out of mind.
Pair water with existing habits. Drink a glass when you wake up, one with each meal, and one before bed. That is five glasses tied to things you already do, leaving only three more to fit in throughout the day.
Use a refillable water bottle with ounce markers. Many journalers fill a 32-ounce bottle twice per day and color in four glasses per fill. This reduces the number of times you need to log your intake.
Color your tracker at the moment you drink, not at the end of the day. Logging in real time is more accurate and reinforces the habit. If you wait until bedtime, you will likely forget or underestimate.
Review your tracker weekly. Look for patterns. Do you consistently miss your goal on busy workdays? Adjust your routine accordingly. The data in your tracker is only useful if you act on it.
Common Mistakes to Avoid When Drawing Your Tracker
Over three years of trial and error, I have seen the same mistakes trip up new journalers. Here is what to watch for:
Making the design too complex is the number one mistake. Reddit users repeatedly say simple designs work better than elaborate ones. If your tracker takes an hour to draw and has tiny cells that are hard to color, you will stop using it within a week.
Setting an unrealistic daily goal leads to discouragement. If you currently drink two glasses per day, do not start with a 12-glass tracker. Build up gradually. Start with five glasses in week one and add one per week until you reach eight.
Skipping days and trying to fill them in later defeats the purpose. If you forget to log, just start fresh the next day. Do not try to reconstruct past intake from memory. It will be inaccurate and the guilt makes you want to abandon the tracker entirely.
Drawing without a pencil sketch first leads to crooked lines and uneven spacing. Take thirty seconds to sketch lightly in pencil, then ink over it. Erase the pencil marks once the ink dries. Your layout will look significantly cleaner.
Combining Your Water Tracker With Other Habit Trackers
One of the best things about a bullet journal habit tracker is that you can combine multiple habits on a single spread. Many journalers put water intake alongside mood, exercise, and sleep trackers.
Reddit users report that combining a water tracker with a mood tracker reveals a clear pattern: on days they drink more water, their mood tends to be better. Seeing that correlation on paper is a powerful motivator to stay hydrated.
To combine trackers, draw a grid with days of the month down the left side and habits across the top. Each column becomes its own mini tracker. Water gets one column, mood gets another, and so on. Fill in each cell daily. This compact format fits several habits on a single page without feeling cluttered.
Frequently Asked Questions
Is a bullet journal good for ADHD?
Yes, a bullet journal works well for ADHD because it is flexible, visual, and self-contained. You can adjust the layout daily, keep everything in one notebook, and use simple checklists that reduce overwhelm. Many users with ADHD find that filling in visual trackers like a water log provides a quick dopamine boost that reinforces the habit.
How do you record water intake in a journal?
Draw a set of icons (drops, glasses, or bottle segments) for each day and color one in every time you drink a glass of water. Most trackers use eight icons per day based on the 8×8 rule, which equals 64 ounces.
How do you make a tracker in a diary?
Pick the habit you want to track, decide on a time frame (weekly or monthly), draw a simple grid with days along one axis, and fill in a cell or icon each day you complete the habit. All you need is a pen, a ruler, and a notebook.
How do you draw a bullet journal for beginners?
Start with a dotted notebook, a pen, and a ruler. Create a monthly calendar page, a habit tracker grid, and a simple daily log. Keep decorations minimal at first. The core system is rapid logging with bullet points, and you can add decorative spreads once you are comfortable with the basics.
Conclusion
Now you know exactly how to draw a water-intake tracker in a bullet journal, with four design styles to choose from and step-by-step instructions for each one. Grab your notebook and pen, pick the design that matches your skill level, and start tracking your hydration today. The best tracker is the one you actually use, so keep it simple and fill it in daily.