
Setting up a meal-planning spread in your bullet journal changed the way I approach weekly dinners. After three months of using my own hand-drawn layouts, I cut my grocery bill by about 25% and stopped staring into the fridge at 6 p.m. wondering what to cook.
In this guide, I’ll walk you through the exact steps I use, plus the layouts I’ve tested and the mistakes I made so you don’t repeat them. By the end, you’ll have a clear plan for designing a meal-planning spread in your bullet journal that you’ll actually stick with.
Table of Contents
- What Is a Meal-Planning Spread in a Bullet Journal?
- Essential Supplies for Your BuJo Meal Planner
- How to Set Up a Meal-Planning Spread in Your Bullet Journal: Step-by-Step
- Designing Your Weekly Meal Plan Layout
- Adding a Meal Prep and Grocery List Section
- Monthly Meal Planning and Theme Nights
- Tips for Sticking With Your Meal Planning Spread
- Frequently Asked Questions
- Conclusion
What Is a Meal-Planning Spread in a Bullet Journal?
A meal-planning spread in your bullet journal is a dedicated page (or two-page spread) where you map out your meals for the week, track groceries, and schedule meal prep tasks. It combines the flexibility of bullet journaling with the structure of a weekly planner.
Unlike pre-printed meal planners, your bullet journal meal plan is fully customizable. You decide how much space breakfast gets, whether snacks live in their own column, and how to organize your grocery list. That’s why so many people prefer a BuJo over a generic food planner diary.
Essential Supplies for Your BuJo Meal Planner
You don’t need much to start. Here’s what I keep on my desk when planning meals.
- A dotted notebook: Dot grid pages make it easy to draw clean columns and grids without measuring. A standard A5 size works for most weekly spreads.
- Fineliner pens: Black 0.3mm and 0.5mm pens handle most of your writing. A colored pen for headers helps separate days at a glance.
- A ruler: Straight lines keep your weekly grid tidy. A small 4-inch ruler fits in most journal covers.
- Post-it notes: These are optional but powerful. Many bullet journalers use them for swap-out weekly templates.
- Washi tape or mild liner highlighters: These add color blocks without bleeding through thin paper.
If you’re just starting, a basic notebook and one black pen are enough. You can add supplies as your layout evolves.
How to Set Up a Meal-Planning Spread in Your Bullet Journal: Step-by-Step
Here’s the exact process I follow each week. It takes me about 20 minutes from blank page to finished spread.
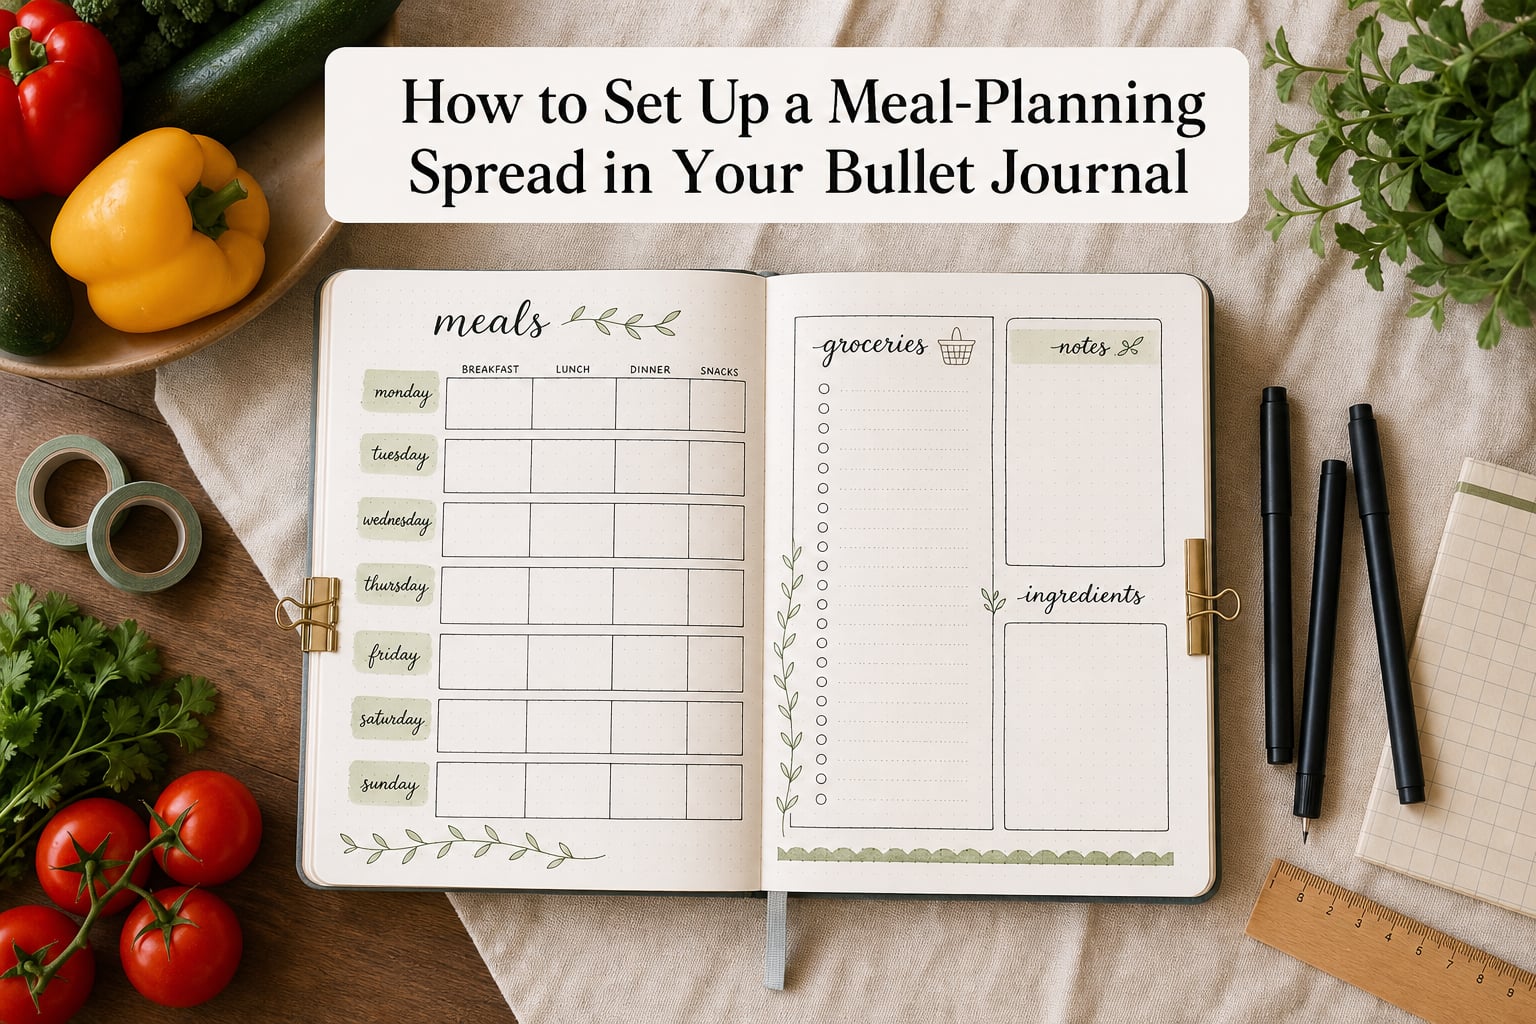
Step 1: Pick the right pages. Open to the next blank two-page spread in your notebook. Leave one page for the weekly meal grid and the facing page for grocery lists, meal prep notes, and leftover tracking.
Step 2: Draw your weekly grid. Divide the page into 7 columns, one per day. Then divide each column into rows for breakfast, lunch, dinner, and snacks. A simple 4-row by 7-column layout is enough for most people.
Step 3: Add headers and dates. Write the days of the week across the top. Add the date range under each day, like “Mon 8/18”. Use a colored pen so the dates stand out.
Step 4: Fill in meals. Start with dinners since those take the most planning. Then work backward to fill in lunches and breakfasts based on leftovers. Snacks fill in last.
Step 5: List ingredients in your grocery section. On the facing page, write each meal’s ingredients under a “Shopping List” header. Group items by store section (produce, dairy, pantry) to make trips faster.
Step 6: Track meal prep tasks. Add a small “Prep” box at the bottom of your spread. List tasks like “Sunday: chop veggies, cook rice, grill chicken.”
Designing Your Weekly Meal Plan Layout
The best layout is the one you’ll actually use. Here are three options that work well for beginners.
Option 1: Minimalist 4-row grid. Seven days across the top, four rows down for breakfast, lunch, dinner, and snacks. This is the cleanest option and the easiest to maintain.
Option 2: Post-it note template. Draw your grid on a post-it note and stick it to your journal page each week. When the week ends, peel it off and start fresh. This works perfectly for people who want a reusable layout without redrawing every Sunday.
Option 3: Habit + meal combo. Combine your meal plan with daily habits like water intake or exercise. Add a thin column on the right side of your grid for habit tracking. This is a good fit if you already use a habit tracker in your journal.
For visual learners, a 3-3-3 weekly rhythm helps. Plan 3 breakfasts you repeat, 3 lunches you rotate, and 3 dinners you batch-cook. This simple structure keeps shopping lists short and reduces decision fatigue.
Adding a Meal Prep and Grocery List Section
A meal-planning spread only works if it connects to action. Your grocery list and prep notes are what turn plans into real food.
On the page facing your weekly grid, draw three boxes. Label them “Shopping List,” “Meal Prep,” and “Leftovers.” The shopping list gets grouped by aisle. The meal prep box holds tasks like “boil eggs, roast vegetables, marinate protein.” The leftovers box is where you track what’s in the fridge so it doesn’t go bad.
Many BuJo users pair this with a digital recipe app. Tools like Copy Me That let you save recipes from any website and tag them for meal planning. When you find a recipe, paste the link into your weekly spread so you can reference it from the grocery store.
Monthly Meal Planning and Theme Nights
Once weekly planning feels automatic, try a monthly view. On the first page of each month, jot down a “Monthly Meal Map” with broad strokes: which week you’ll try new recipes, which week is leftover-heavy, and which week focuses on batch cooking.
Theme nights are a smart shortcut for families. Pick a theme for each day of the week. “Meatless Monday,” “Taco Tuesday,” “Sheet-Pan Wednesday,” “Soup Thursday,” and “Pizza Friday” take the guesswork out of dinner.
You can also add a recipe index at the back of your journal. Reserve two or three pages for a simple table with columns for recipe name, page number, and rating. When you find a keeper, write it down so you can find it later.
Tips for Sticking With Your Meal Planning Spread
Consistency is harder than the setup. Here are the habits that keep me coming back to my journal each week.
Plan on the same day. Sunday mornings work well for most people. Pick a time and stick with it. After a few weeks, your brain starts expecting it.
Start small. If full weekly planning feels like too much, start with dinners only. Add lunch the next week, then snacks.
Leave room to adjust. Real life happens. Use a pencil for meal slots so you can swap. Or use post-it notes for the meal titles if you hate crossing things out.
Review before you shop. Check your fridge, freezer, and pantry before adding anything to the grocery list. This one habit cuts food waste dramatically.
Celebrate wins. After a month of consistent planning, note how much you saved or how much less food you threw away. Tracking the win keeps motivation high.
For people with ADHD, bullet journal meal planning can be especially powerful. The visual structure, the act of writing things down, and the flexibility to change layouts all support executive function. If your first layout doesn’t stick, try a different one next week. The system is yours to shape.
Frequently Asked Questions
What is the 3-3-3 rule for meal prep?
The 3-3-3 rule is a simple weekly structure: prepare 3 breakfasts, 3 lunches, and 3 dinners that you rotate throughout the week. This reduces decision fatigue, keeps grocery lists short, and ensures you always have something ready to eat.
How do I layout my bullet journal for meal planning?
Start with a two-page spread. Draw a grid on the left page with 7 columns (one per day) and 4 rows (breakfast, lunch, dinner, snacks). Use the right page for a grocery list, meal prep tasks, and a leftover tracker. Keep headers simple and use a colored pen for dates.
What is the 5 4 3 2 1 rule for groceries?
The 5-4-3-2-1 rule is a shopping method: buy 5 vegetables, 4 fruits, 3 proteins, 2 grains or starches, and 1 treat or fun item per trip. This balance keeps meals varied without overwhelming your cart or your budget.
Is BuJo good for ADHD?
Yes, bullet journaling works well for ADHD brains because it combines visual structure with flexibility. The act of writing down meals builds external accountability, and the ability to redesign layouts keeps the system engaging. Start with a simple weekly grid and adjust as you learn what works.
Conclusion
Setting up a meal-planning spread in your bullet journal takes about 20 minutes the first time, then 10 minutes each week after that. The payoff is real: less food waste, lower grocery bills, and fewer “what’s for dinner” moments.
Start simple with a 4-row weekly grid, add a grocery list and prep box, and adjust your layout as you learn what works. In a month, you’ll have a personalized meal-planning spread that fits your life.