
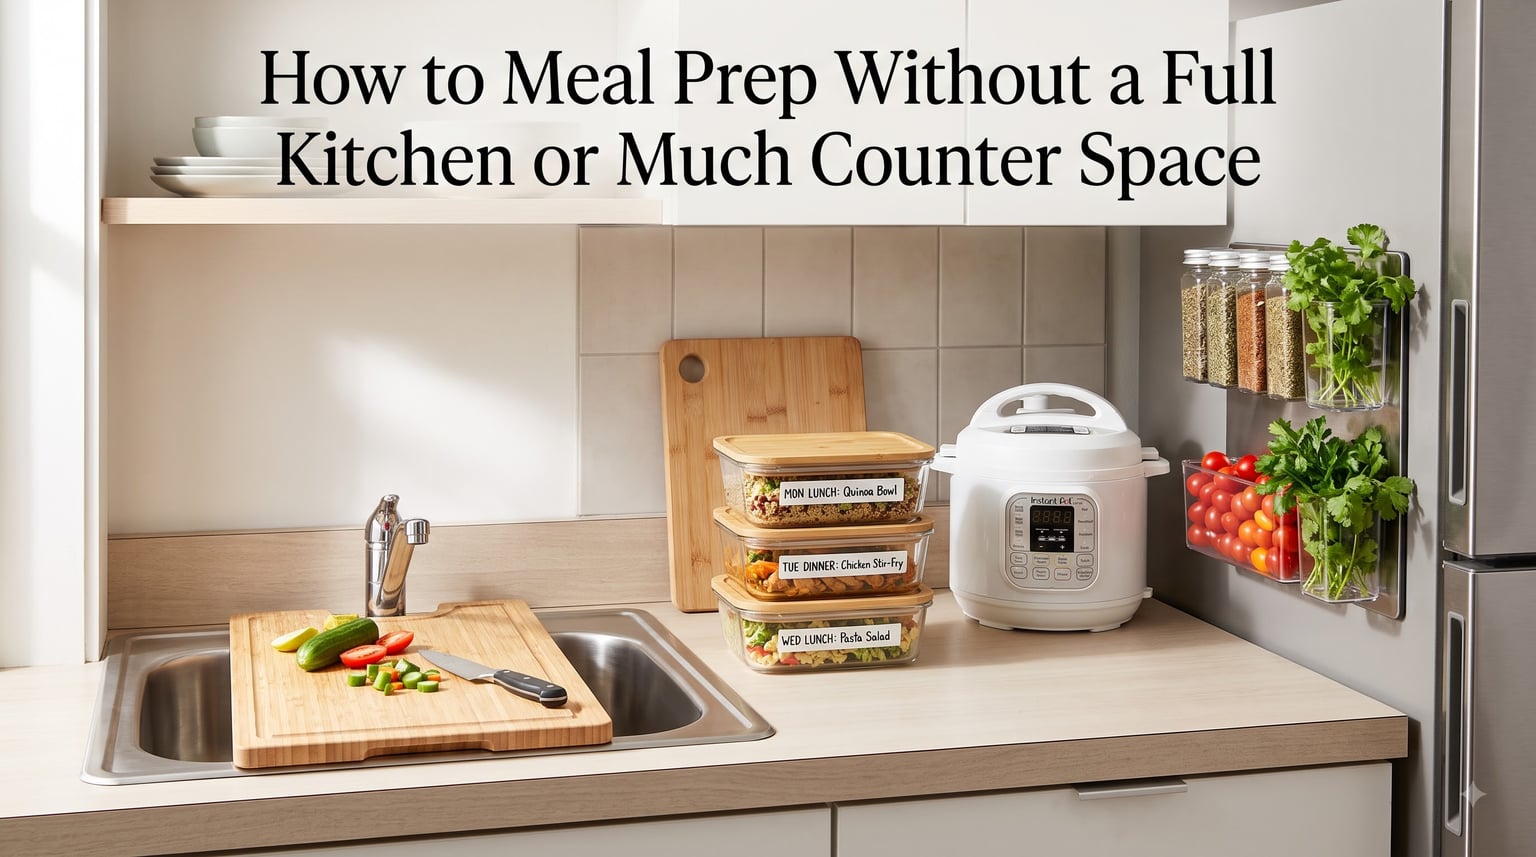
If you’re reading this, you probably know the feeling: you want to eat well, save money, and stop relying on takeout, but your kitchen is barely big enough to hold a cutting board. Maybe you live in a studio apartment with a hot plate and a mini fridge. Maybe you’re in a dorm with a microwave and a shared sink down the hall. Or maybe you’re in an RV where the entire “kitchen” folds away when you’re done.
I’ve been there. So have thousands of people on Reddit’s meal prep communities, where users describe working with as little as 1.5 feet of counter space. The good news? You can absolutely meal prep without a full kitchen or much counter space. You just need a different approach.
In this guide, I’ll walk you through a simple system I call the 3-3-3 Counter Method, designed specifically for people with tight kitchens. Whether you’re prepping for weight loss, budget, or just sanity, these strategies will work even if your entire counter is two square feet.
Table of Contents
- Why Meal Prep in a Small Kitchen Feels Hard (And Why It Shouldn’t)
- The 3-3-3 Counter Method for Meal Prep Without a Full Kitchen
- Equipment That Earns Its 2 Square Feet
- Vertical Storage: Doubling Your Space Without Doubling Your Rent
- No-Cook and Microwave-Only Meal Prep Ideas
- Staged Prepping: How to Prep in Tiny Bursts
- Storage Solutions: Fridge, Freezer, and Counter
- Frequently Asked Questions
- Your Small Kitchen Is Bigger Than You Think
Why Meal Prep in a Small Kitchen Feels Hard (And Why It Shouldn’t)
Let’s be honest about why small-kitchen meal prep feels so overwhelming. When you pull out a cutting board, a knife, three ingredients, and a pan, your counter disappears. Dishes pile up in the sink because there’s nowhere else to put them. The fridge is too small to hold a week of containers. And by the time you’ve cooked one meal, the kitchen looks like a disaster zone.
This is the exact frustration people share in forums. One Reddit user described their kitchen as “a 1.5-foot counter where I can fit a cutting board, a stove and oven, and my sink.” Another said meal prep took them 12 hours because they had to clean as they went, with no room to work efficiently. RV dwellers adapt to total fridge and freezer space of just 7.5 cubic feet. College students balance everything on a desk.
The problem isn’t your kitchen. It’s the approach. Traditional meal prep advice assumes you have acres of counter space, a full-size fridge, and multiple burners going at once. That advice falls apart when you’re working with a fraction of the space.
Here’s the mindset shift: meal prep without a full kitchen isn’t about cooking everything at once. It’s about working in stages, using tools that do multiple jobs, and storing food vertically so your tiny fridge holds more than you think possible. Once you adopt that framework, your small kitchen stops being an obstacle and starts being perfectly adequate.
The 3-3-3 Counter Method for Meal Prep Without a Full Kitchen
The 3-3-3 Counter Method is the framework I use to structure meal prep when counter space is tight. It stands for 3 zones, 3 sessions, 3 days. Here’s how it works.
The 3 Zones
Even the tiniest kitchen has three functional areas you can use as temporary zones. Your first zone is the prep area, which might be a cutting board balanced over the sink or a fold-out table. Your second zone is the cooking area, which could be a single burner, a microwave, or an Instant Pot. Your third zone is the storage area, which is your fridge, freezer, or a cool corner of your counter.
The key is to never use all three zones at the same time. Prep your ingredients, then clear the prep zone completely before you start cooking. Once food is cooked, clear the cooking zone before you move to storage. This single rule eliminates the clutter spiral that makes small kitchens feel impossible.
The 3 Sessions
Instead of one marathon cooking session (which requires tons of counter space and hours of cleanup), break your weekly prep into three short sessions of 20 to 30 minutes each. Here’s a sample schedule:
Session 1 (Sunday evening): Chop vegetables, portion dry ingredients, and mix marinades or dressings. Store everything in containers. This session only uses your prep zone.
Session 2 (Monday or Tuesday): Cook one batch of protein and one batch of grains. This could be chicken in an Instant Pot, rice in the microwave, or eggs boiled on a single burner. You’re only using the cooking zone.
Session 3 (Wednesday or Thursday): Refresh your supply. Cook a second protein, assemble a few no-cook meals, and restock anything running low. This keeps food fresh and prevents the “everything goes bad at once” problem.
The 3 Days
Because most small fridges can’t hold a full seven days of meals safely, design your prep around three-day cycles. Each session produces roughly three days of food. This keeps ingredients fresh, reduces food waste (a major pain point for small-fridge preppers), and gives you flexibility to adjust your menu mid-week.
Three days of breakfasts, lunches, and dinners is typically six to nine containers. That’s manageable even in a mini fridge if you stack smartly, which we’ll cover shortly.
Equipment That Earns Its 2 Square Feet
When you’re short on space, every tool needs to justify the room it takes. Here’s the short list of equipment that does real work in a small kitchen, based on what experienced small-space preppers actually use and recommend.
The Multi-Function Champions
An Instant Pot or similar electric pressure cooker is the single most recommended tool for small-kitchen meal prep. It sautes, pressure cooks, slow cooks, and makes rice, all in one pot that sits on your counter. You can cook an entire batch of chili, shredded chicken, or hard-boiled eggs without touching your stove. One device replaces a pot, a pan, and a rice cooker.
A multi-function vegetable chopper with interchangeable blades lets you dice, slice, and spiralize without pulling out a cutting board, a knife, and three different gadgets. It’s compact, easy to clean, and dramatically reduces your active prep time.
A collapsible strainer or colander folds flat to the thickness of a dinner plate. You can store it in a drawer or hang it on a hook. It takes up almost no space but handles everything from draining pasta to rinsing beans.
The Space-Saving Essentials
Over-sink cutting boards turn your sink into extra counter space instantly. You can prep ingredients over the sink, then wash the board and tuck it away. This is a game-changer for kitchens where the counter is too small for both a cutting board and a bowl.
Magnetic spice racks attach to your fridge or a metal backsplash, freeing up cabinet and drawer space. Instead of 15 jars cluttering a shelf, they live vertically on a surface you weren’t using anyway.
Tension rods placed under the sink or inside a cabinet create instant dividers for cutting boards, baking sheets, and lids. They cost under $10 and solve the “everything falls out when I open the cabinet” problem.
Vertical Storage: Doubling Your Space Without Doubling Your Rent
If you can’t spread out, go up. Vertical storage is the single most effective way to create room in a tiny kitchen, and most people underuse it dramatically.
On the Counter
Use tiered shelf risers to stack containers, cans, and jars vertically instead of lining them up in a single row. A two-tier riser that takes up one square foot of counter can hold twice as much as the same area flat. U-shaped wire risers are ideal because they let you see everything at a glance.
Wall-mounted organizers above your counter can hold utensils, paper towels, oven mitts, and lightweight tools. Command hooks and magnetic strips keep your most-used items accessible without claiming counter real estate.
In the Fridge
Small fridges waste a lot of vertical space because the shelves are spaced too far apart. Add stackable shelf inserts or use containers that are designed to nest. Square containers stack more efficiently than round ones. The “perfect Tetris” approach, packing containers tightly with no wasted gaps, can increase your fridge capacity by 30 to 40 percent.
Keep ready-to-eat meals on the middle shelf at eye level, raw ingredients on the bottom shelf, and drinks and condiments in the door. This system makes it easy to grab what you need without shuffling everything around.
In Cabinets and on Walls
Over-the-door organizers aren’t just for closets. An over-the-cabinet-door rack can hold foil, plastic wrap, cleaning supplies, or lightweight snacks. Under-shelf baskets slide onto existing cabinet shelves to create a second layer of storage for small items.
If you have a blank wall near your kitchen area, a pegboard system (like the classic IKEA SKADIS) can hold utensils, small pots, measuring cups, and even a lightweight pan. Everything is visible and within reach, but nothing touches your counter.
No-Cook and Microwave-Only Meal Prep Ideas
One of the biggest questions I see in forums is: what can I actually make without a stove? Whether you’re in a dorm, a hotel room, or an apartment with a broken oven, no-cook and microwave-only meal prep is not only possible, it can be genuinely good.
High-Protein No-Cook Meals
Greek yogurt parfaits: Layer Greek yogurt with granola, berries, and a drizzle of honey in jars. Prep three at a time. They last four days in the fridge and pack 20-plus grams of protein each.
Tuna or chicken salad jars: Mix canned tuna or chicken with Greek yogurt, mustard, diced celery, and seasonings. Serve with crackers, over greens, or stuffed in a wrap. No cooking required.
Overnight oats: Combine rolled oats, milk (or a milk alternative), chia seeds, and fruit in a jar. Let it sit overnight. You can prep five days’ worth in about 10 minutes with zero cooking.
Chickpea salad sandwiches: Mash canned chickpeas with mayo or avocado, add diced onion and celery, season heavily. It tastes like chicken salad but is entirely plant-based and takes five minutes.
Microwave-Only Meals
Mug meals: Crack two eggs into a mug, add cheese, spinach, and a splash of milk, and microwave for 90 seconds. You get a fluffy microwave omelet in under two minutes with zero pans to wash. Mug mac and cheese (pasta, water, cheese, microwave) works too.
Microwave-baked potatoes: Poke holes in a potato, microwave for 5 to 7 minutes, and top with black beans, salsa, cheese, and Greek yogurt. It’s a full meal with almost no cleanup.
Steamed vegetables: Put broccoli, green beans, or carrots in a microwave-safe bowl with a splash of water, cover with a plate, and microwave for 3 to 4 minutes. Crisp-tender vegetables every time.
Microwave rice and grains: Many stores sell pre-cooked microwave rice pouches that are ready in 90 seconds. Pair with canned beans, salsa, and pre-cooked chicken for instant burrito bowls.
Assembly-Only Meals (Zero Heat)
Trail mix snack packs: Portion nuts, dried fruit, and dark chocolate into small bags or containers. Grab-and-go protein that needs no fridge.
Hummus and veggie boxes: Scoop hummus into containers and pack with carrot sticks, cucumber slices, and pita wedges.
Peanut butter banana wraps: Spread peanut butter on a tortilla, add a banana, roll, and slice. Three minutes, four ingredients, portable.
Staged Prepping: How to Prep in Tiny Bursts
The biggest mistake small-kitchen preppers make is trying to do everything in one session. That works in a big kitchen where you can spread out. In a tiny kitchen, it creates chaos. Staged prepping, also called “batch-in-stages,” solves this by breaking your prep into short focused bursts.
The 30-Minute Weekly Plan
If you genuinely have no time, here’s a 30-minute plan that produces three days of meals:
Minutes 1 to 10: Chop all your vegetables for the next three days. Onions, peppers, cucumbers, whatever you’ll eat. Store them in one container each or grouped by meal.
Minutes 10 to 20: Cook one protein. This could be microwaving pre-cooked chicken strips, boiling eggs on a single burner, or pressure-cooking a batch of beans in an Instant Pot. Let it rest while you move on.
Minutes 20 to 30: Assemble three lunch containers using your prepped veggies, cooked protein, and a simple dressing or sauce. Clean your knife, cutting board, and one pan. Done.
The 1-Hour Weekly Plan
If you have an hour, you can prep more substantially:
Minutes 1 to 15: Chop vegetables and portion dry ingredients. Mix one batch of overnight oats for breakfasts.
Minutes 15 to 35: Cook two items simultaneously. Use your Instant Pot for grains or beans while you cook protein on the stove or in the microwave. Two zones, not three.
Minutes 35 to 50: Assemble containers for three lunches and three dinners. Layer grains, protein, and vegetables in stackable containers. Portion snacks into bags.
Minutes 50 to 60: Clean everything. Wipe down your single counter. Put away all tools. Your kitchen should look exactly as it did before you started, minus the containers now in your fridge.
The Psychology of Short Bursts
One thing competitors rarely mention: the mental overwhelm of a tiny kitchen is real. When your kitchen is small, the mess feels bigger because it takes up a larger percentage of your visible space. Short, focused prep bursts keep the chaos contained. You start clean, work in one zone, and end clean. That psychological reset is why staged prepping works even when traditional meal prep fails.
Storage Solutions: Fridge, Freezer, and Counter
Storage is where most small-kitchen meal prep plans fall apart. You cooked the food, but now where does it go? Here’s how to store a week of meals when your fridge is the size of a dorm room.
What Stays on the Counter
Free up fridge space by storing produce that doesn’t need refrigeration on the counter. These items are safe at room temperature: potatoes, onions, garlic, winter squash, tomatoes (they lose flavor in the fridge), bananas, citrus fruits, avocados (until ripe), and apples (for up to a week).
Some produce can sit on the counter for a day or two before moving to the fridge: bell peppers, cucumbers, and fresh herbs in a glass of water. This staged approach keeps fridge space free for prepared meals while preventing spoilage.
Fridge Tetris: Stacking for Maximum Capacity
Use rectangular containers, not round ones. Rectangles pack together with zero wasted space between them. Invest in containers of the same brand and size so they stack perfectly. Mixed containers create uneven stacks and wasted vertical space.
Label everything with the date using masking tape and a marker. In a small fridge where containers get moved around, labels prevent the “mystery container” problem that leads to food waste. Write the meal name and the date you prepped it.
Store the meals you’ll eat first at the front and top. Put later meals in the back and bottom. This rotation system ensures nothing gets forgotten and pushed to the back of the fridge to spoil.
Freezer Strategies for Tiny Freezers
If your freezer is just a shelf inside your fridge, you have limited options but they’re still useful. Freeze cooked proteins in single-portion flat bags (they stack like books). Freeze smoothie ingredients in pre-portioned bags so you can dump, blend, and go.
Don’t freeze things in bulky containers if space is tight. Flat freezer bags take up a fraction of the room and thaw faster. Label them clearly, because once they’re frozen, they all look the same.
Pantry Ingredients That Save the Day
Stock space-saving pantry staples that require minimal or no cooking. Canned beans, microwave rice pouches, instant couscous (just add hot water), canned tuna and chicken, nut butters, and shelf-stable hummus. These ingredients form the backbone of no-cook and microwave-only meal prep and take up almost no fridge space.
Whole wheat couscous is a particularly smart choice. You just pour boiling water over it, cover, and wait five minutes. No stove time beyond boiling water. It’s compact, shelf-stable, and pairs with almost any protein or vegetable.
Frequently Asked Questions
What is the 3-3-3 rule for meal prep?
The 3-3-3 rule for meal prep means working with 3 zones (prep, cook, store), breaking your weekly prep into 3 short sessions instead of one marathon, and planning food in 3-day cycles so your small fridge can handle it without spoilage. It is designed specifically for people with limited counter space.
What to do if you don’t have a lot of counter space?
If you don’t have much counter space, use an over-sink cutting board to create instant prep area, store tools vertically on wall hooks and magnetic strips, break prep into short single-zone sessions, and clean as you go so clutter never builds up. Work on one task at a time rather than spreading everything out.
What meals can you make without a kitchen?
You can make overnight oats, Greek yogurt parfaits, tuna salad jars, chickpea salad sandwiches, hummus and veggie boxes, peanut butter banana wraps, microwave mug omelets, microwave baked potatoes with toppings, and no-cook burrito bowls using canned beans and microwave rice. None of these require a stove or oven.
How to meal prep without a microwave?
You can meal prep without a microwave by focusing on no-cook meals like salads, wraps, overnight oats, and cold grain bowls. Use a slow cooker or Instant Pot for batch cooking, or boil water on a single burner for instant couscous, couscous, and packet rice. Store meals in insulated containers if you want them warm at lunchtime.
What are some easy meal ideas if I don’t have a kitchen?
Easy no-kitchen meal ideas include canned tuna or chicken pouches with crackers, peanut butter and jelly wraps, trail mix snack packs, overnight oats in jars, hummus with pita and veggies, canned soup heated in a mug with hot water from a kettle, and pre-cooked microwave rice with canned beans and salsa. These require zero or minimal equipment.
How do I store meal prep food without much fridge space?
Store meals in rectangular stackable containers of the same size for maximum efficiency. Keep room-temperature-safe produce like potatoes, onions, and tomatoes on the counter. Use the three-day rotation system so you only store three days of food at once. Freeze flat portions in freezer bags to save space and thaw quickly.
Your Small Kitchen Is Bigger Than You Think
Meal prep without a full kitchen or much counter space is entirely doable once you stop trying to replicate a big-kitchen workflow. The 3-3-3 Counter Method gives you a framework: use three zones one at a time, break prep into three short sessions, and plan in three-day cycles that fit your fridge.
Pair that method with the right space-saving tools, an Instant Pot that earns its counter spot, vertical storage that uses walls and doors instead of precious counter, and a rotation of no-cook and microwave meals for the days you can’t face the stove. That’s everything you need.
Start small. Pick one session this week, prep three lunches using ingredients you already have, and see how it feels. Once you experience the relief of opening your fridge to ready-to-go meals, that tiny kitchen starts feeling like plenty.