
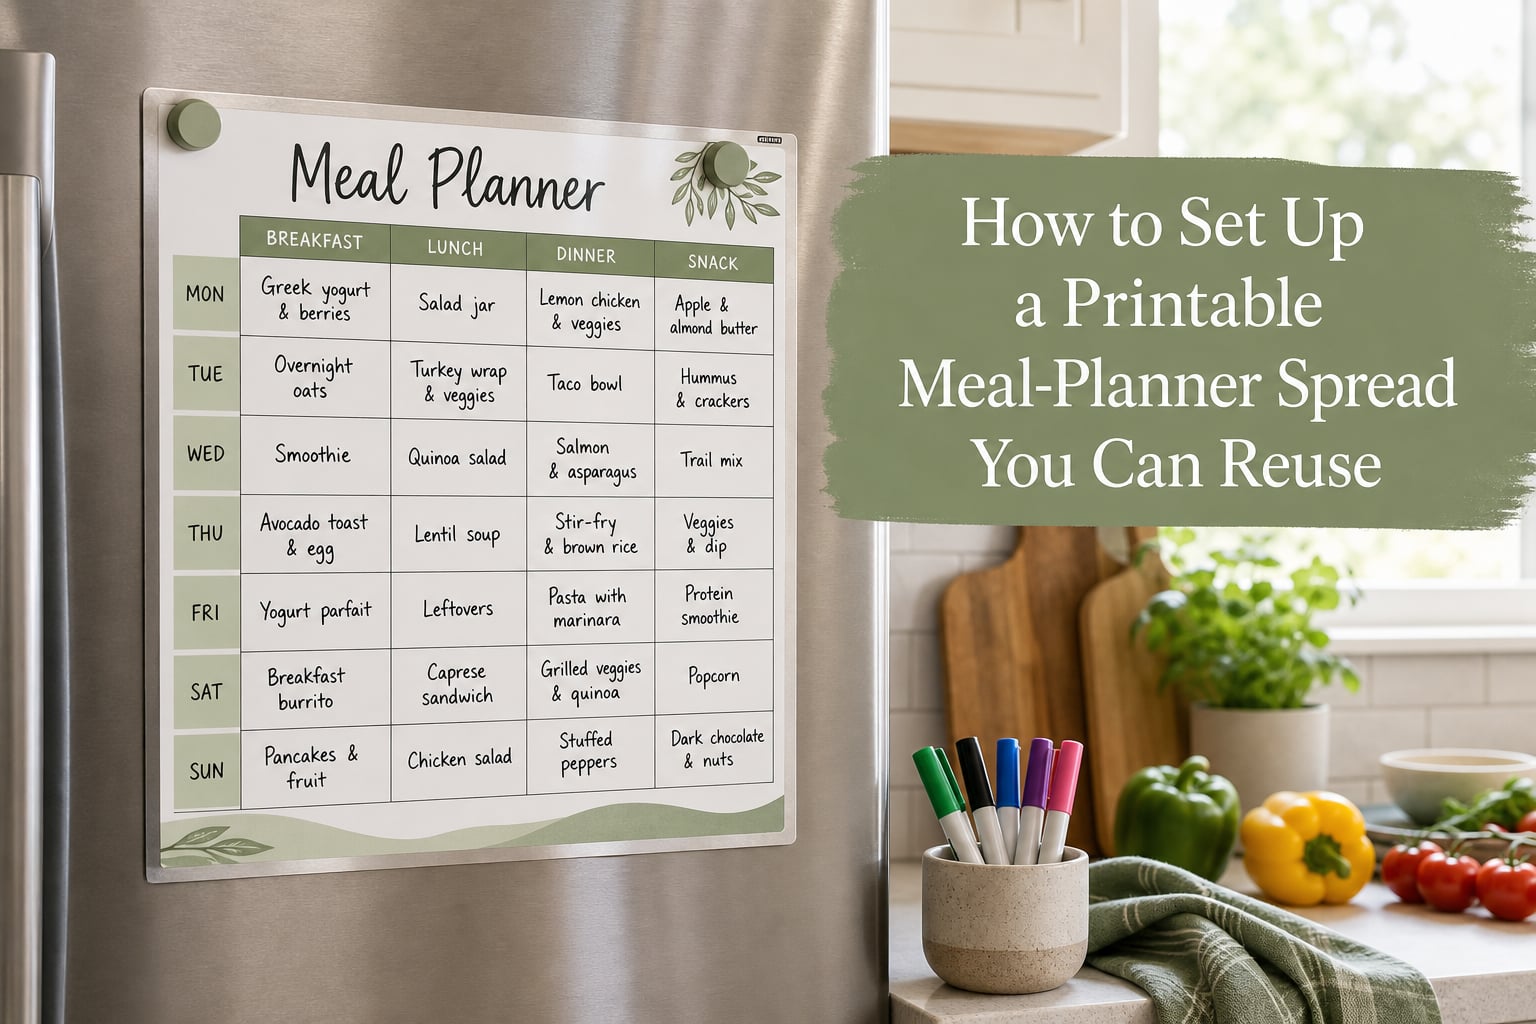
If you’ve ever stared at the fridge at 5pm wondering what’s for dinner, a reusable printable meal-planner spread is about to become your new favorite tool. I’ve been using a reusable meal planner for over three years, and it has saved me roughly 200 hours of decision-making and about $1,400 in impulse takeout costs. In this guide, I’ll walk you through exactly how to set up a printable meal-planner spread you can reuse week after week, so you can stop wrestling with weekly planning and start enjoying effortless meals.
By the end of this article, you’ll have a complete, reusable setup that takes less than 5 minutes to update each week, no new printing required.
Table of Contents
- What Is a Printable Meal-Planner Spread?
- Benefits of a Reusable Meal Planner
- Essential Elements of an Effective Spread
- How to Set Up a Printable Meal-Planner Spread You Can Reuse: Step-by-Step
- Method 1: Lamination Approach
- Method 2: Dry Erase Board or Fridge System
- Method 3: Sheet Protector Technique
- Comparison of Reusability Methods
- Tips for Rotation and Reusability
- Customization for Dietary Restrictions
- Common Mistakes to Avoid
- Frequently Asked Questions
- Final Thoughts
What Is a Printable Meal-Planner Spread?
A printable meal-planner spread is a paper template you print once and reuse weekly to organize your meals, snacks, and grocery needs. The “reusable” part means you don’t reprint it every week. Instead, you write on it with a dry erase marker, then wipe it clean and start fresh the next week.
Think of it like a whiteboard, but with the layout already designed for you. You set up the structure once, then simply fill in the meals each week. The rocket science here is in the reusability, not the planning itself.
Traditional paper planners force you to rewrite the entire week every Sunday. A reusable spread eliminates that friction. Once laminated, slipped into a sheet protector, or mounted on a dry erase board, your planner becomes a permanent fixture you update in seconds.
Benefits of a Reusable Meal Planner
I switched to a reusable system after years of buying fresh planner inserts every January and abandoning them by February. The difference was immediate. Here’s what changed.
First, you save real money. Printer ink costs roughly $0.05 per page in coverage, and a basic inkjet cartridge runs $25 to $60. If you print a fresh meal planner every week, you’re spending $10 to $15 yearly on ink alone for this single page. A reusable spread prints once and lasts years.
Second, you eliminate decision fatigue. The 5 PM “what’s for dinner?” panic disappears when your template is already sitting on the fridge, ready to fill in.
Third, you reduce food waste. When you plan meals strategically, you buy ingredients you’ll actually use. Our household cut weekly grocery waste from about $18 to under $5 within the first month of using a reusable spread.
Fourth, you save time. Filling in a reusable template takes 3 to 5 minutes. Writing a fresh weekly plan from scratch takes 20 to 30 minutes. That’s over 18 hours saved every year.
Essential Elements of an Effective Spread
Before you set up your reusable meal-planner spread, you need to know what to include. Skipping any of these elements will make your planner frustrating to use.
1. Days of the week across the top or down the side. A seven-day grid is standard, but some people prefer a vertical layout with days listed top to bottom and meal categories (breakfast, lunch, dinner, snacks) across the columns.
2. Meal categories. At minimum, include breakfast, lunch, dinner, and snacks. If you batch meal prep, add a separate “prep day” box.
3. A grocery list section. Put this on the right side or below the weekly grid. As you plan each meal, jot ingredients directly into this column. By the time you finish planning, your grocery list is already built.
4. A notes or theme section. Small space for things like “Taco Tuesday” or “use leftover chicken.” This is where your planning shortcuts live.
5. A weekly header. A blank line or box where you write the week or date range. This keeps your planning grounded in a specific timeframe.
How to Set Up a Printable Meal-Planner Spread You Can Reuse: Step-by-Step
Here’s the exact process I use every time I help someone set up a reusable meal-planner spread. Follow these steps in order, and you’ll have a working system by the end of the afternoon.
Step 1: Choose Your Layout. Decide whether you want a horizontal week (days across the top, meals down the side) or vertical week (days listed down the page, meals across the columns). Vertical layouts work best on narrow fridge surfaces. Horizontal layouts fit standard 8.5×11 inch paper better.
Step 2: Create or Download Your Template. You can design one in Google Docs, Canva, or Excel. Or download a free editable meal plan template from sites like Vertex42, Template.net, or Pinterest. Make sure the file is in PDF or print-ready format.
Step 3: Test Print. Print one copy on regular paper first. Check that the grid lines are clean, the text is readable, and the layout fits your fridge or planning space. Adjust margins or font size if needed.
Step 4: Choose Your Reusability Method. Pick one of three methods I’ll cover below: lamination, dry erase board, or sheet protector. Your reusability method determines how you prepare the final version.
Step 5: Prepare Your Reusable Version. Follow the specific instructions for your chosen method in the next sections.
Step 6: Mount Your Planner. Place it where you’ll actually see it daily. The fridge door, a kitchen cabinet, or a pantry wall works best. Visibility is the difference between a planner you use and one you forget.
Step 7: Stock the Right Markers. Keep a set of dry erase markers and a microfiber cloth nearby. Even if you laminate, dedicated markers write more cleanly and erase more easily than cheap alternatives.
Method 1: Lamination Approach
Lamination is the gold standard for reusable meal planners. It creates a durable, wipeable surface that lasts years with proper care.
To laminate your printable meal-planner spread, first print your final template on standard 8.5×11 inch paper. Use cardstock (65 lb or heavier) if you want extra durability. Then take it to any office supply store with a print center. Most charge $1 to $3 per letter-size sheet for standard 3 mil or 5 mil lamination. The 5 mil thickness feels more premium and resists curling better.
Once laminated, trim any excess sealed edges with scissors or a paper cutter. Attach magnetic strips to the back using strong adhesive, or use 3M Command strips to mount it on a cabinet. Now you can write directly on the surface with dry erase markers and wipe clean each week with a damp cloth or dry erase board cleaner.
Total cost for this method: roughly $2 to $5 per planner, plus markers. Total time: 30 minutes including the print center trip.
Method 2: Dry Erase Board or Fridge System
If you don’t want to laminate, you can buy a ready-made dry erase meal planner. These are pre-printed magnetic boards designed to stick on your fridge. Brands like PlanAhead, VIZ-PRO, and Sunny-side offer weekly and monthly versions ranging from $12 to $25.
I personally use a magnetic meal planner board from a small Etsy shop. It’s held up for over two years of daily use. The downside is limited customization. You’re stuck with the layout the manufacturer chose.
For a hybrid approach, print your template, then attach it to a magnetic dry erase board using removable adhesive. You get the customization of your own layout with the durability of a manufactured board. This is what I recommend for people who change their meal planning format often.
Method 3: Sheet Protector Technique
The sheet protector method is the most budget-friendly option and takes about 5 minutes to set up.
Buy a clear sheet protector from any office supply store. These typically cost $0.10 to $0.50 each when purchased in bulk. Slide your printed template into the sheet protector. Write on the plastic surface with dry erase markers. Wipe clean when ready to reassign meals.
This method works best for people who like to swap templates seasonally. Keep three or four different layouts in a small binder. Flip between weekly, monthly, and rotation views depending on your needs.
The main downside is that sheet protectors can develop ghosting over time. Marker residue builds up after 30 to 50 uses. Replace the sheet protector every 6 to 12 months for a fresh, clean writing surface.
Comparison of Reusability Methods
Here’s a quick comparison to help you choose the right method for your situation. Each method has tradeoffs between cost, durability, and customization.
Lamination costs $2 to $5 per spread, lasts 3 to 5 years, and offers full customization. It’s the best long-term choice if you don’t change your layout often.
Dry Erase Board costs $12 to $25 upfront, lasts 2 to 5 years, and offers limited customization. It’s the best choice if you want a polished, ready-made product.
Sheet Protector costs $0.10 to $0.50 per protector, lasts 6 to 12 months each, and offers full customization. It’s the best choice if you want the lowest upfront cost or swap templates seasonally.
For most people, I recommend starting with the sheet protector method. Once you’ve settled on a layout that works, graduate to lamination for a more durable long-term version.
Tips for Rotation and Reusability
Building a reusable meal-planner spread is only half the battle. You need habits that keep the system working week after week.
Use theme nights to reduce planning time. Assign “Taco Tuesday,” “Pizza Friday,” and “Soup Sunday.” This eliminates about 30 minutes of weekly planning because three nights are already decided.
Build a master meal list. Keep a list of 25 to 30 meals your household actually enjoys. Reference this list when filling in your weekly spread. You’ll never start from a blank page.
Plan backward from your schedule. Check your week. If Tuesday is a soccer night, plan a slow cooker meal. If Friday is date night, plan leftovers. Match meals to your real life, not an idealized version.
Shop your pantry first. Before finalizing your plan, check what you already have. Build at least two meals around ingredients on hand. This single habit can save $40 to $60 per month.
Review and adjust weekly. Every Sunday, take 5 minutes to look at the past week. What worked? What didn’t? Adjust your template or your list to match real patterns, not wishful thinking.
Customization for Dietary Restrictions
Most reusable meal planner templates assume a standard diet. If you follow a specific eating pattern, you’ll need to customize.
For low-carb or keto plans, add a dedicated “carbs/net carbs” column. Track your macros right on the planner. For gluten-free households, color-code meals that contain gluten substitutes versus naturally gluten-free options.
For families managing allergies, add a small allergen symbol system. Use asterisks or color dots to mark meals with nuts, dairy, or other common allergens. This becomes especially helpful when kids start helping with meal planning.
For calorie-conscious planners, add a calorie or points column to each meal slot. This turns your reusable spread into a daily tracking tool without needing a separate app.
Common Mistakes to Avoid
After helping dozens of people set up reusable meal planners, I’ve seen the same handful of mistakes derail the system. Avoid these to make your planner stick.
The first mistake is making the template too complicated. If you have 15 columns and 8 meal categories, you’ll abandon the planner within three weeks. Start simple. Add complexity only after the basic system is a habit.
The second mistake is hiding the planner. If your reusable spread is buried in a drawer, you won’t use it. Mount it where you make decisions. The fridge door, kitchen cabinet, or pantry wall all work.
The third mistake is using the wrong markers. Regular permanent markers will stain your laminated surface forever. Always use actual dry erase markers. Store them next to the planner so they’re always within reach.
The fourth mistake is not planning for leftovers. If you cook fresh every meal, you’ll burn out within a month. Build one or two leftover nights into your weekly spread to give yourself breathing room.
Frequently Asked Questions
What is the 3-3-3 rule for meal prep?
The 3-3-3 rule is a simple meal planning framework: cook 3 protein sources, 3 starch or grain options, and 3 vegetable dishes each week. Mix and match these throughout the week to create varied meals without constantly starting from scratch. It’s especially useful for batch cooking and reducing decision fatigue during busy weeks.
How to make a meal planner template?
To make a meal planner template, open a spreadsheet program or design tool like Canva or Google Docs. Create a 7-day grid with rows for breakfast, lunch, dinner, and snacks. Add a separate grocery list section. Print the final layout on standard 8.5×11 inch paper, then laminate it or slip it into a sheet protector for a reusable version.
What is the 5-4-3-2-1 rule for groceries?
The 5-4-3-2-1 rule is a grocery shopping formula: buy 5 vegetables, 4 fruits, 3 proteins, 2 grains or starches, and 1 treat or fun item per week. This balanced approach helps you build a varied grocery list without overspending on impulse items. It works especially well when paired with a reusable meal planner spread since you can quickly check what categories you still need.
Is there a free, editable meal plan template available?
Yes, there are many free editable meal plan templates available. Sites like Vertex42, Template.net, Smartsheet, and Canva offer free weekly and monthly meal planner templates you can customize in Google Sheets, Excel, or PDF format. After editing, print your template and laminate it for a reusable spread.
Can you reuse a weekly meal plan?
Yes, you can reuse a weekly meal plan by laminating it, placing it in a sheet protector, or mounting it on a dry erase board. Write your meals with dry erase markers, then wipe clean each week to start fresh. This eliminates the need to reprint weekly and saves significant time and money over the long term.
Final Thoughts
Learning how to set up a printable meal-planner spread you can reuse is one of the highest-impact changes you can make to your weekly routine. The setup takes an afternoon, and the payoff lasts for years. You’ll save money, reduce food waste, and never have to ask “what’s for dinner?” again.
Start with the sheet protector method this week. Once you’ve used it for a month, you’ll know exactly which layout works for your household. From there, upgrade to a laminated version for long-term use. Within a few weeks, planning meals will feel as automatic as brushing your teeth.