
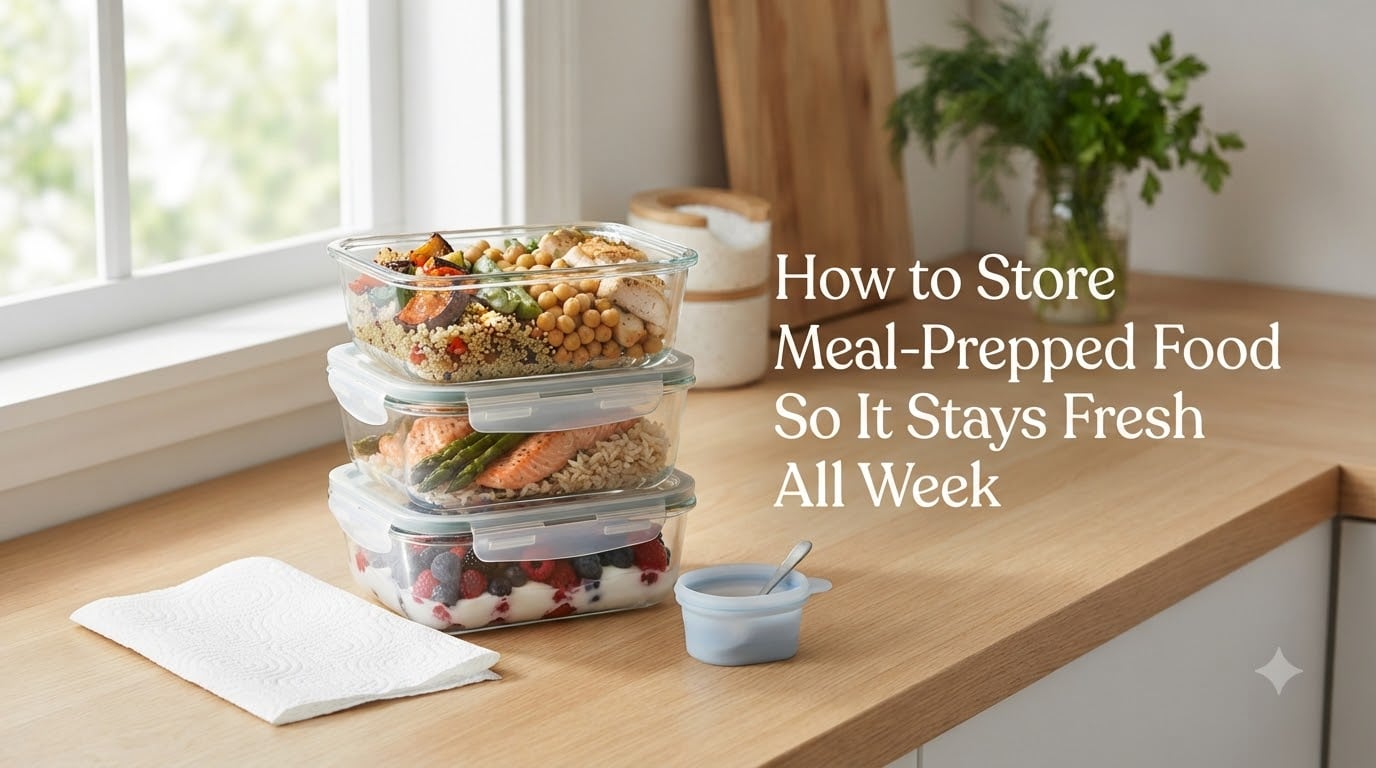
I have been meal-prepping for over a decade, and the most common question I get from readers is the same one I asked when I started: how do you keep meal-prepped food fresh all week without it turning into a soggy, bland mess by Thursday? It is a fair question, because storing food wrong is the single biggest reason people quit meal prep after just a few weeks.
The good news is that knowing how to store meal prep food is not complicated once you understand a few foundational principles. In this guide I will walk you through the exact system I use to prep meals that stay fresh, flavorful, and safe to eat for the full week. I will cover the 3-3-3 rule (a strategy almost no article fully explains), moisture management hacks that prevent sogginess, and storage timelines for every major food type.
By the end, you will have a complete framework for keeping your batch-cooked meals tasting like they were made the same day. I will also share the FDA food safety guidelines that keep you on the right side of the bacterial danger zone. Let us get into it.
Table of Contents
- Quick Answer: What Is the 3-3-3 Rule for Meal Prep?
- Why Meal Prep Food Goes Bad Faster Than You Think
- Food Safety Foundations: The FDA Guidelines You Need to Know
- Refrigerator vs Freezer: Where Should You Store Each Meal?
- Choosing the Best Containers for Meal Prep Storage
- Moisture Management Hacks: How to Keep Meal Prep From Getting Soggy
- Safe Storage Times by Food Type: Proteins, Grains, Vegetables, and More
- The FIFO System and Labeling Strategy for Weekly Meal Prep
- Special Storage Tips for Salads, Pasta, Sandwiches, and Soups
- Reheating Meal Prep Without Losing Flavor or Texture
- FAQs
- Final Thoughts: Keep Your Meal Prep Fresh All Week
Quick Answer: What Is the 3-3-3 Rule for Meal Prep?
The 3-3-3 rule for meal prep is a simple storage framework that keeps your food fresh, safe, and organized. It works like this: cook enough food for 3 days, store it in the fridge for up to 3 days, and eat it within 3 days of reheating any portion. The goal is to keep meals cycling through your fridge before quality drops off.
Here is how the 3-3-3 rule breaks down in practice:
Cook for 3 days: Batch-cook enough meals to cover three days of eating. This keeps food at peak freshness instead of letting it sit for a full week.
Refrigerate for 3 days: Store cooked meals in airtight containers in the fridge for no more than 3-4 days. This is the sweet spot where flavor and safety overlap.
Freeze the rest: Anything you will not eat within 3 days goes straight into the freezer. You can pull it out later in the week for days 5, 6, and 7.
The 3-3-3 rule solves the biggest problem with seven-day meal prep: most cooked food does not taste great after four days in the fridge. By splitting your prep between fridge and freezer, you get the convenience of weekly batch cooking without sacrificing quality. This is the exact system I recommend in my beginner’s guide to weekly meal prep.
Why Meal Prep Food Goes Bad Faster Than You Think
Meal prep food degrades faster than home-cooked meals eaten the same day for three reasons: bacterial growth, moisture migration, and oxidation. Once you understand what is actually happening inside your containers, the storage rules start to make sense.
Bacteria grow most rapidly between 40 and 140 degrees Fahrenheit. The FDA calls this range the danger zone. Food left in the danger zone for more than two hours becomes unsafe to eat. When you pack hot food into a sealed container and put it in the fridge, the inside of that container can sit in the danger zone for hours.
Moisture migration is the second culprit. When warm food cools inside a sealed container, condensation forms on the lid and drips back down. This is why your rice gets gummy, your greens wilt, and your crispy chicken turns soft. The moisture has nowhere to go, so it pools on top of your food.
Oxidation is the third factor. Exposure to air causes fats to go rancid and vegetables to lose color and nutrients. This is why airtight containers matter so much. The less air inside the container, the slower the oxidation process.
These three forces work together, which is why food that sits for five days in a poorly sealed container tastes dramatically worse than food stored properly for three days.
Food Safety Foundations: The FDA Guidelines You Need to Know
Food safety is the foundation of good meal prep storage. Every technique I share in this guide builds on the following FDA-aligned principles.
The 2-hour rule: Cooked food should be refrigerated within 2 hours of cooking. If the temperature in your kitchen is above 90 degrees Fahrenheit, that window shrinks to 1 hour. This is non-negotiable for food safety.
The danger zone is 40-140 degrees Fahrenheit. Bacteria multiply rapidly in this range. Your fridge should be set to 40 degrees or below. Use a refrigerator thermometer to verify, because the built-in dial is often inaccurate.
Safe storage time for cooked meals: The FDA recommends eating refrigerated cooked meals within 3 to 4 days. This applies to cooked chicken, beef, rice, pasta, and most vegetables. After 4 days, the risk of foodborne illness increases significantly.
Cool food before sealing: Let hot food cool to room temperature on the counter for 20-30 minutes before sealing it in airtight containers. Do not leave it out longer than 2 hours total. Cooling first prevents condensation buildup inside the container.
Reheat to 165 degrees Fahrenheit: When reheating meals, bring the food to an internal temperature of at least 165 degrees to kill any bacteria that developed during storage. Use a food thermometer if you want to be certain.
These guidelines are not just theory. I have followed them for years of weekly meal prep without a single case of food poisoning. The rules are simple, and they work.
Refrigerator vs Freezer: Where Should You Store Each Meal?
The fridge versus freezer decision comes down to when you plan to eat each meal. Meals you will eat within 3-4 days go in the fridge. Meals for days 5-7 go in the freezer. This is the core of the 3-3-3 rule.
Refrigerator storage (days 1-4): Use the fridge for meals you will eat Monday through Thursday. Most cooked proteins, grains, and vegetables stay fresh for 3-4 days when stored properly in airtight containers. The fridge preserves texture and flavor better than the freezer, so prioritize it for meals you will eat soonest.
Freezer storage (days 5-7): Freeze meals for Friday through Sunday. The freezer extends the life of cooked food to 2-3 months, but for meal prep purposes, you are usually freezing for a few days to a week. Freezing pauses bacterial growth and locks in freshness.
How to freeze meal prep properly: Cool the food completely before freezing. Use freezer-safe containers or heavy-duty freezer bags. Remove as much air as possible to prevent freezer burn. Label each container with the contents and date.
Thawing frozen meals: The safest method is to transfer frozen meals to the fridge the night before you plan to eat them. This allows slow, even thawing. You can also thaw in the microwave using the defrost setting, but fridge thawing produces better texture.
What not to freeze: Salads, raw greens, boiled eggs, and creamy dairy-based sauces do not freeze well. They become watery or grainy when thawed. If your meal includes these components, store them separately in the fridge and add them fresh.
Choosing the Best Containers for Meal Prep Storage
The container you choose affects freshness, food safety, and reheating quality more than any other variable. Here is how I think about container selection after testing dozens of options.
Glass containers with snap-locking lids: These are my top recommendation for most people. Glass does not absorb odors or stain from tomato-based sauces. It is microwave-safe, oven-safe, and dishwasher-safe. The downside is weight and breakability. Popular brands include Glasslock and Pyrex, both frequently recommended in meal prep communities.
Plastic containers: Plastic is lightweight, cheap, and does not break. The tradeoff is that it stains easily, absorbs odors over time, and may warp in the microwave. If you use plastic, look for BPA-free, microwave-safe options. Replace them when they become cloudy or scratched.
Airtight seals matter most: Whatever material you choose, the lid must create an airtight seal. This is what prevents oxidation, slows bacterial growth, and keeps moisture from escaping. Test a container by filling it with water, sealing it, and turning it upside down. If it leaks, it is not airtight.
Divided containers for component separation: Containers with built-in compartments let you separate wet and dry ingredients in a single meal. This is especially useful for grain bowls, bento-style lunches, and meals with sauces.
Silicone cup inserts: Small silicone cups fit inside larger containers and keep individual components separated. Use them for dressings, dips, nuts, or anything that should stay dry until you eat. Reddit’s MealPrepSunday community swears by these for texture preservation.
Moisture Management Hacks: How to Keep Meal Prep From Getting Soggy
Moisture is the enemy of meal prep. It makes rice gummy, wilts greens, and turns crispy foods soft. After years of trial and error, these are the moisture management hacks that actually work.
The paper towel trick: Place a dry paper towel inside your container on top of the food before sealing. The paper towel absorbs excess condensation that forms as the food cools. This single hack extends the freshness of salads, roasted vegetables, and grains by 1-2 days. Replace the paper towel every time you open the container.
Cool before sealing: Never seal hot food in an airtight container. The steam has nowhere to go and turns into condensation that pools on your food. Let food cool on the counter for 20-30 minutes, then seal and refrigerate. This is the most common mistake I see beginners make.
Separate wet and dry components: Store dressings, sauces, and soups in separate small containers rather than mixing them into your meal. Add the dressing right before eating. This keeps salads crisp, rice from getting mushy, and bread from going soggy.
Use silicone cups for small components: Place a silicone cup inside your meal prep container for things like nuts, croutons, cheese, or fruit. These items turn unpleasant when they absorb moisture from other foods. The silicone cup creates a barrier.
Drain excess liquid before storing: If you are storing something like sliced tomatoes, cucumbers, or marinated vegetables, drain the liquid before packing. Use a paper towel to pat wet vegetables dry before they go into the container.
Do not overfill containers: Leave half an inch of space between the food and the lid. Overfilled containers trap more air and moisture, which accelerates spoilage. That small gap also gives you room to add a paper towel on top.
Safe Storage Times by Food Type: Proteins, Grains, Vegetables, and More
Different foods have different storage timelines. Here is a practical reference for how long common meal prep ingredients last in the fridge and freezer.
Cooked chicken: 3-4 days in the fridge, 2-3 months in the freezer. Chicken is one of the most popular meal prep proteins, but it dries out when reheated. Brining before cooking helps it retain moisture through the week.
Cooked beef and pork: 3-4 days in the fridge, 2-3 months in the freezer. Ground meats follow the same timeline but should be eaten closer to the 3-day mark for best quality.
Cooked rice: 4-6 days in the fridge, up to 6 months in the freezer. Rice actually reheats well and holds texture longer than most grains. Let it cool completely before refrigerating to prevent it from getting gummy.
Cooked pasta: 3-5 days in the fridge, 2 months in the freezer. Store pasta dry and add sauce separately. Sauced pasta gets mushy and absorbs liquid over time.
Cooked vegetables: 3-4 days in the fridge, 2-3 months in the freezer. Roasted vegetables hold up better than boiled or steamed ones. Blanching vegetables before freezing preserves color and texture.
Salads and raw greens: 3-5 days in the fridge, do not freeze. Store greens with a paper towel and keep dressing separate. Heartier greens like kale last longer than delicate greens like spring mix.
Soups and stews: 3-4 days in the fridge, 2-3 months in the freezer. Soups actually taste better after a day in the fridge because the flavors meld. Freeze individual portions for easy lunches.
Cooked eggs and egg dishes: 3-4 days in the fridge, do not freeze well. Hard-boiled eggs last up to a week but should be peeled right before eating.
The FIFO System and Labeling Strategy for Weekly Meal Prep
FIFO stands for First-In, First-Out. It is a system borrowed from restaurant kitchens that ensures you eat older meals before newer ones. This prevents food waste and keeps you from discovering a mystery container in the back of your fridge two weeks later.
How to set up FIFO at home: When you put new meals in the fridge, push the older meals to the front and place the new ones behind them. You will naturally grab the front meals first, which are the oldest. It sounds obvious, but this simple habit eliminates most food waste.
Label every container: Use masking tape and a marker, or erasable labels designed for containers. Write the contents and the date you cooked it. This takes 10 seconds per container and saves you from guessing games later in the week.
Color-code by day: Some meal preppers use colored dot stickers to indicate which day a meal should be eaten. For example, red for Monday, orange for Tuesday, and so on. This works well if you prep full meals for specific days.
Keep a fridge inventory: Write a simple list on a whiteboard or sticky note on your fridge door showing what meals are inside and their dates. Cross them off as you eat them. This takes the guesswork out of meal planning and prevents over-prepping.
The FIFO system is especially important if you are meal prepping for weight loss. Knowing exactly what you have and when it needs to be eaten helps you stick to your plan instead of ordering takeout when you feel disorganized.
Special Storage Tips for Salads, Pasta, Sandwiches, and Soups
Certain foods need special handling to stay fresh all week. These are the foods I get the most questions about, and they are also the ones most likely to disappoint if stored wrong.
Salads: Layering is the key to a crisp salad on day five. Put dressing at the bottom of the jar or container, then hearty vegetables like carrots and cucumbers, then proteins, then greens on top. The greens never touch the dressing until you shake it. Add a paper towel on top to absorb moisture.
Mason jar salads: Mason jars are ideal for salads because they are tall, airtight, and keep ingredients stacked. A properly layered mason jar salad stays fresh for 4-5 days. Use wide-mouth jars for easier eating and cleaning.
Pasta: Store pasta and sauce in separate containers. Toss the plain pasta with a small amount of olive oil to prevent sticking. When you are ready to eat, combine and reheat. This prevents the pasta from absorbing liquid and turning to mush.
Sandwiches: Do not pre-assemble sandwiches with wet ingredients. Store bread, fillings, and condiments separately. Assemble at mealtime. If you must prep ahead, put a barrier like lettuce or cheese between the bread and moist fillings to slow sogging.
Soups and stews: Cool soups completely before refrigerating or freezing. Store in individual portions so you only reheat what you need. Repeated reheating degrades quality and increases food safety risk. Freeze soups in freezer bags laid flat to save space.
Grain bowls: Store grains, proteins, vegetables, and sauces in separate compartments. Add the sauce right before eating. This keeps every component at its best texture and flavor.
Reheating Meal Prep Without Losing Flavor or Texture
Storage is only half the battle. How you reheat determines whether your meal tastes fresh or like leftovers. These techniques make a bigger difference than you might expect.
Reheat slowly: Use 60-70% power in the microwave instead of full power. This heats the food more evenly and prevents the outside from overcooking while the inside stays cold. Cover the container loosely to trap steam without making the food soggy.
Add moisture when reheating: Sprinkle a few drops of water on rice, grains, or meats before reheating. This replaces moisture lost during storage and prevents drying. Cover with a damp paper towel for best results.
Reheat proteins separately: Chicken and other meats reheat better on their own. Reheat the meat first, then add it to your grains or vegetables. This prevents overcooking the meat while waiting for other components to heat through.
Use the stovetop for best results: A skillet with a splash of water or oil reheats food more evenly than a microwave. This is especially true for stir-fries, roasted vegetables, and anything that should be crispy.
Do not reheat twice: Only reheat the portion you plan to eat. Repeated heating and cooling cycles degrade food quality and increase food safety risk. Portion correctly when you pack.
FAQs
How to keep meal prep fresh for a week?
To keep meal prep fresh for a full week, split your meals between the fridge and freezer. Store meals for days 1-4 in the fridge in airtight containers. Freeze meals for days 5-7 and thaw them overnight in the fridge before eating. Use the 3-3-3 rule, add paper towels to absorb moisture, and cool food before sealing to prevent condensation.
Is meal prepping for 7 days safe?
Yes, meal prepping for 7 days is safe if you store meals correctly. Meals eaten within 3-4 days can stay in the fridge. Meals for days 5-7 should be frozen and thawed before eating. Follow FDA guidelines: refrigerate within 2 hours of cooking, keep your fridge at 40 degrees or below, and reheat to 165 degrees Fahrenheit.
What is the 3-3-3 rule for meal prep?
The 3-3-3 rule for meal prep means cooking enough food for 3 days, storing it in the fridge for up to 3 days, and freezing the remaining portions for later in the week. This approach keeps food at peak freshness because meals do not sit in the fridge longer than 3-4 days.
How to meal prep for 7 days without food going bad?
To meal prep for 7 days without food going bad, cook all your meals on one day, refrigerate the meals you will eat in the first 3-4 days, and freeze the rest. Thaw frozen meals overnight in the fridge before eating. Use airtight containers, label everything with dates, and follow the FIFO system so older meals get eaten first.
How long can meal prep chicken last in the fridge?
Cooked chicken lasts 3-4 days in the fridge when stored in an airtight container. For longer storage, freeze cooked chicken for up to 2-3 months. Always refrigerate chicken within 2 hours of cooking and reheat it to 165 degrees Fahrenheit before eating.
How to store meal prep without sogginess?
To prevent sogginess, cool food to room temperature before sealing, place a paper towel inside the container to absorb condensation, and store wet and dry ingredients separately. Use silicone cups for dressings and sauces, and do not overfill containers. Leave space between the food and the lid.
Final Thoughts: Keep Your Meal Prep Fresh All Week
Storing meal prep food comes down to three things: temperature control, moisture management, and timing. Follow the 3-3-3 rule, use airtight containers, master the paper towel trick, and label everything with dates. Do these four things and your meals will taste fresh from Monday through Sunday. Now that you know how to store meal prep food properly, the only thing left is to start cooking.